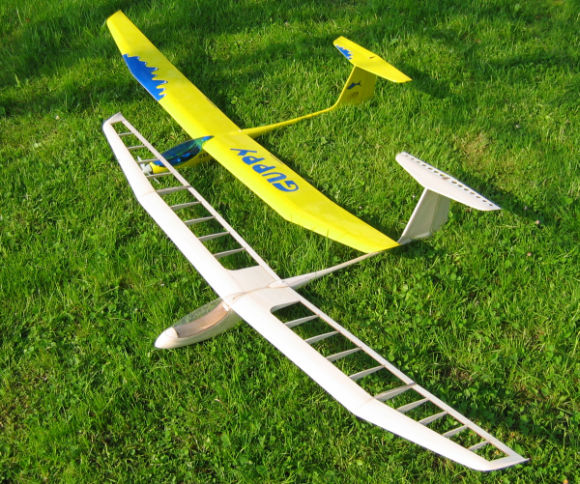
I have been reading a lot on the Guppy glider for some time and fell in love with this beautiful glider.
It has been a long time since I downloaded the free plans (more than a year, I think!) and finally decided to start building it. It is going to take a long time more, before I could complete it. I'm not sure if anyone has build this locally, I made a search but was not able to find any build thread here.
Thanks to the designer, Mitja from Slovenia, who provided all the answers and support in the building of the Guppy glider. Plans and other build information can be found here:

Getting started....
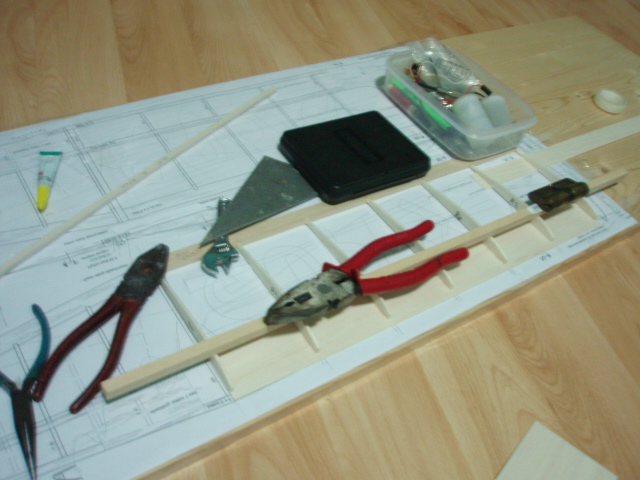
From the tiled pdf plans, I printed and paste them together. Going to build the wings first, I cut out all the ribs profiles and paste them on the balsa sheet for cutting.
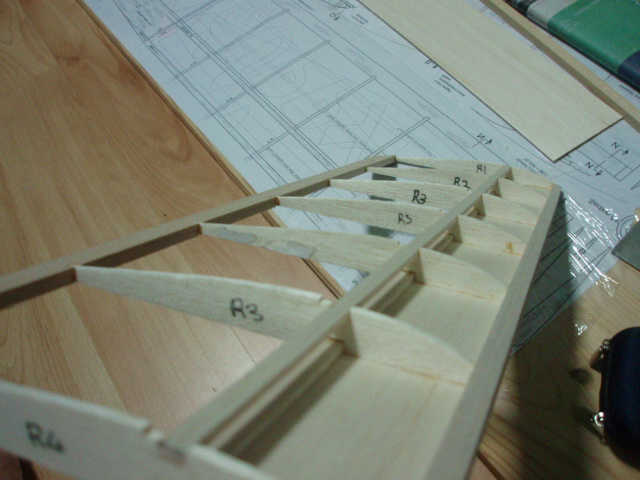
In the plans, it calls for different thickness on the different ribs, I used 3/32" for all ribs.
For the trailing edge, I used the standard 3/4"x1/4". The ones stated in the plans were not available locally. The length of the ribs were also adjusted accordingly as my TE was wider.
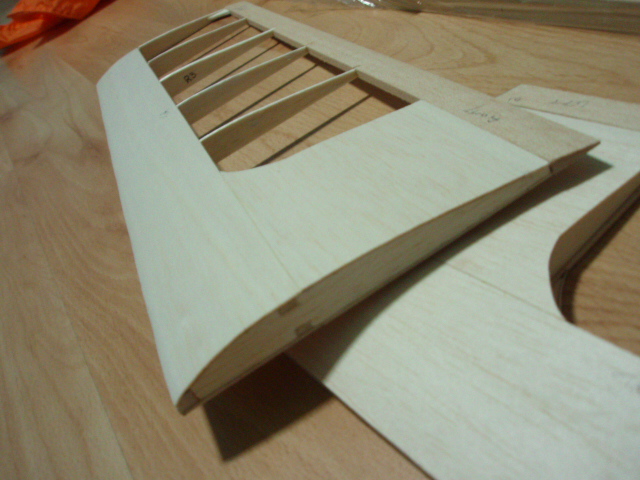
The Wing Spars and Leading Edge were also cut and ready. The LE need to be cut at an angle to follow the profile of the LE of the rib, this is a bit tricky, I got the angle wrong 2 times! The cutting is based on a steel rule and some ninja judgment.
In cutting the ribs and the other balsa parts, make sure your pen knife is very sharp. A slightly blunt knife will result in unsatisfactory cut parts and joints. It is also better to conduct the cut in one go, rather then multiple cuts. I did not perform additional sanding of the ribs.
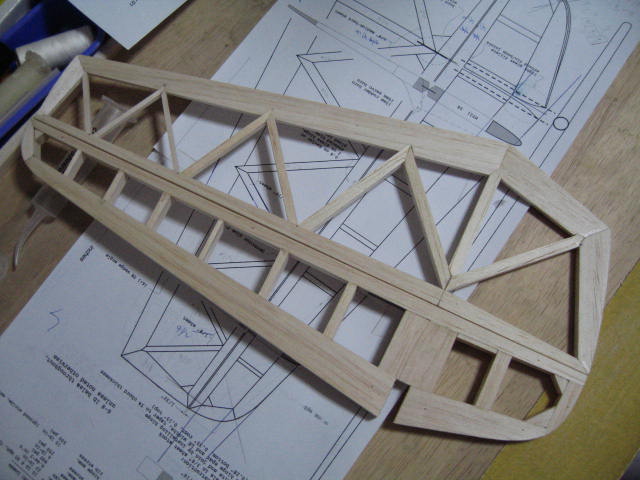
I thought I had all the parts ready, but I left out 2 pcs of R3 when I was about to assemble the main panels. There are total of 4 panels for the wings.
I stick the plans onto my building board and cover it it with food wrap. Just use scotch tape and stretch all the wrinkles out. You'll need to make more duplicate copies of the plans, as you'll be cutting them up later.
........to be continued.
MS


It has been a long time since I downloaded the free plans (more than a year, I think!) and finally decided to start building it. It is going to take a long time more, before I could complete it. I'm not sure if anyone has build this locally, I made a search but was not able to find any build thread here.
Thanks to the designer, Mitja from Slovenia, who provided all the answers and support in the building of the Guppy glider. Plans and other build information can be found here:
Getting started....
From the tiled pdf plans, I printed and paste them together. Going to build the wings first, I cut out all the ribs profiles and paste them on the balsa sheet for cutting.
In the plans, it calls for different thickness on the different ribs, I used 3/32" for all ribs.
For the trailing edge, I used the standard 3/4"x1/4". The ones stated in the plans were not available locally. The length of the ribs were also adjusted accordingly as my TE was wider.
The Wing Spars and Leading Edge were also cut and ready. The LE need to be cut at an angle to follow the profile of the LE of the rib, this is a bit tricky, I got the angle wrong 2 times! The cutting is based on a steel rule and some ninja judgment.
In cutting the ribs and the other balsa parts, make sure your pen knife is very sharp. A slightly blunt knife will result in unsatisfactory cut parts and joints. It is also better to conduct the cut in one go, rather then multiple cuts. I did not perform additional sanding of the ribs.
I thought I had all the parts ready, but I left out 2 pcs of R3 when I was about to assemble the main panels. There are total of 4 panels for the wings.
I stick the plans onto my building board and cover it it with food wrap. Just use scotch tape and stretch all the wrinkles out. You'll need to make more duplicate copies of the plans, as you'll be cutting them up later.
........to be continued.
MS


Comment