Announcement

Collapse
No announcement yet.

JR 9XII LCD Backlight

Collapse

Zenm Tech Pte Ltd

Collapse

Visit Zenmtech at rc.zenmtech.com

X
 
  • Filter
  • Time
  • Show
Clear All
new posts

    JR 9XII LCD Backlight

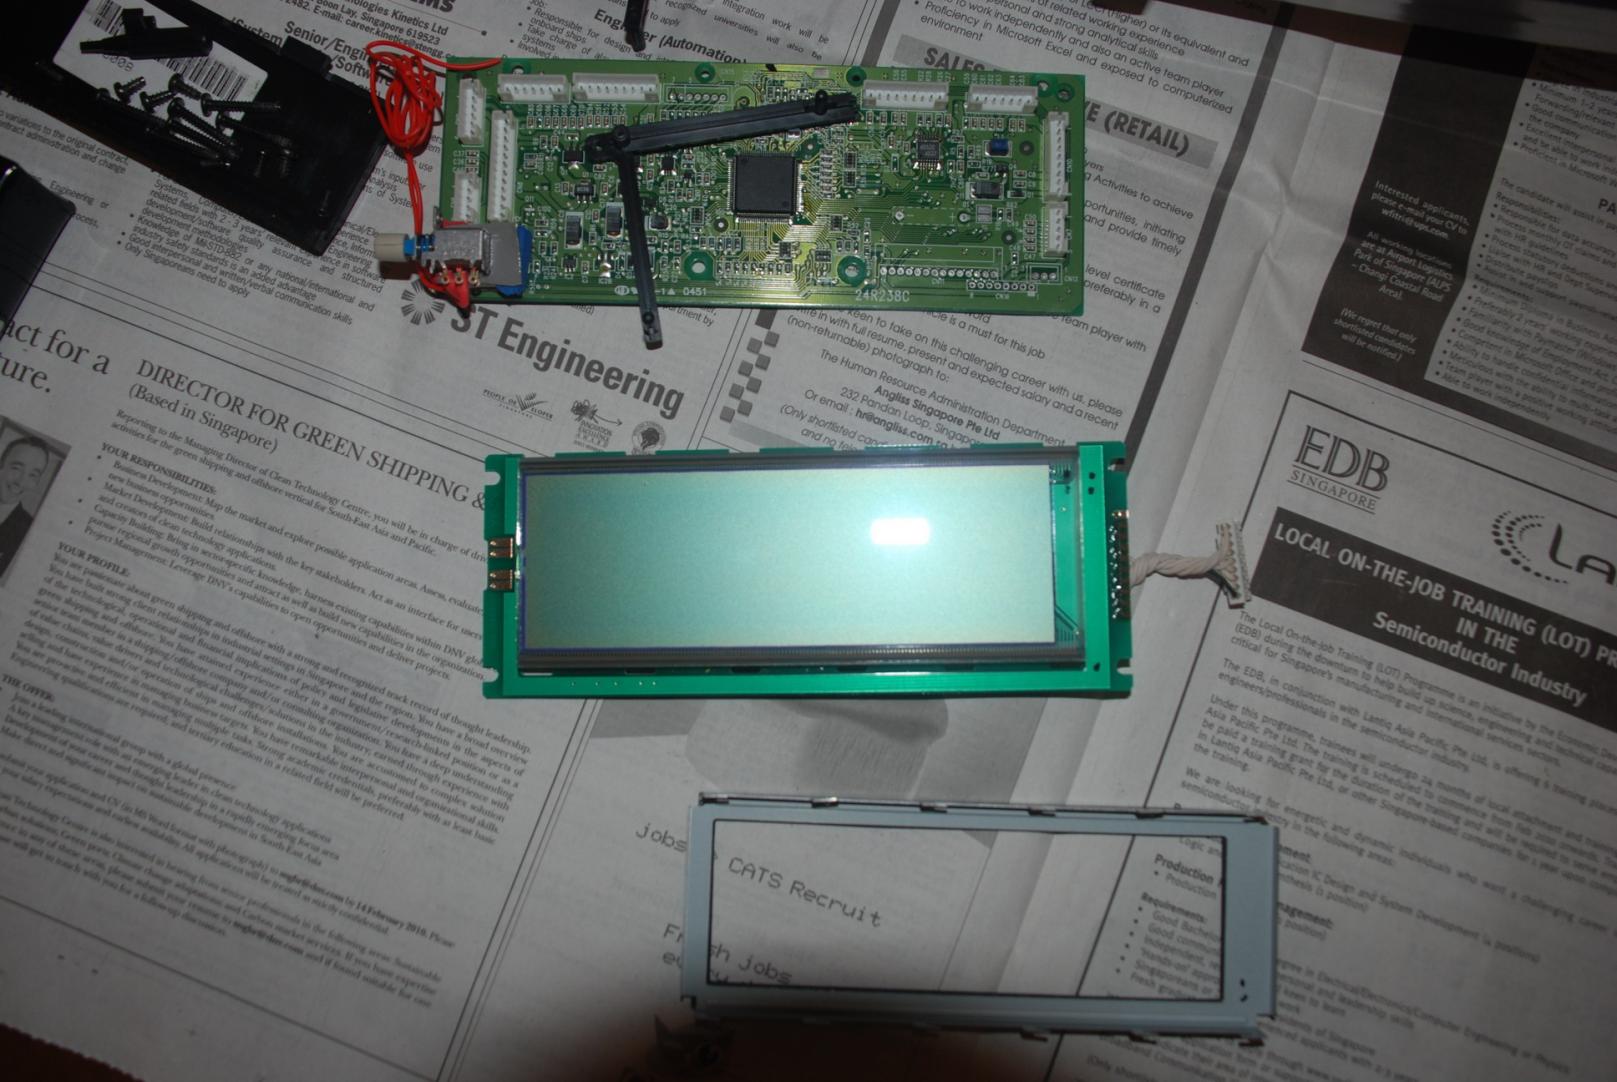
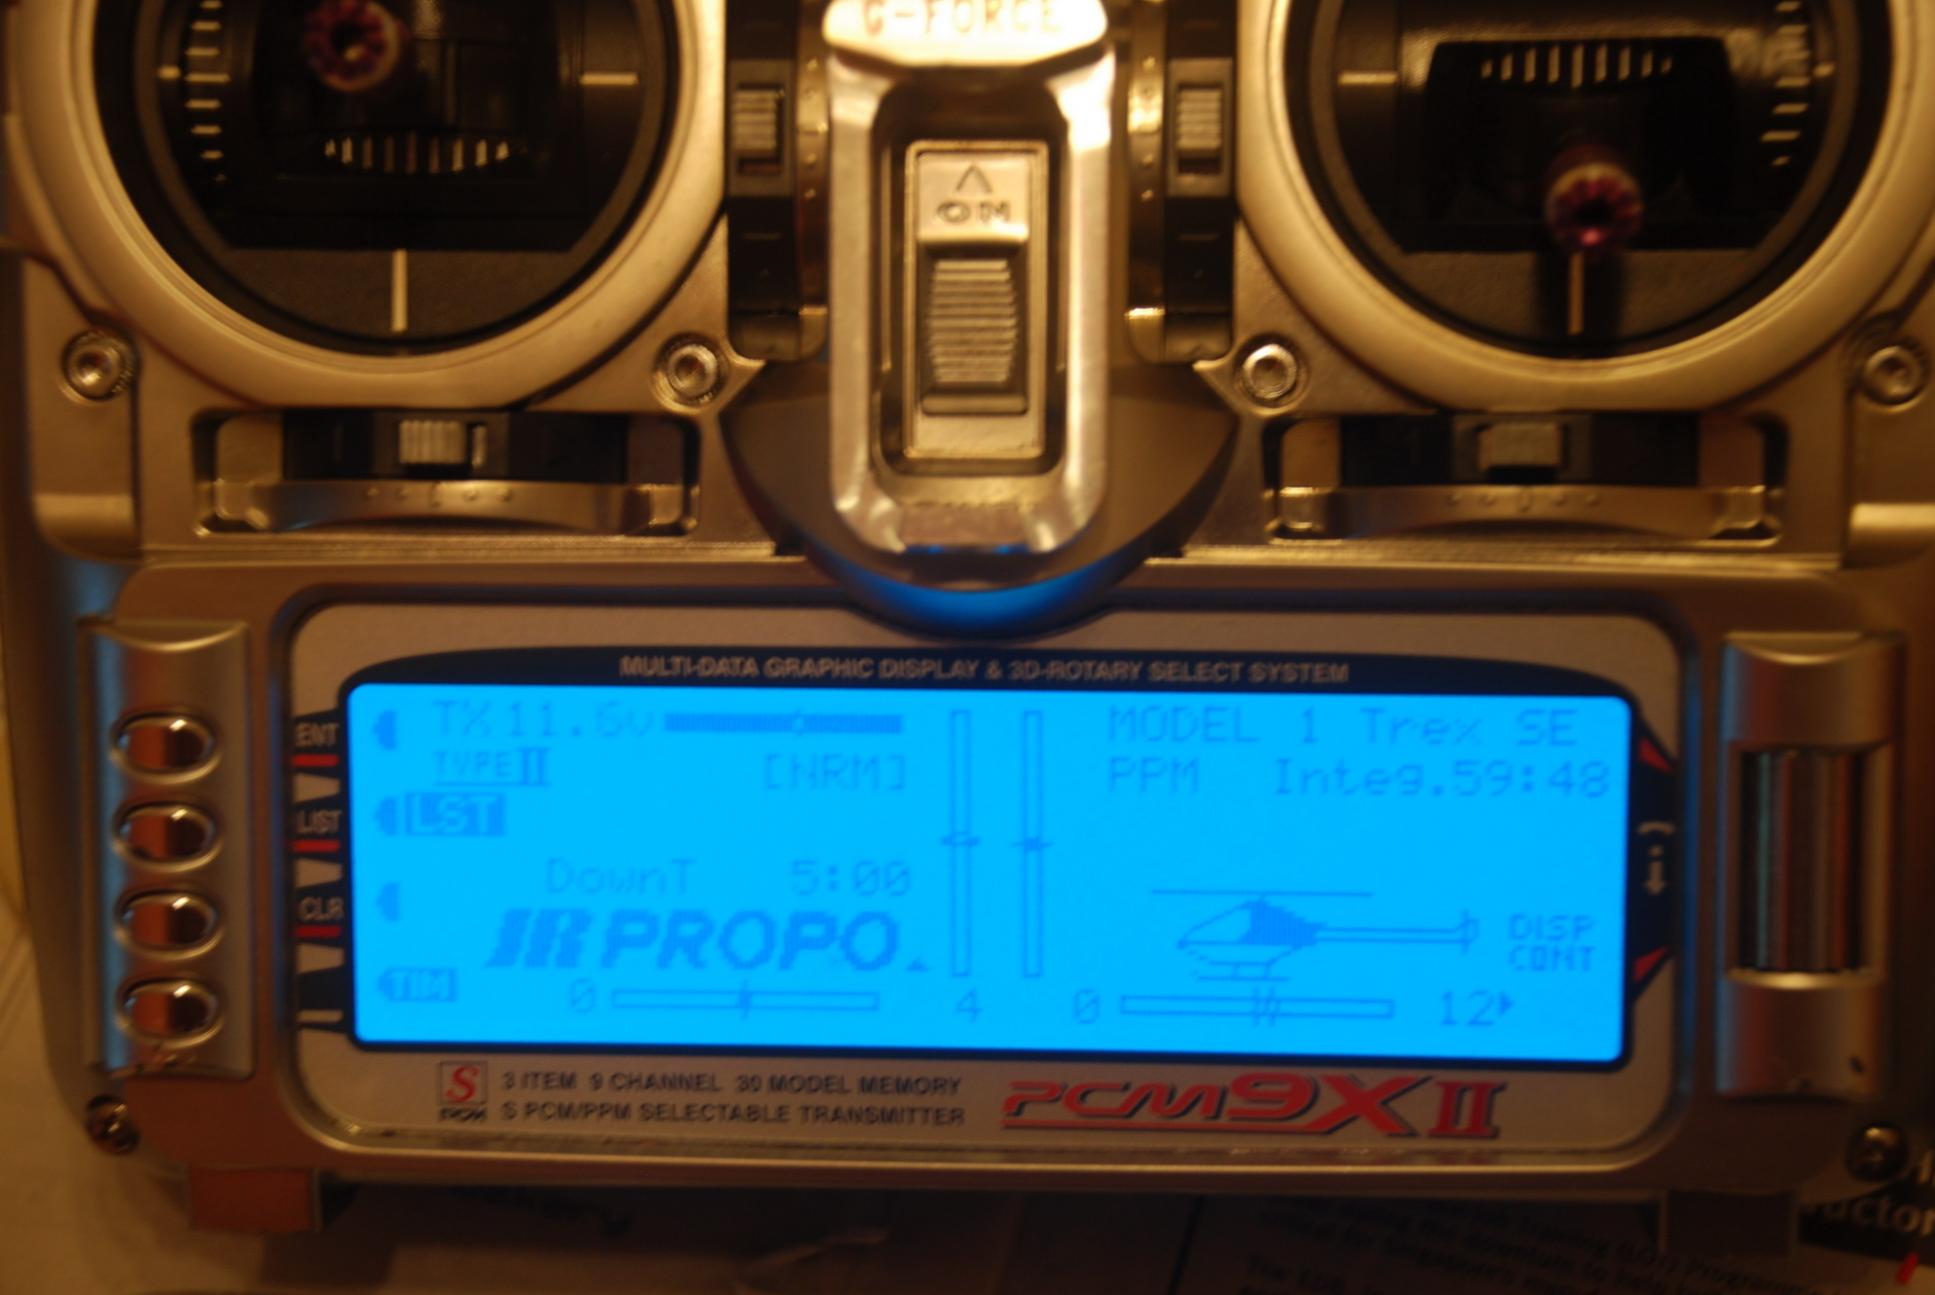
    I wanted to add backlight on my 9XII LCD and decided to use EL panel instead LED. Push on/push off switch is located at the charging point since I no longer need it as I am using LIPO for my tx. However, backlight only work when the tx power is on.

    Chai

    Lets' moveon.......

    #2
    LCD EL backlite

    Here are some photos taken during the operation. LCD was removed from radio and the silver backing was carfully removed from the LCD. Leave behind the green polarizing filter on the LCD. The adhesive was cleanly removed but the green polarizing filter must stay. The EL panel is cut to size and fitted on the back of the LCD. Assemble all parts and soldered the inverter, EL panel and power switch.

    Chai

    Lets' moveon.......

    Comment


      #3
      Parts

      Firstly, I bought the 5" x 2" EL panel and inverter from Ebay costing less than S$20 including shipping. The length (5") is just nice for JR9X and the 2" side needs to trim (using scissor, just like cutting paper) to fit. Get a push on/push off switch from SIM LIM, costing S$1 each. You need to remove the LCD board from the TX. With the LCD, remove the metal frame by bending the metal clip. Next, carefully remove the LCD with the contacts still attached to the LCD from the electronic board and slowly peel off the sliver backing. This step is crucial 
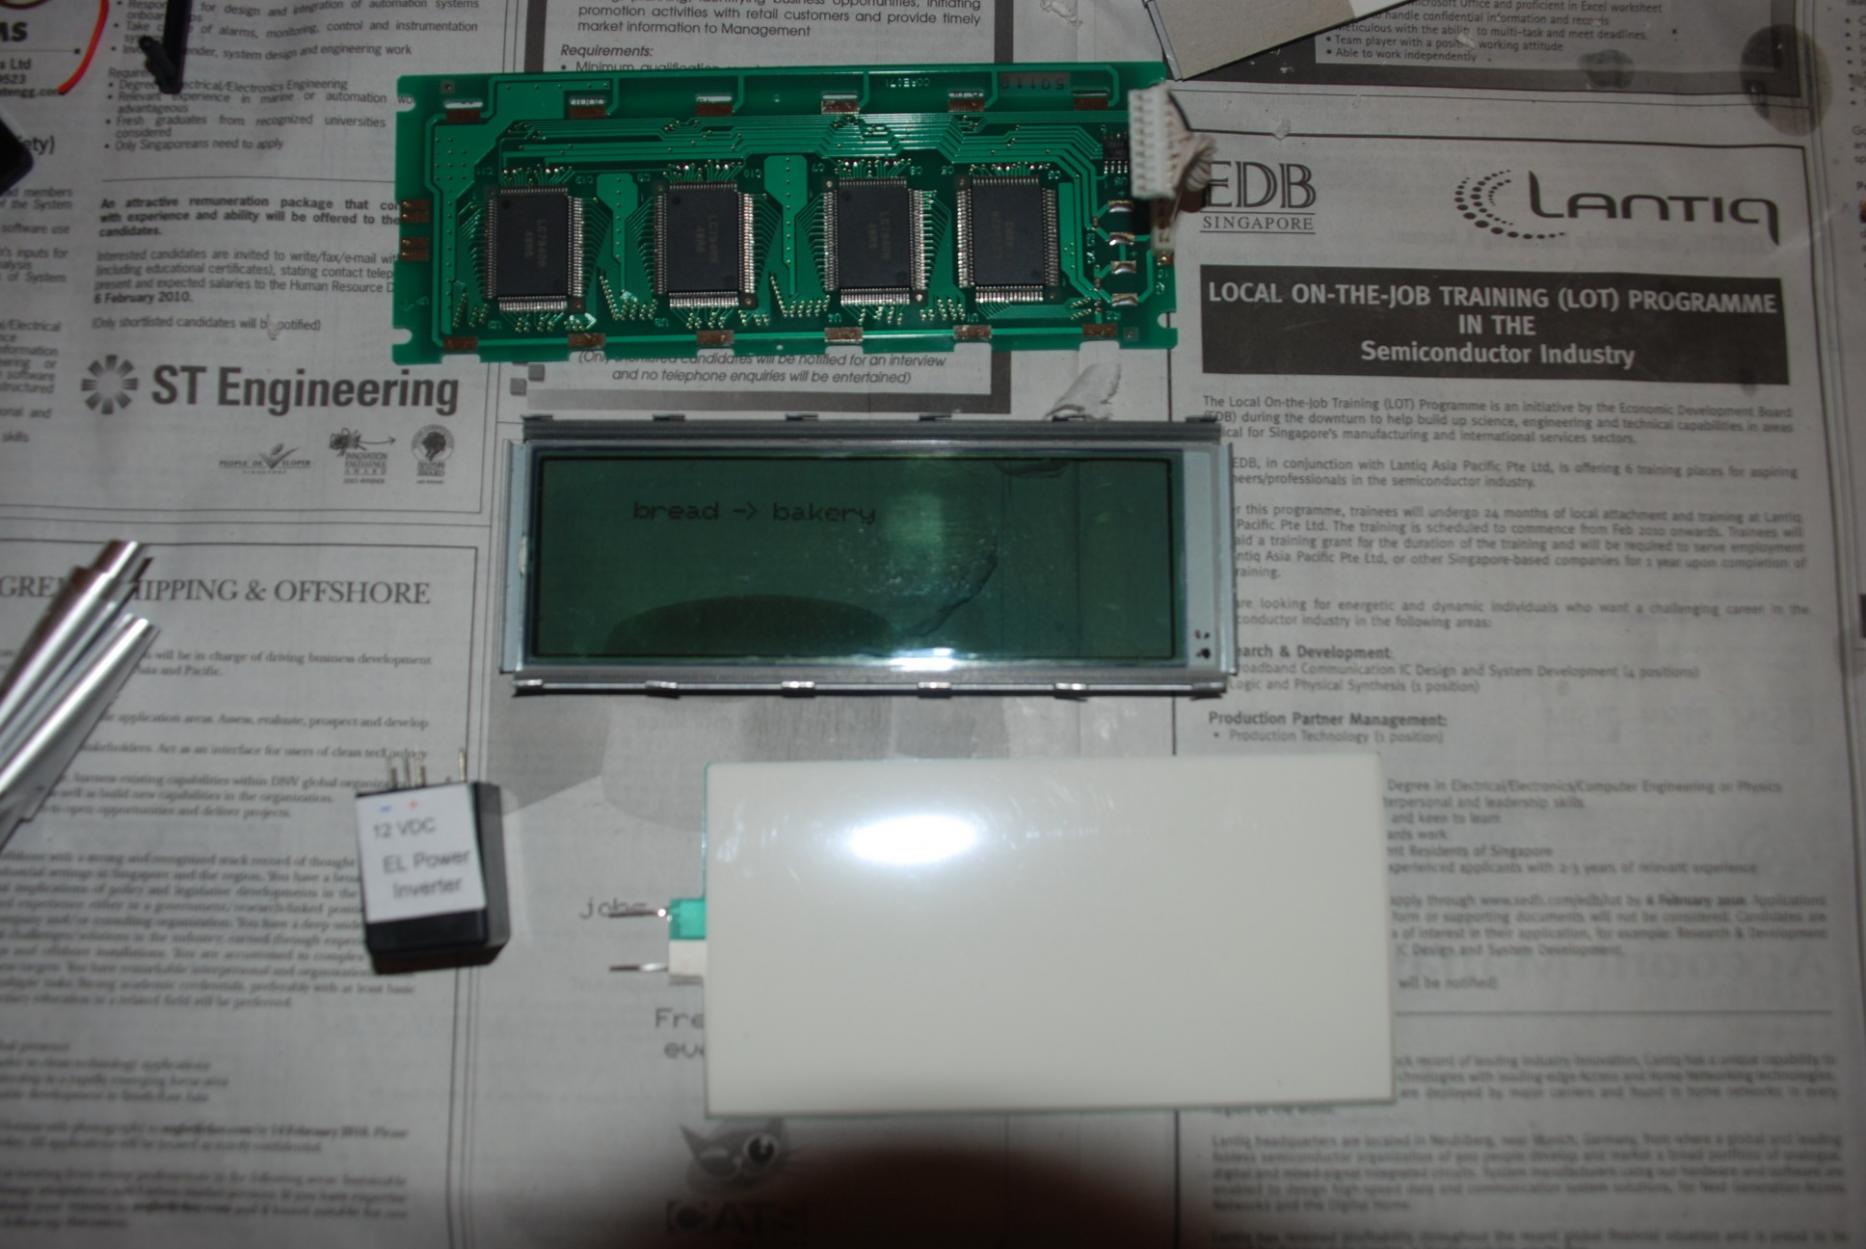
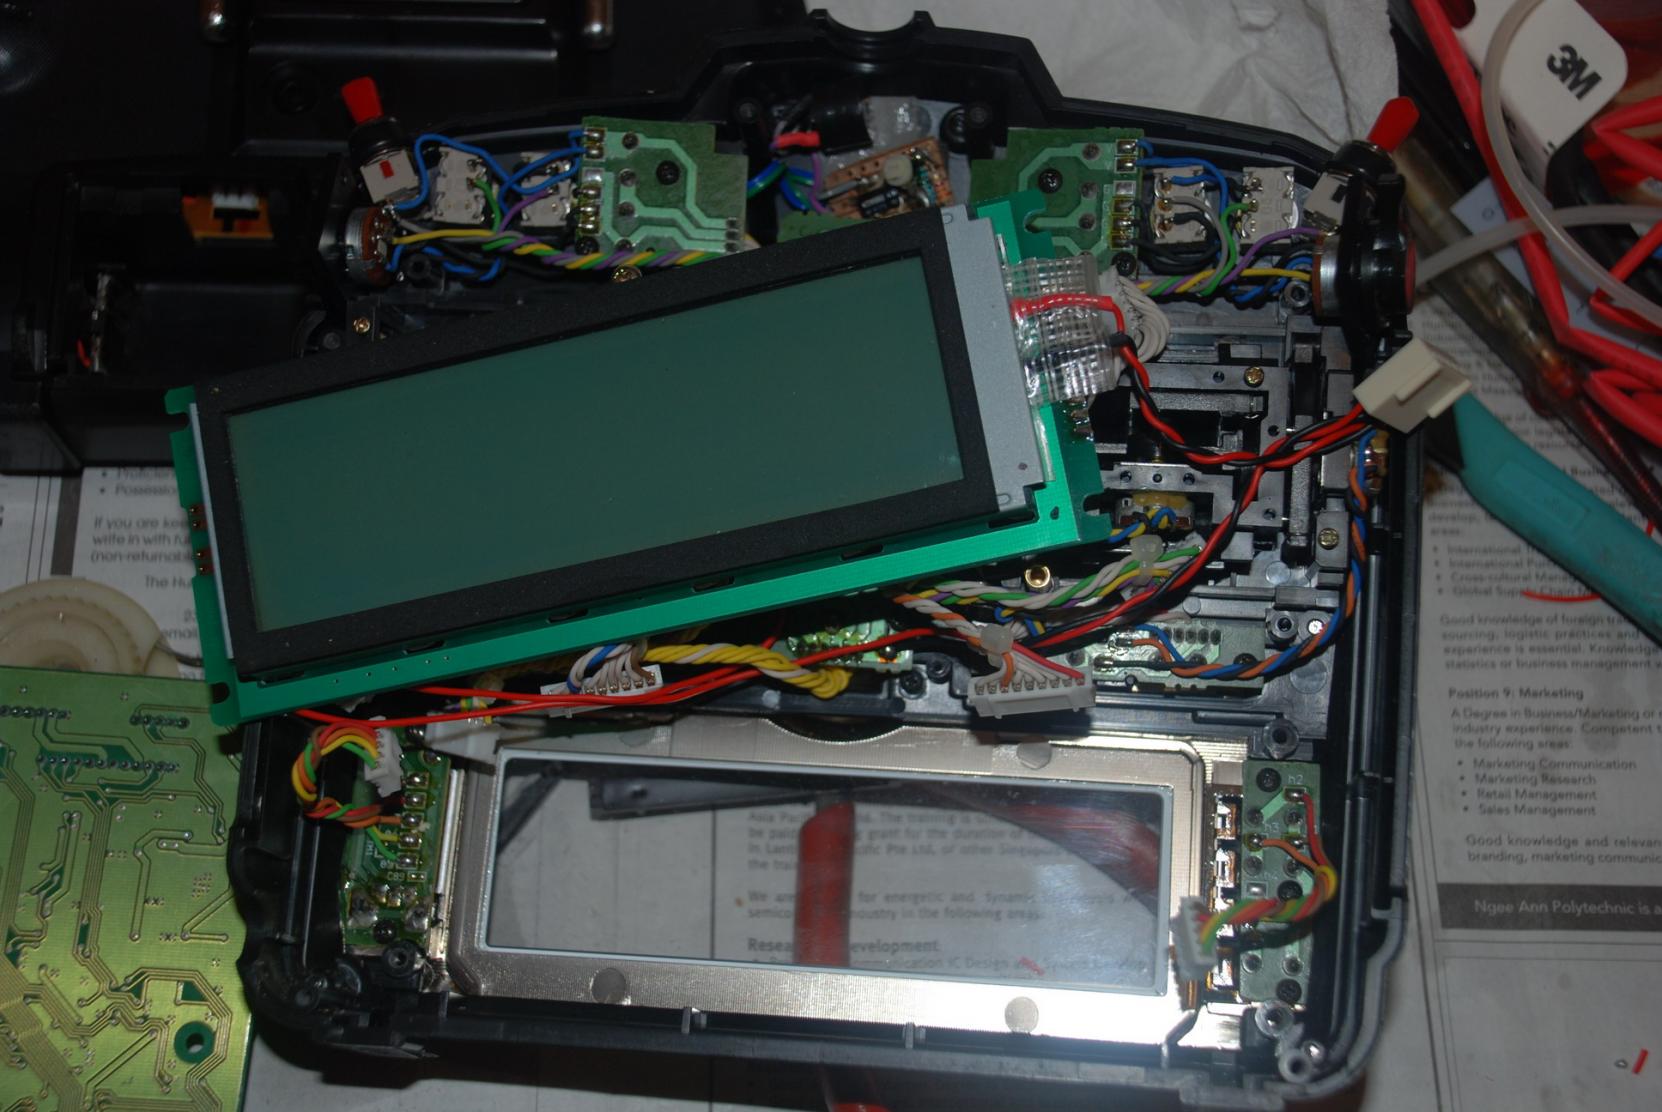
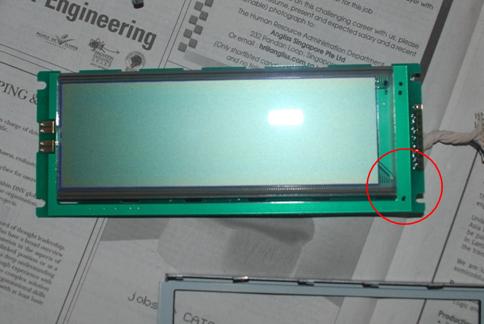
. Only remove the silver layer and leaving the green polarizing filter still sticking on the LCD. Then, you have to remove the adhesive residue that is still on the green filter using tissue paper. I sit the LCD on the metal frame for better grip during the cleaning process. Remember to keep the LCD contacts still attached on the LCD. I used Tamiya thinner to clean the surface. It took me more than 1 hour for this step. Once this is done, the rest is pretty easy. I soldered the push on/push off switch to the power switch so that when the TX is off, so is the backlight. The inverter can sit just at the side which is next to the battery compartment of the TX back cover.

      Above are my steps taken which may not be the best or suitable for everyone.

      If you need more information, contact me and I will take some photos of my TX.
      Chai

      Lets' moveon.......

      Comment


        #4
        LCD alignment

        During installation, align the LCD as shown on the pic. It took me more than 1 hour to realise this.

        Chai

        Lets' moveon.......

        Comment


          #5
          thks

          Originally posted by moveon View Post
          During installation, align the LCD as shown on the pic. It took me more than 1 hour to realise this.
          cool thread..thks a lot bro

          Comment


            #6
            Originally posted by Incredible319 View Post
            cool thread..thks a lot bro
            Sure Here is a close up of the display.....

            Chai

            Lets' moveon.......

            Comment


              #7
              LCD Backlight

              Cool man.

              Comment


                #8
                EL panel

                For those trying your hands on the modification, remember to use a pair of scissor to cut the EL panel. DO NOT USE RULER AND PEN KNIFE
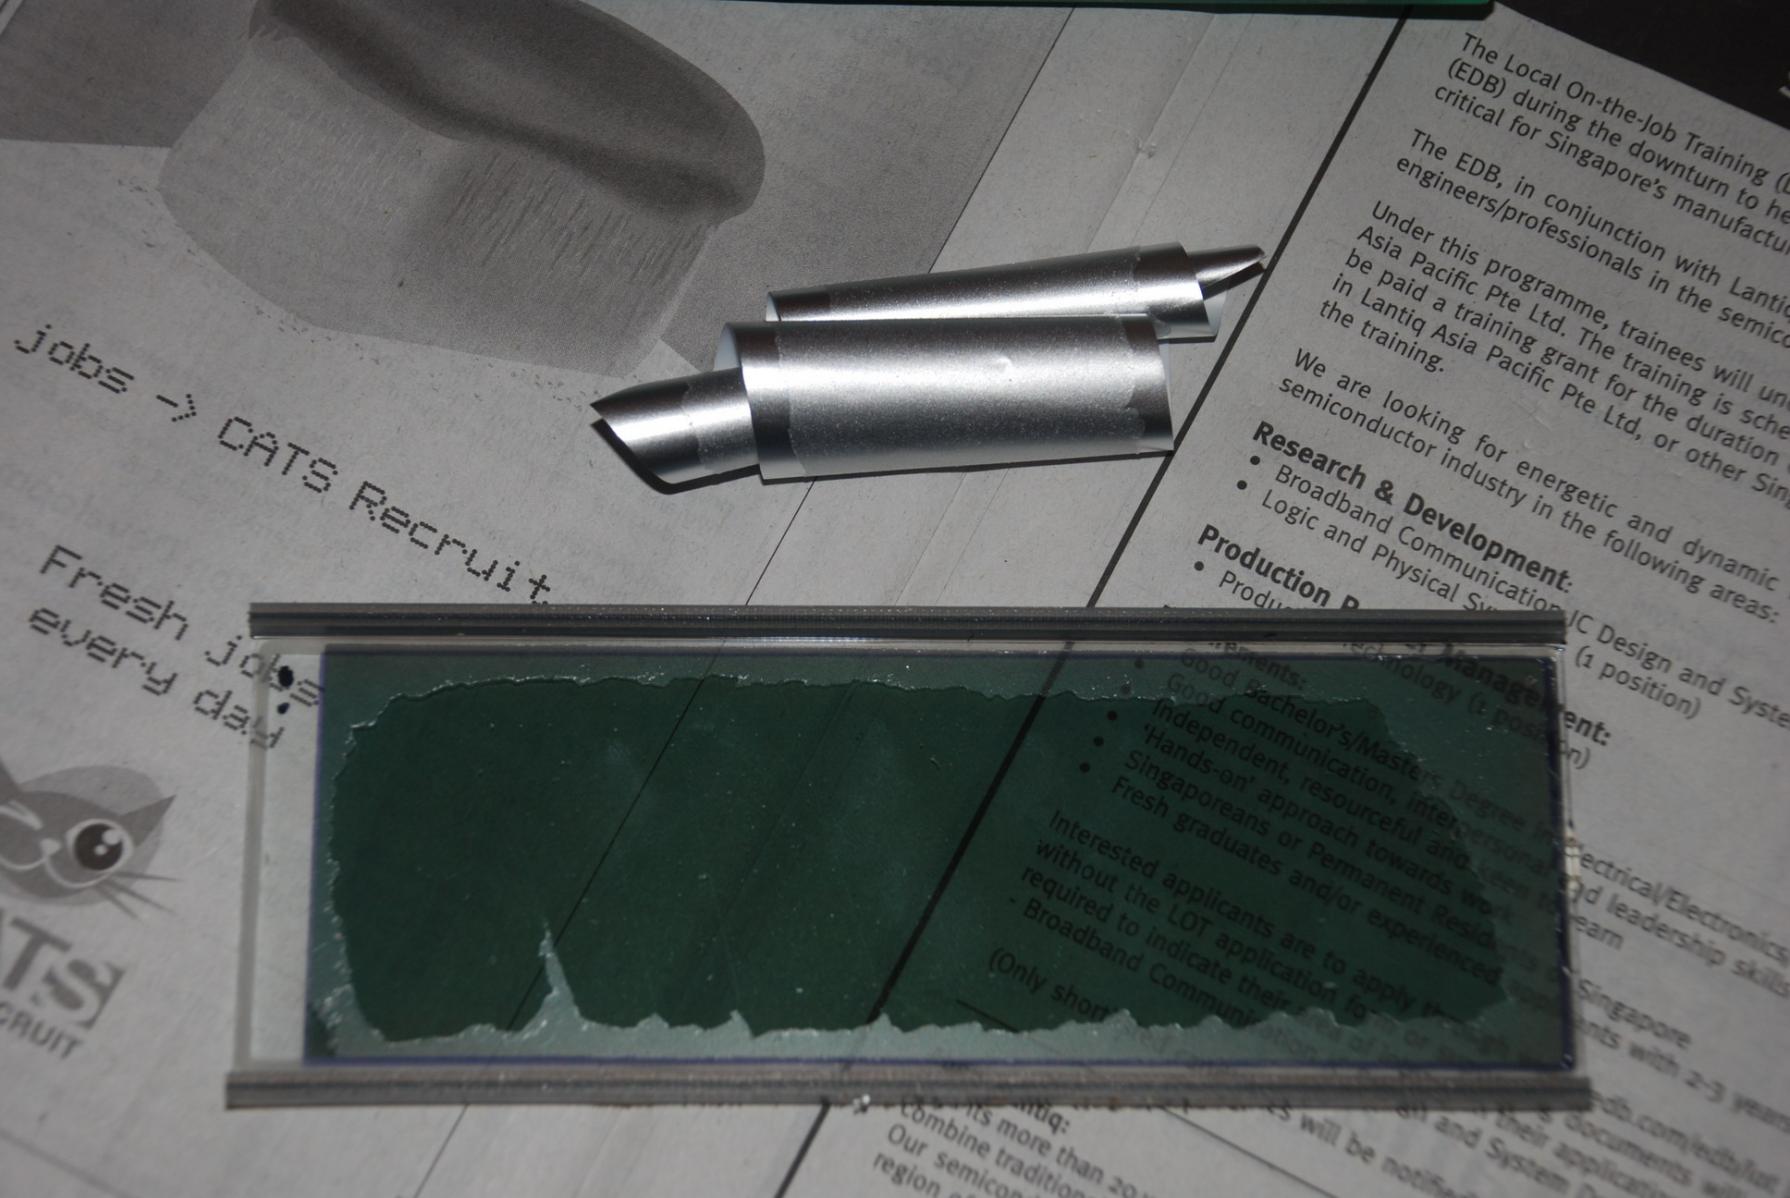
. The pressure of the pen knife will separate the 2 layers of the EL Panel.
                Chai

                Lets' moveon.......

                Comment


                  #9
                  the inverter

                  hey bro,

                  what about that inverter component? was it in the tx already or do we need to buy separately? if so, which one and how to solder it?

                  thks!

                  Comment


                    #10
                    Originally posted by Incredible319 View Post
                    hey bro,

                    what about that inverter component? was it in the tx already or do we need to buy separately? if so, which one and how to solder it?

                    thks!
                    Hi Bro,

                    You have to buy the inverter together with the EL panel. 12V +/- soldered to the inverter and another pair of AC from inverter to the panel.
                    Chai

                    Lets' moveon.......

                    Comment


                      #11
                      Originally posted by moveon View Post
                      During installation, align the LCD as shown on the pic. It took me more than 1 hour to realise this.
                      Daer sir
                      I have JR 9x II But last week I drop it to ground . Now its display shows nothing. then I opened the case I saw nothing except a few particules of some thing oil in side the transmitter.
                      Later I opened the display itself but I coudnt make anything
                      I want to ask is it possible to find display only as a spare.

                      Regards
                      Osman

                      Comment


                        #12
                        Originally posted by osman View Post
                        Daer sir
                        I have JR 9x II But last week I drop it to ground . Now its display shows nothing. then I opened the case I saw nothing except a few particules of some thing oil in side the transmitter.
                        Later I opened the display itself but I coudnt make anything
                        I want to ask is it possible to find display only as a spare.

                        Regards
                        Osman
                        Hi Osman,

                        Sorry to hear about your 9X. The oil you noticed is the liquid from the cracked LCD. I do not know if you can find a replacement part or even if it's worth the cost.
                        Chai

                        Lets' moveon.......

                        Comment


                          #13
                          Just to share my mod.

                          The back light is switch on/off using a push switch which is salvage from an old modem, recycle.

                          Thank you for the sharing, moveon.

                          Share the joy of flying . . .

                          Comment


                            #14
                            Originally posted by VinCopter View Post
                            Just to share my mod.

                            The back light is switch on/off using a push switch which is salvage from an old modem, recycle.

                            Thank you for the sharing, moveon.
                            Swee....
                            Chai

                            Lets' moveon.......

                            Comment


                              #15
                              Originally posted by VinCopter View Post
                              Just to share my mod.

                              The back light is switch on/off using a push switch which is salvage from an old modem, recycle.

                              Thank you for the sharing, moveon.
                              wa so nice.. i want also... must c c next time
                              For sale


                              trex 700/ 12mm main shaft swash leveller. carbon type $22 only new

                              Comment

                              Working...
                              X