Announcement

Collapse
No announcement yet.

Scratch build DLG

Collapse

Zenm Tech Pte Ltd

Collapse

Visit Zenmtech at rc.zenmtech.com

X
 
  • Filter
  • Time
  • Show
Clear All
new posts

    Scratch build DLG

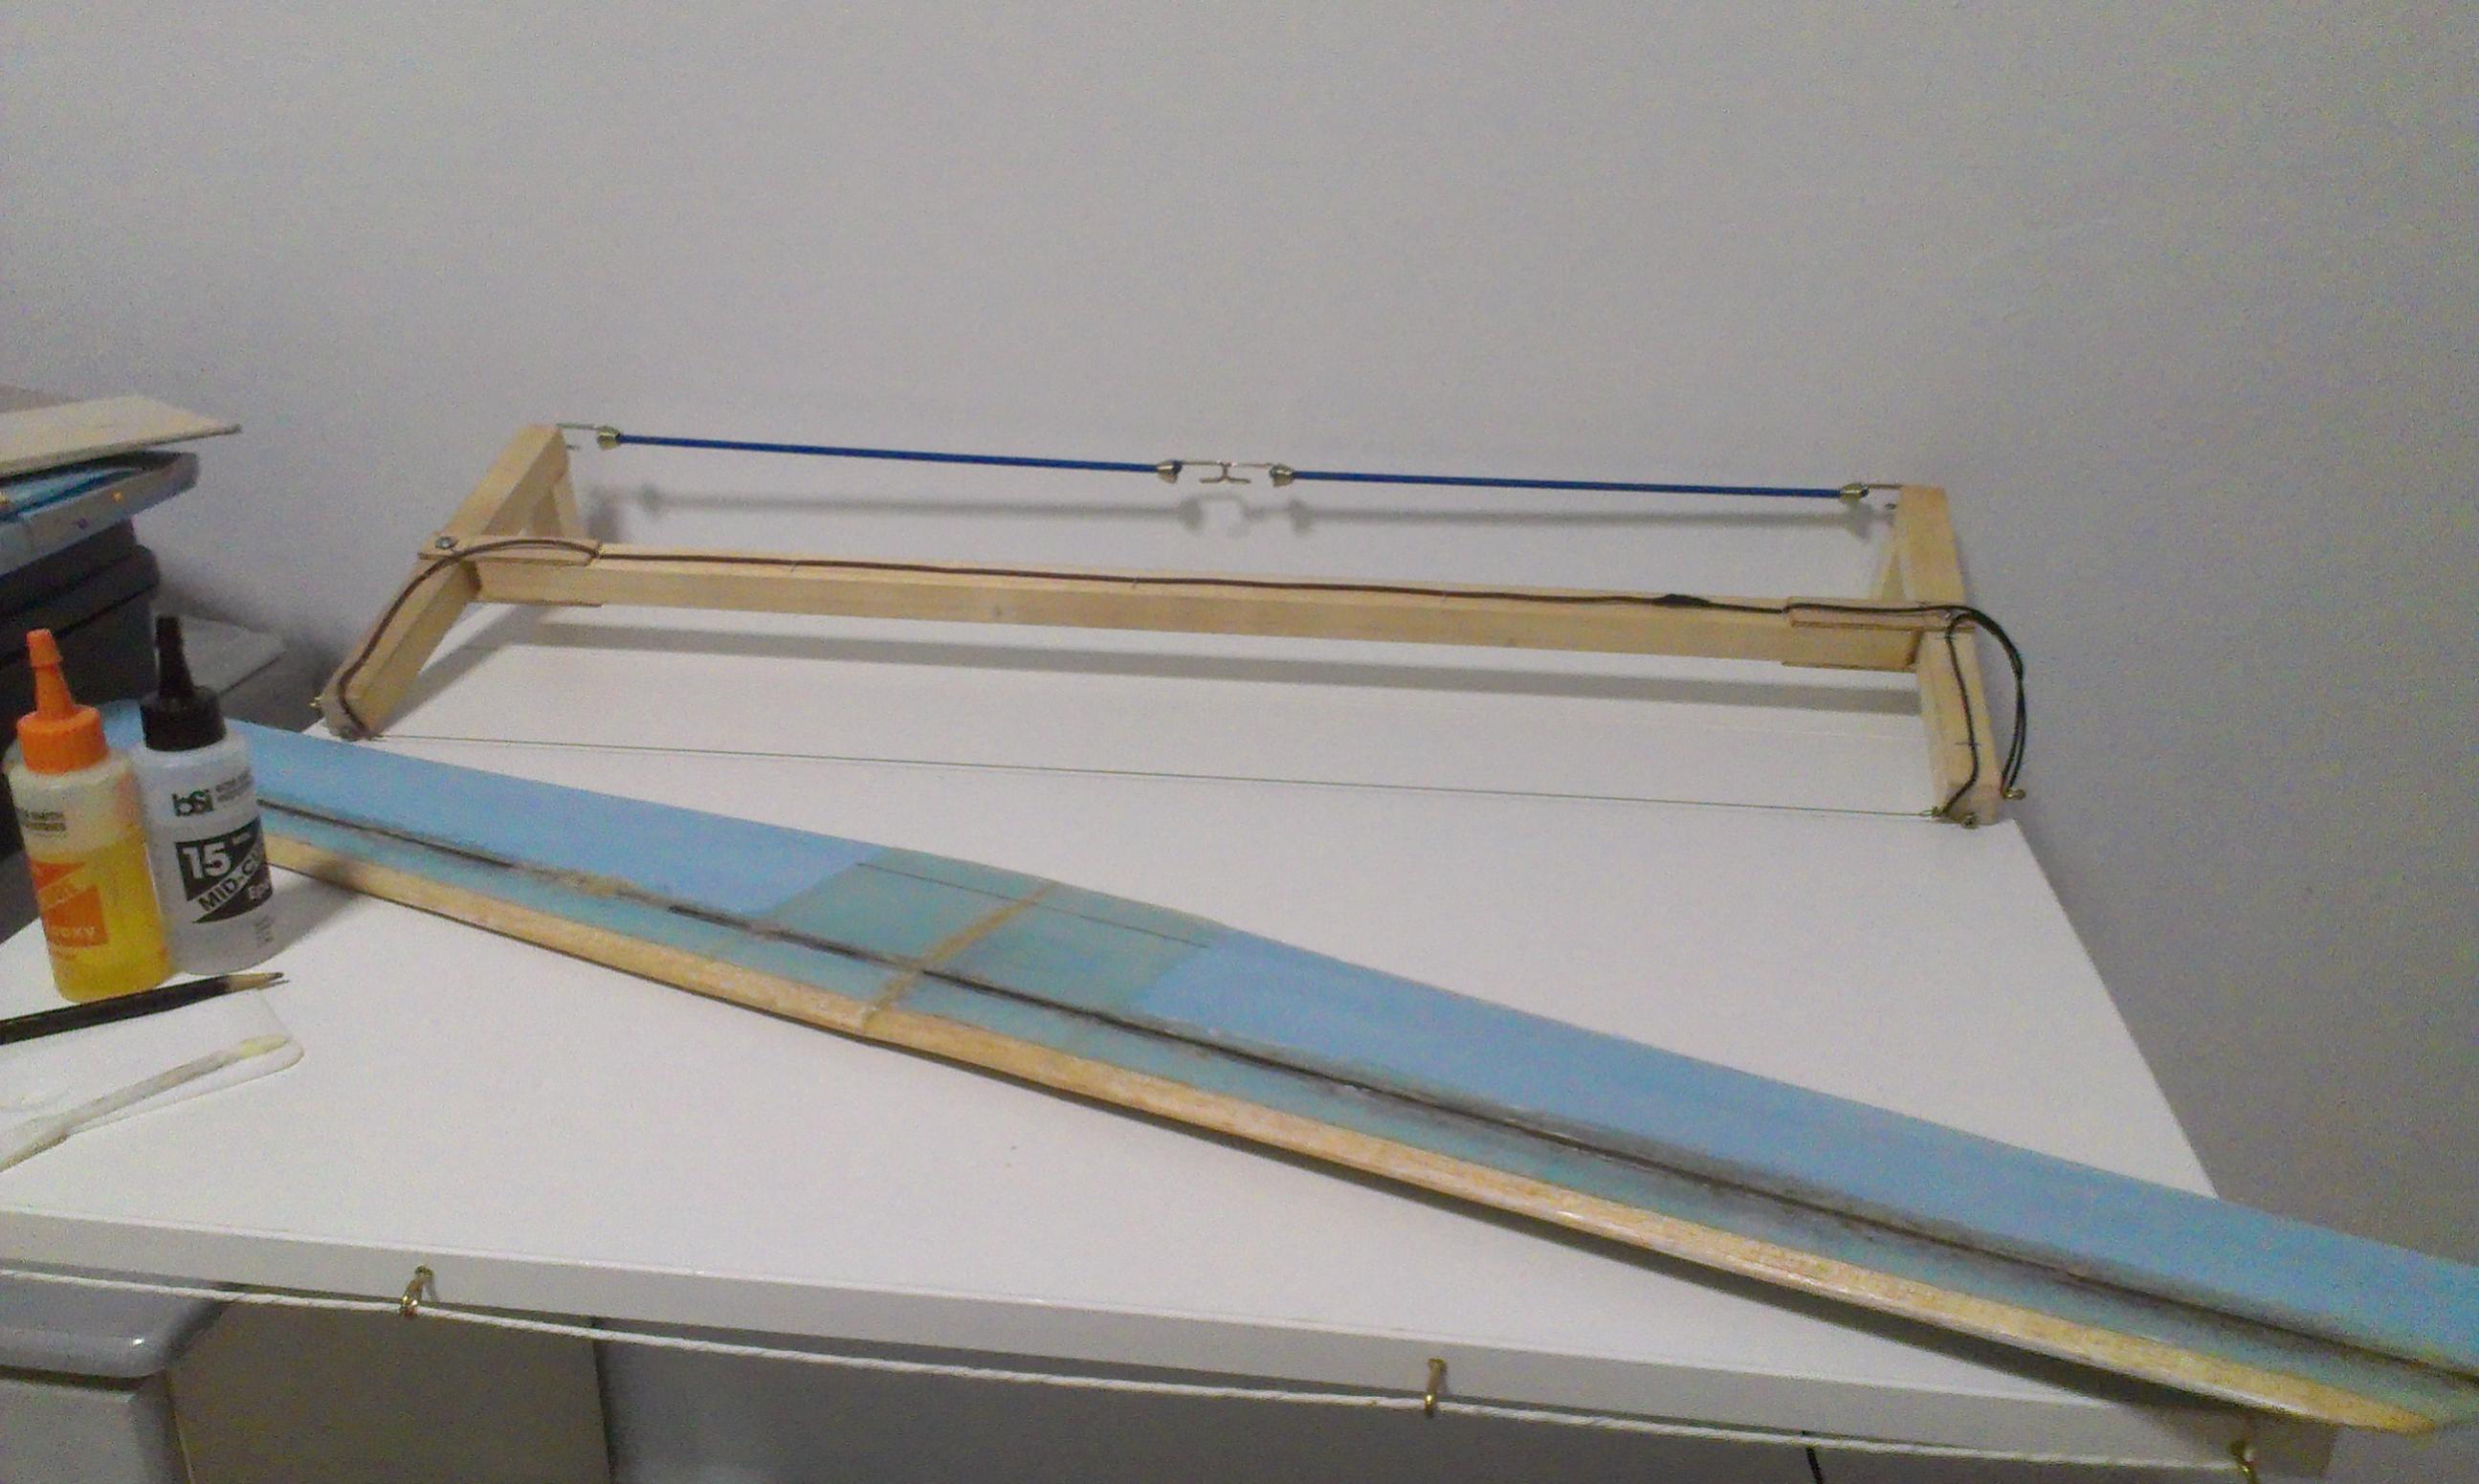
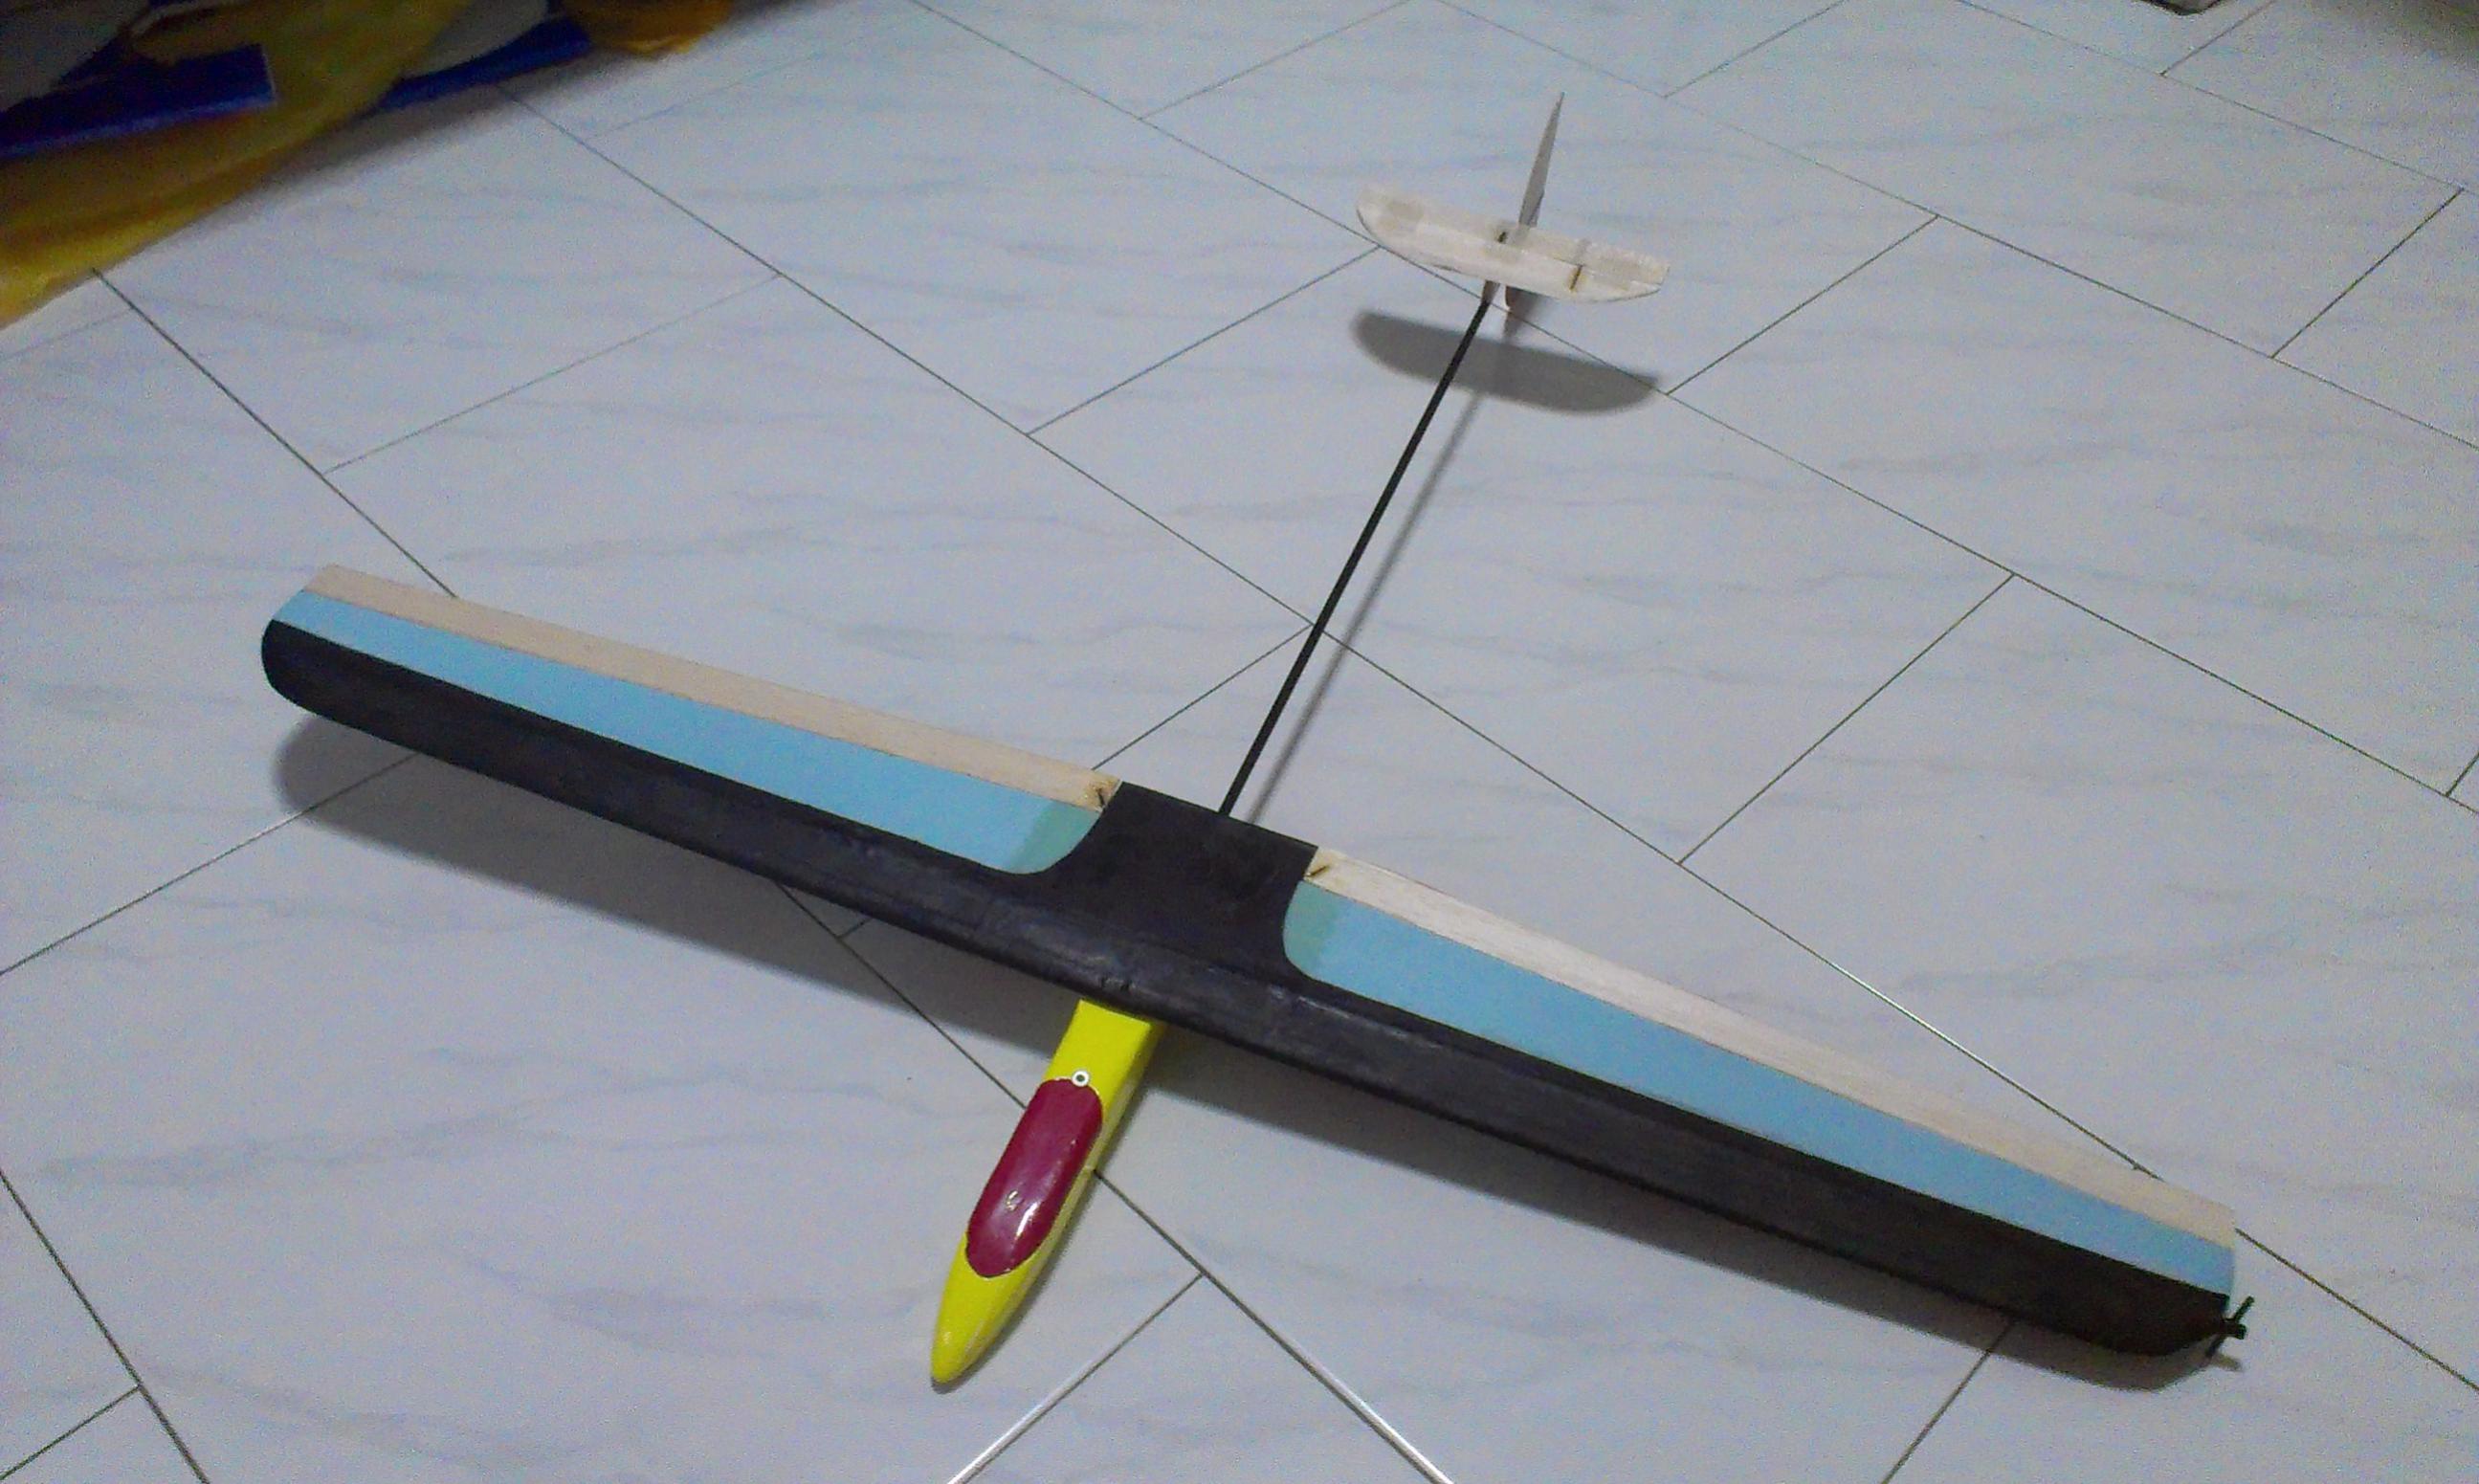
    have been flying parkjets for years and its time for a change. Seeing the dlgs at the NTU aerofest 2012 fly like paper dragon flies, i simply want to get my hands on one. Take a quick look at some dlgs availble on the market and wow, they are NOT cheap! Bo bian, i dunwan to make my wallet cry, haha....so build my own~ did some research on the best airfoil to use and selected the HM51. The wings are bluefoam cut along a template with a hotwire cutter
    Click image for larger version

Name:	2012-12-18 00.53.17.jpg
Views:	1
Size:	334.2 KB
ID:	986848

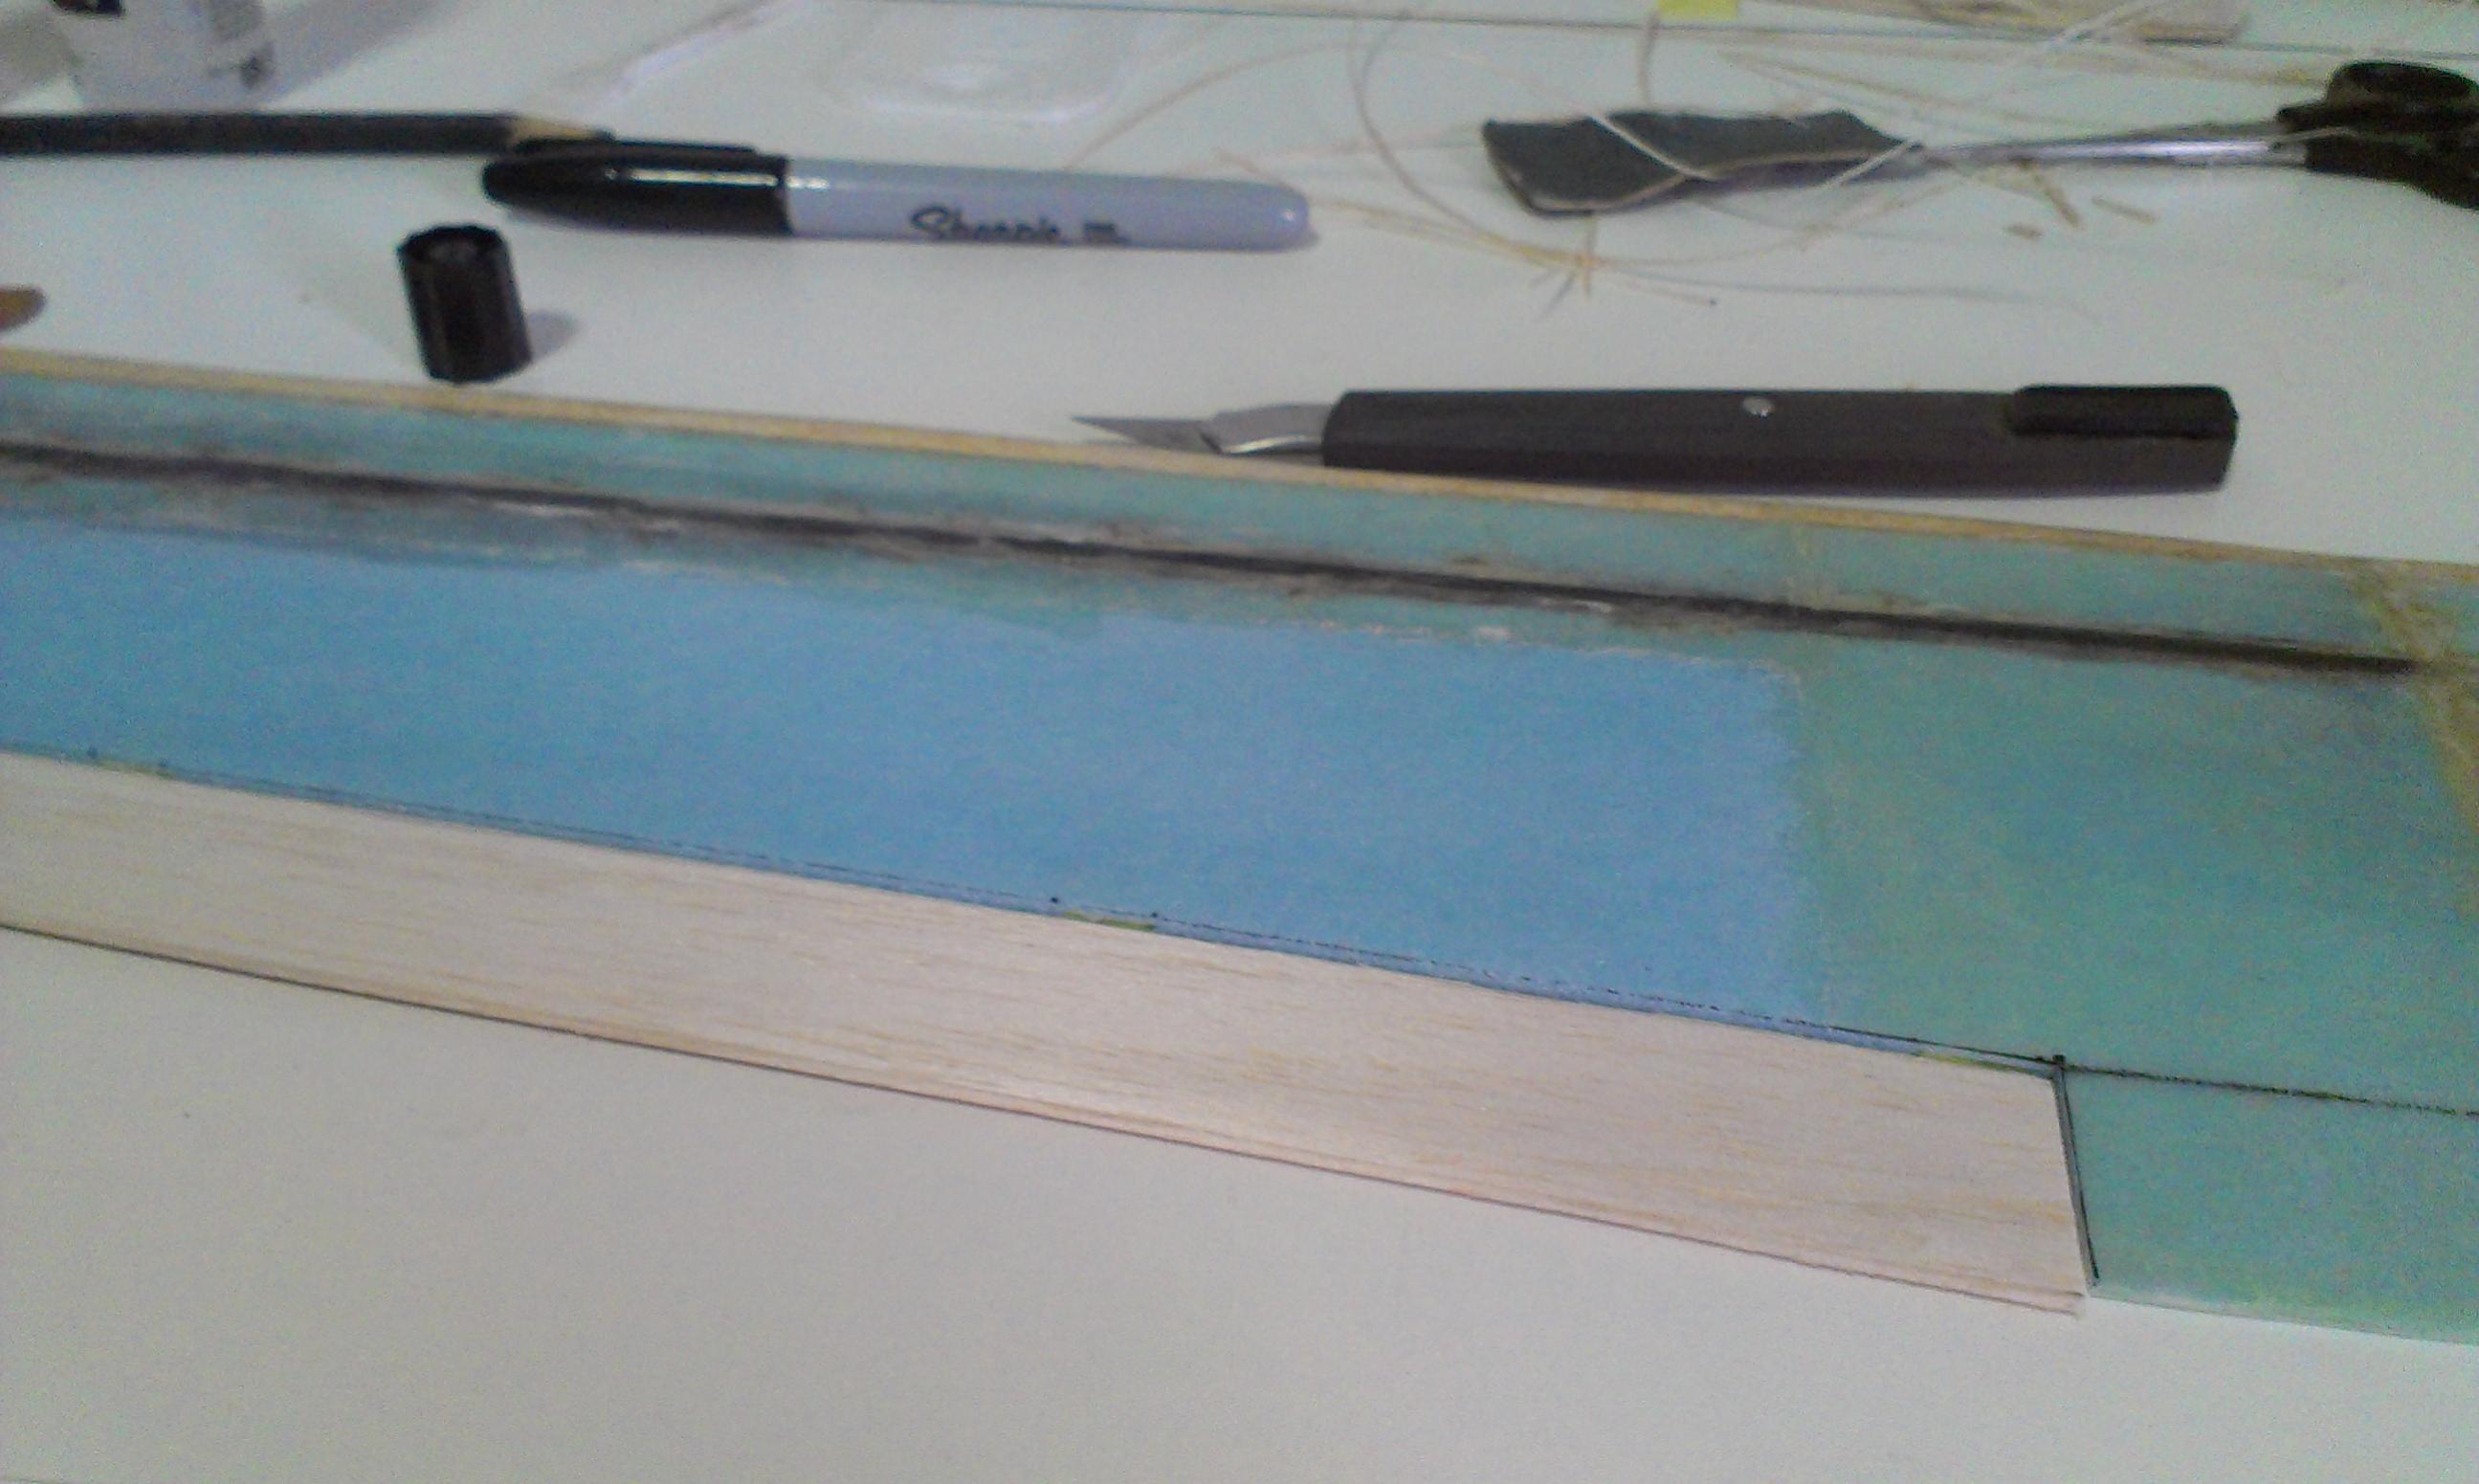
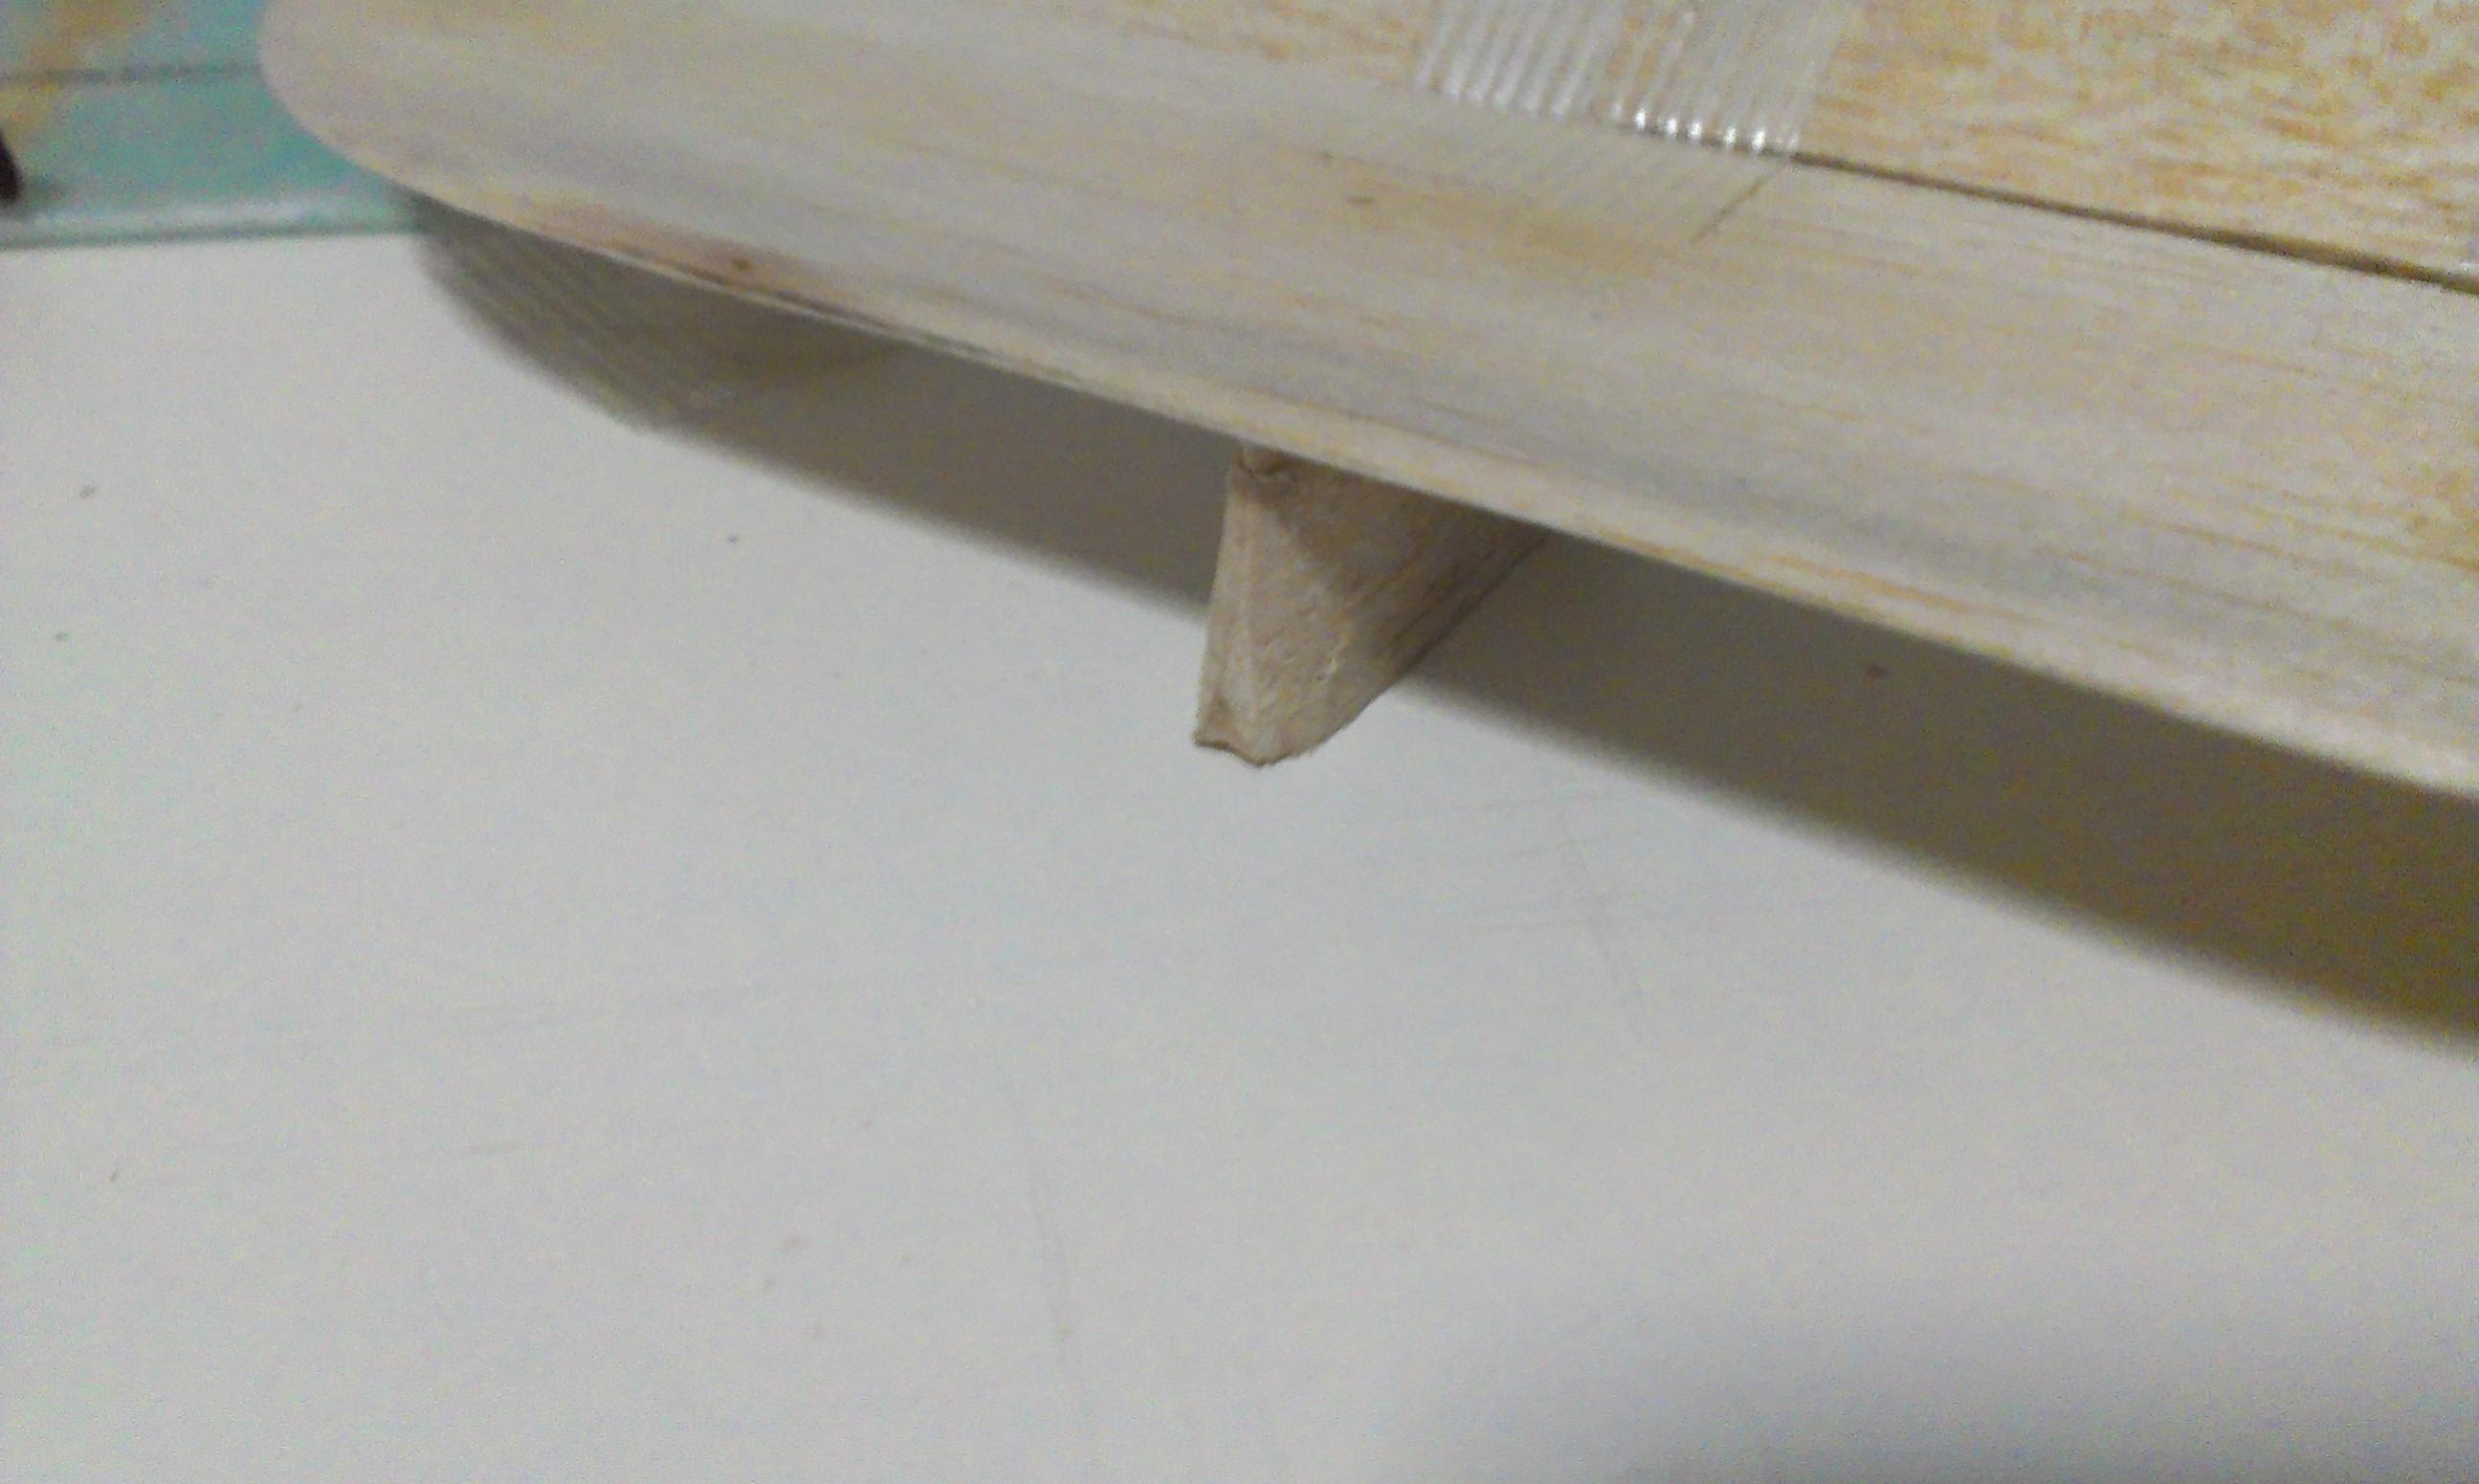
    the leading edge is a balsa square stick carved and sanded to shape. The strength of the wing and the solid launch peg comes from a 6mm carbon tube that runs through the entire wing (protrudes out on the side where the launch peg will be) for a real solid launch, i drill a hole through the carbon tube and the launch peg is stuck into the hole and secured with epoxy. The wing's leading edge is den covered with fiberglass, so is the center portion( where the two wing halves comes together ).
    Next is to install the ailerons. The balsa ailerons are airfoiled to match the wing's profile.
    Click image for larger version

Name:	2012-12-18 15.12.47.jpg
Views:	1
Size:	278.7 KB
ID:	986849

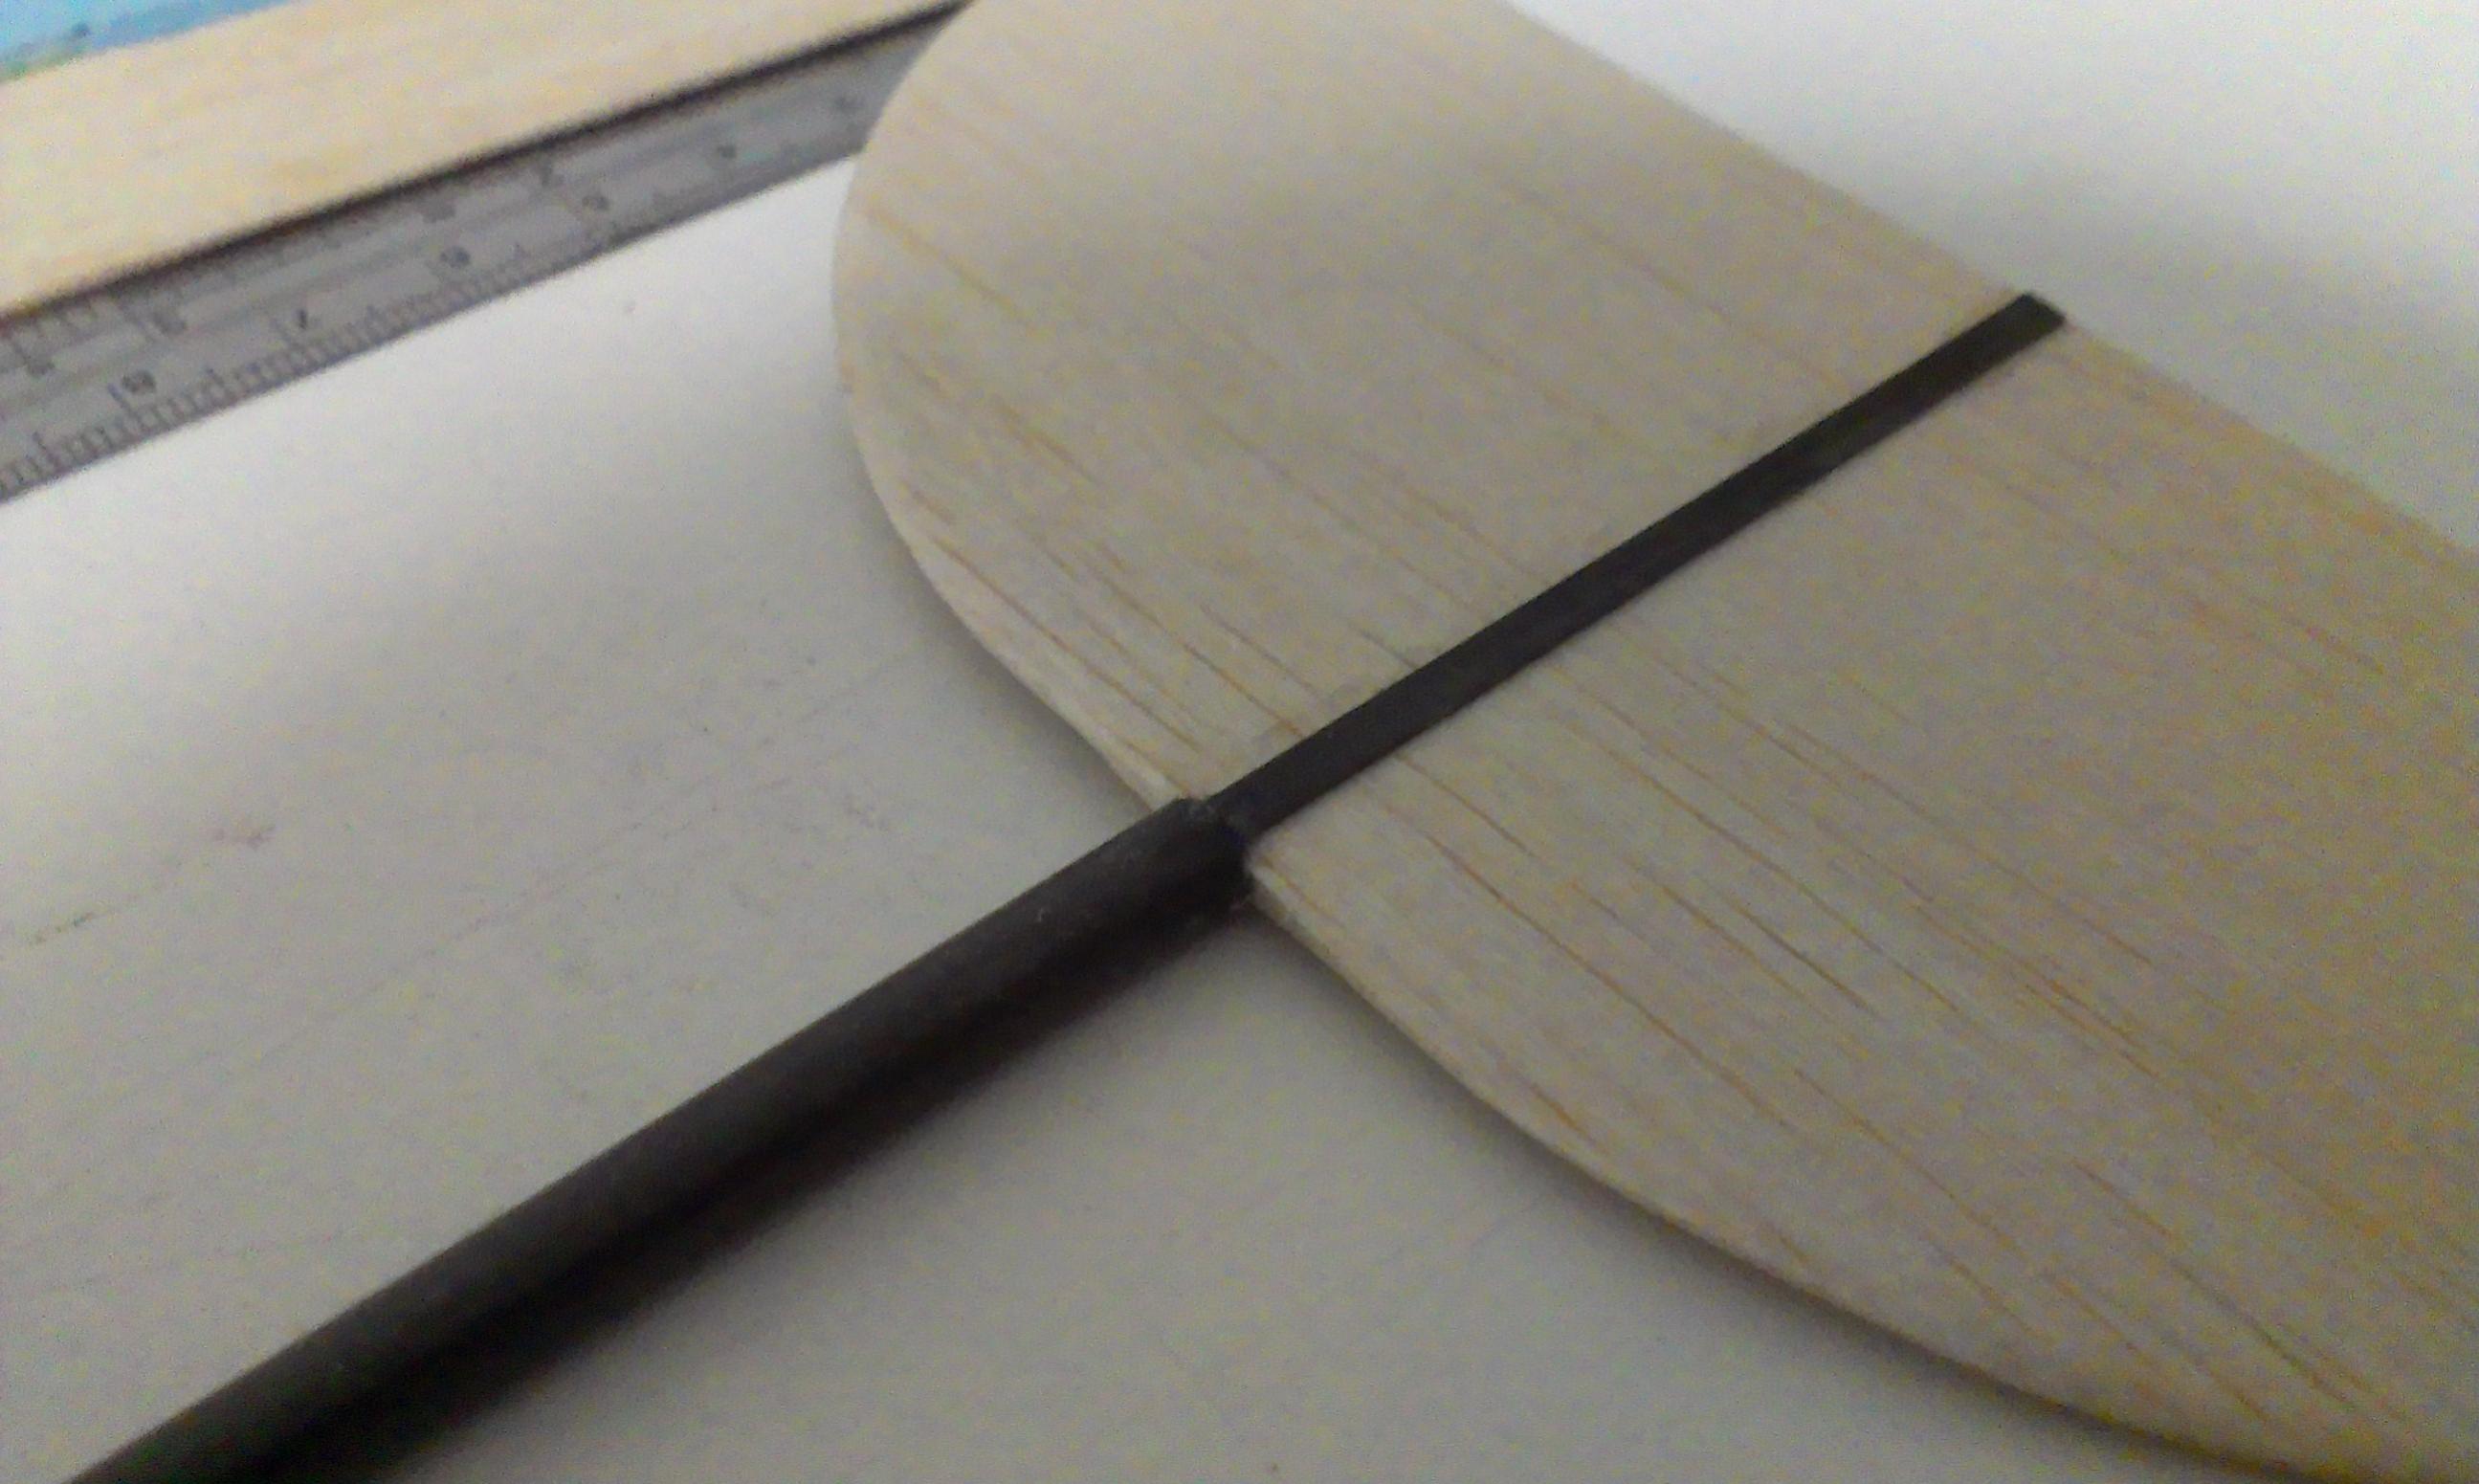
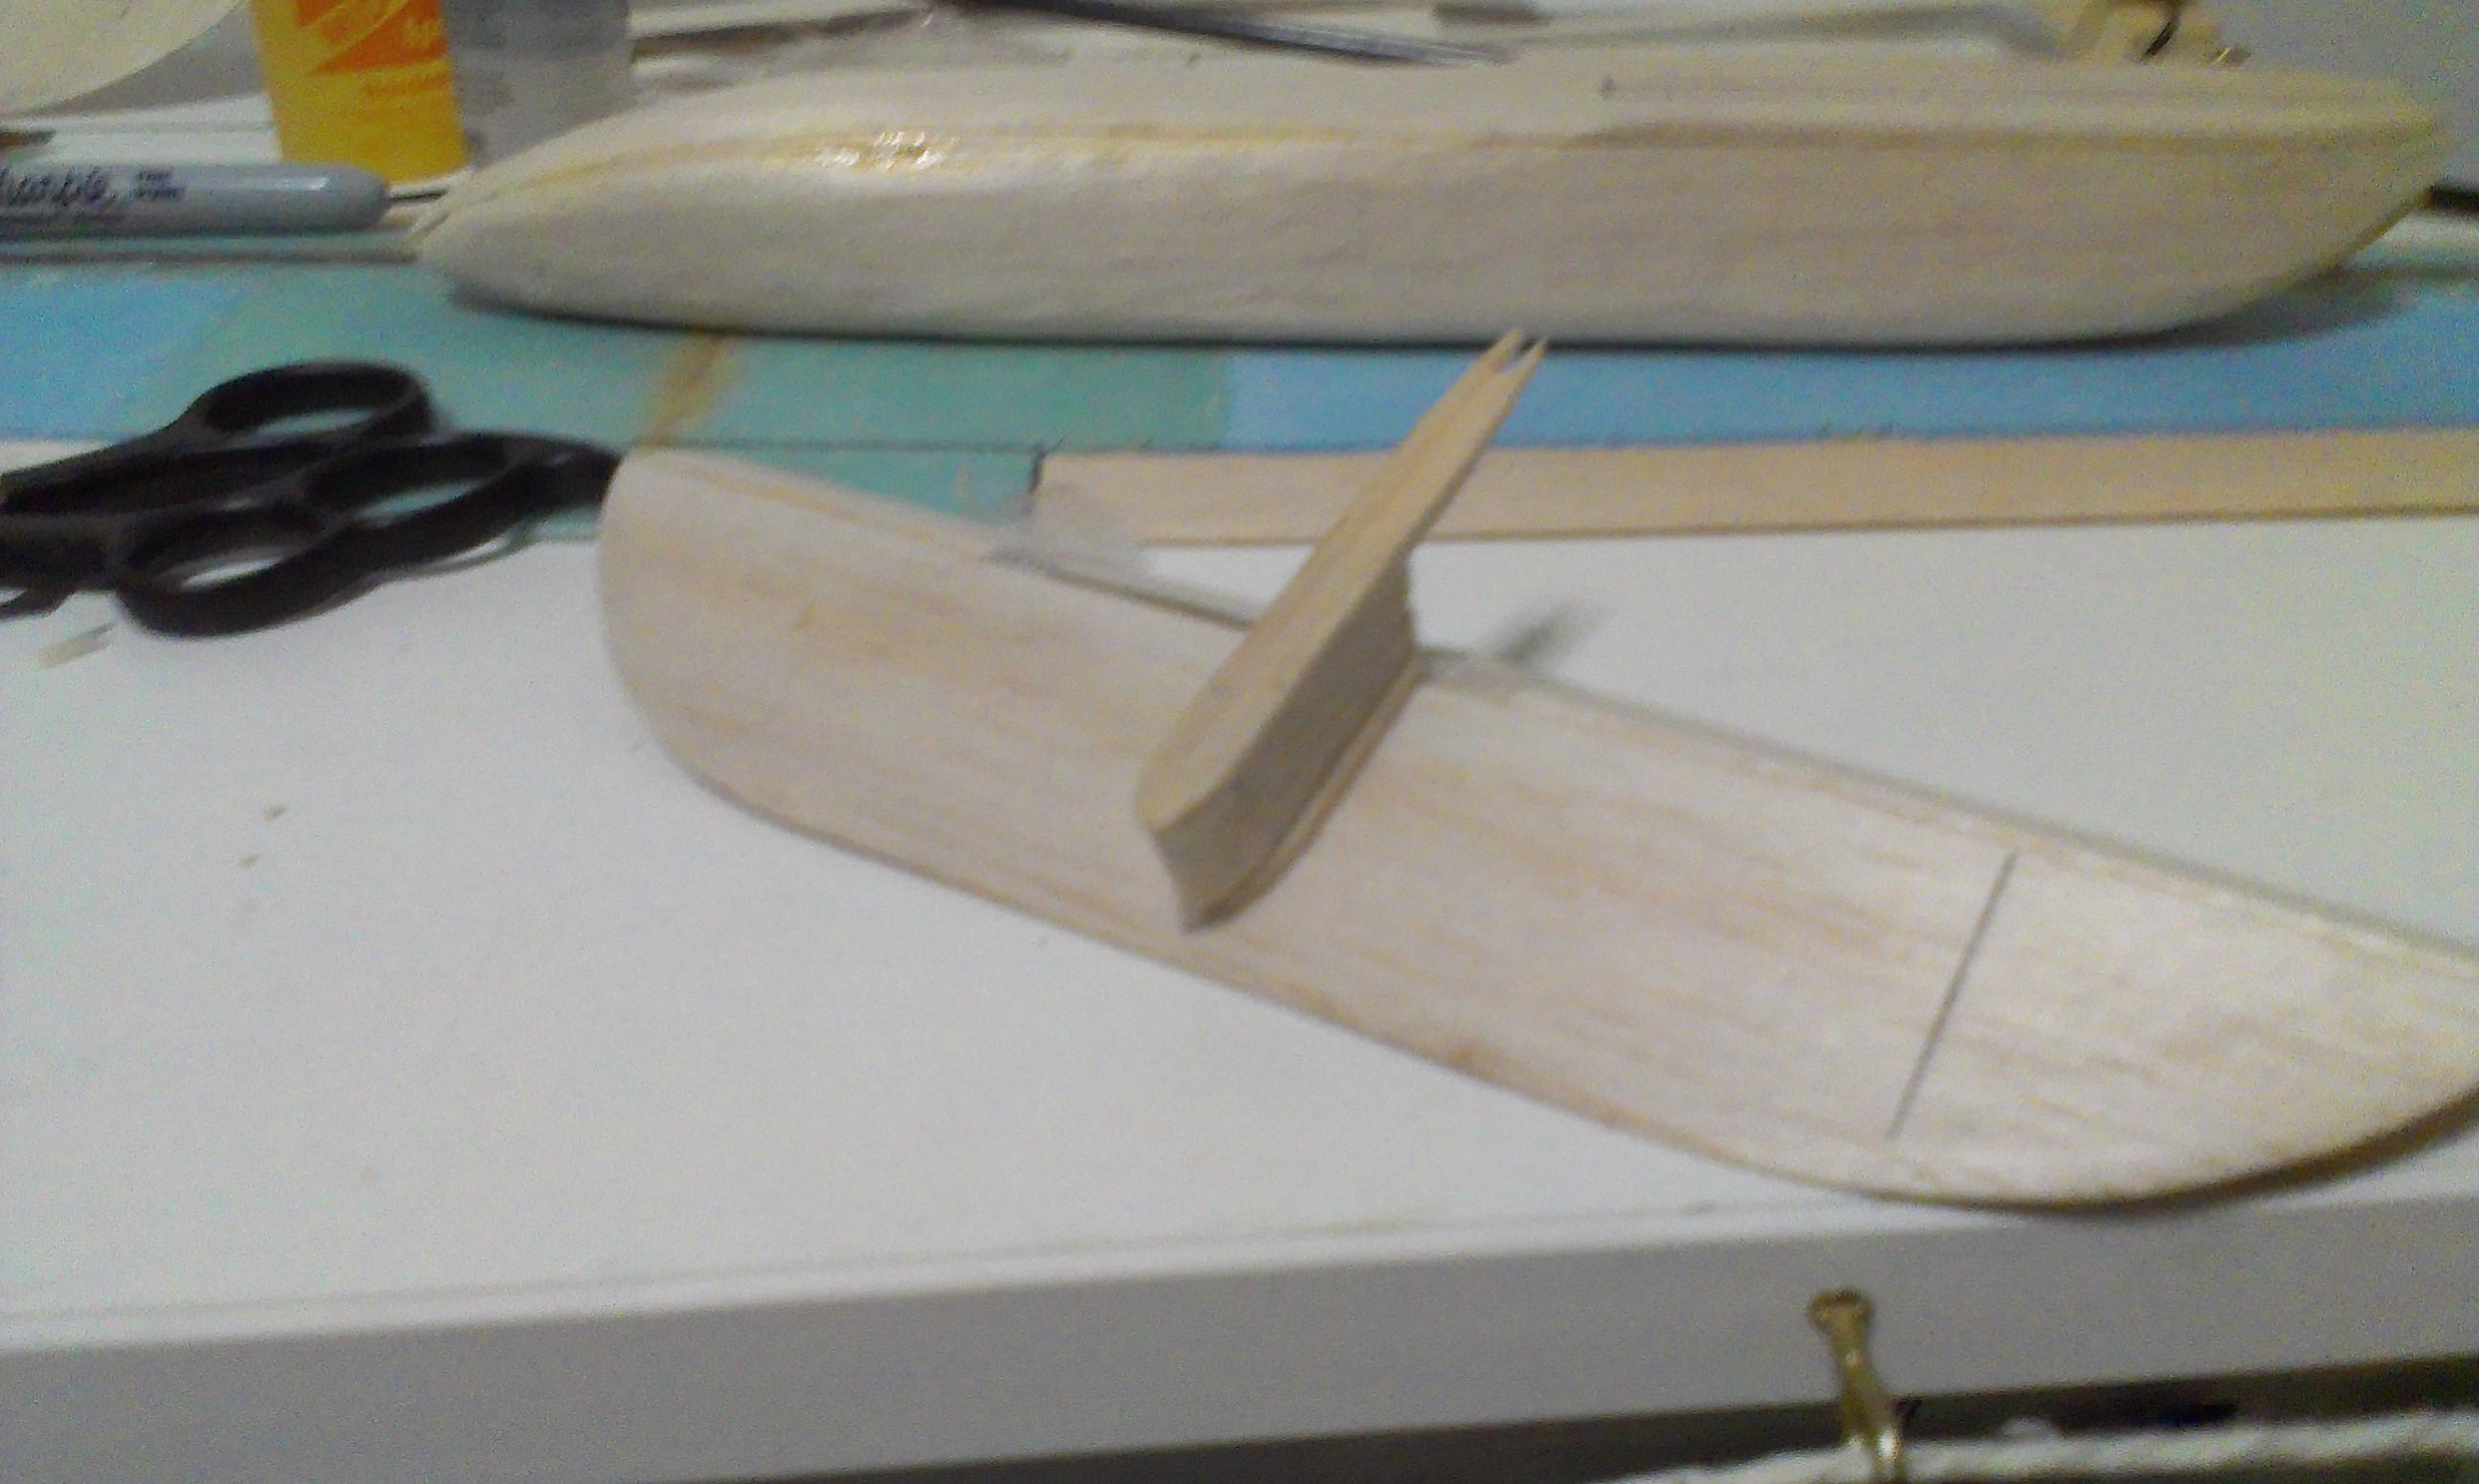
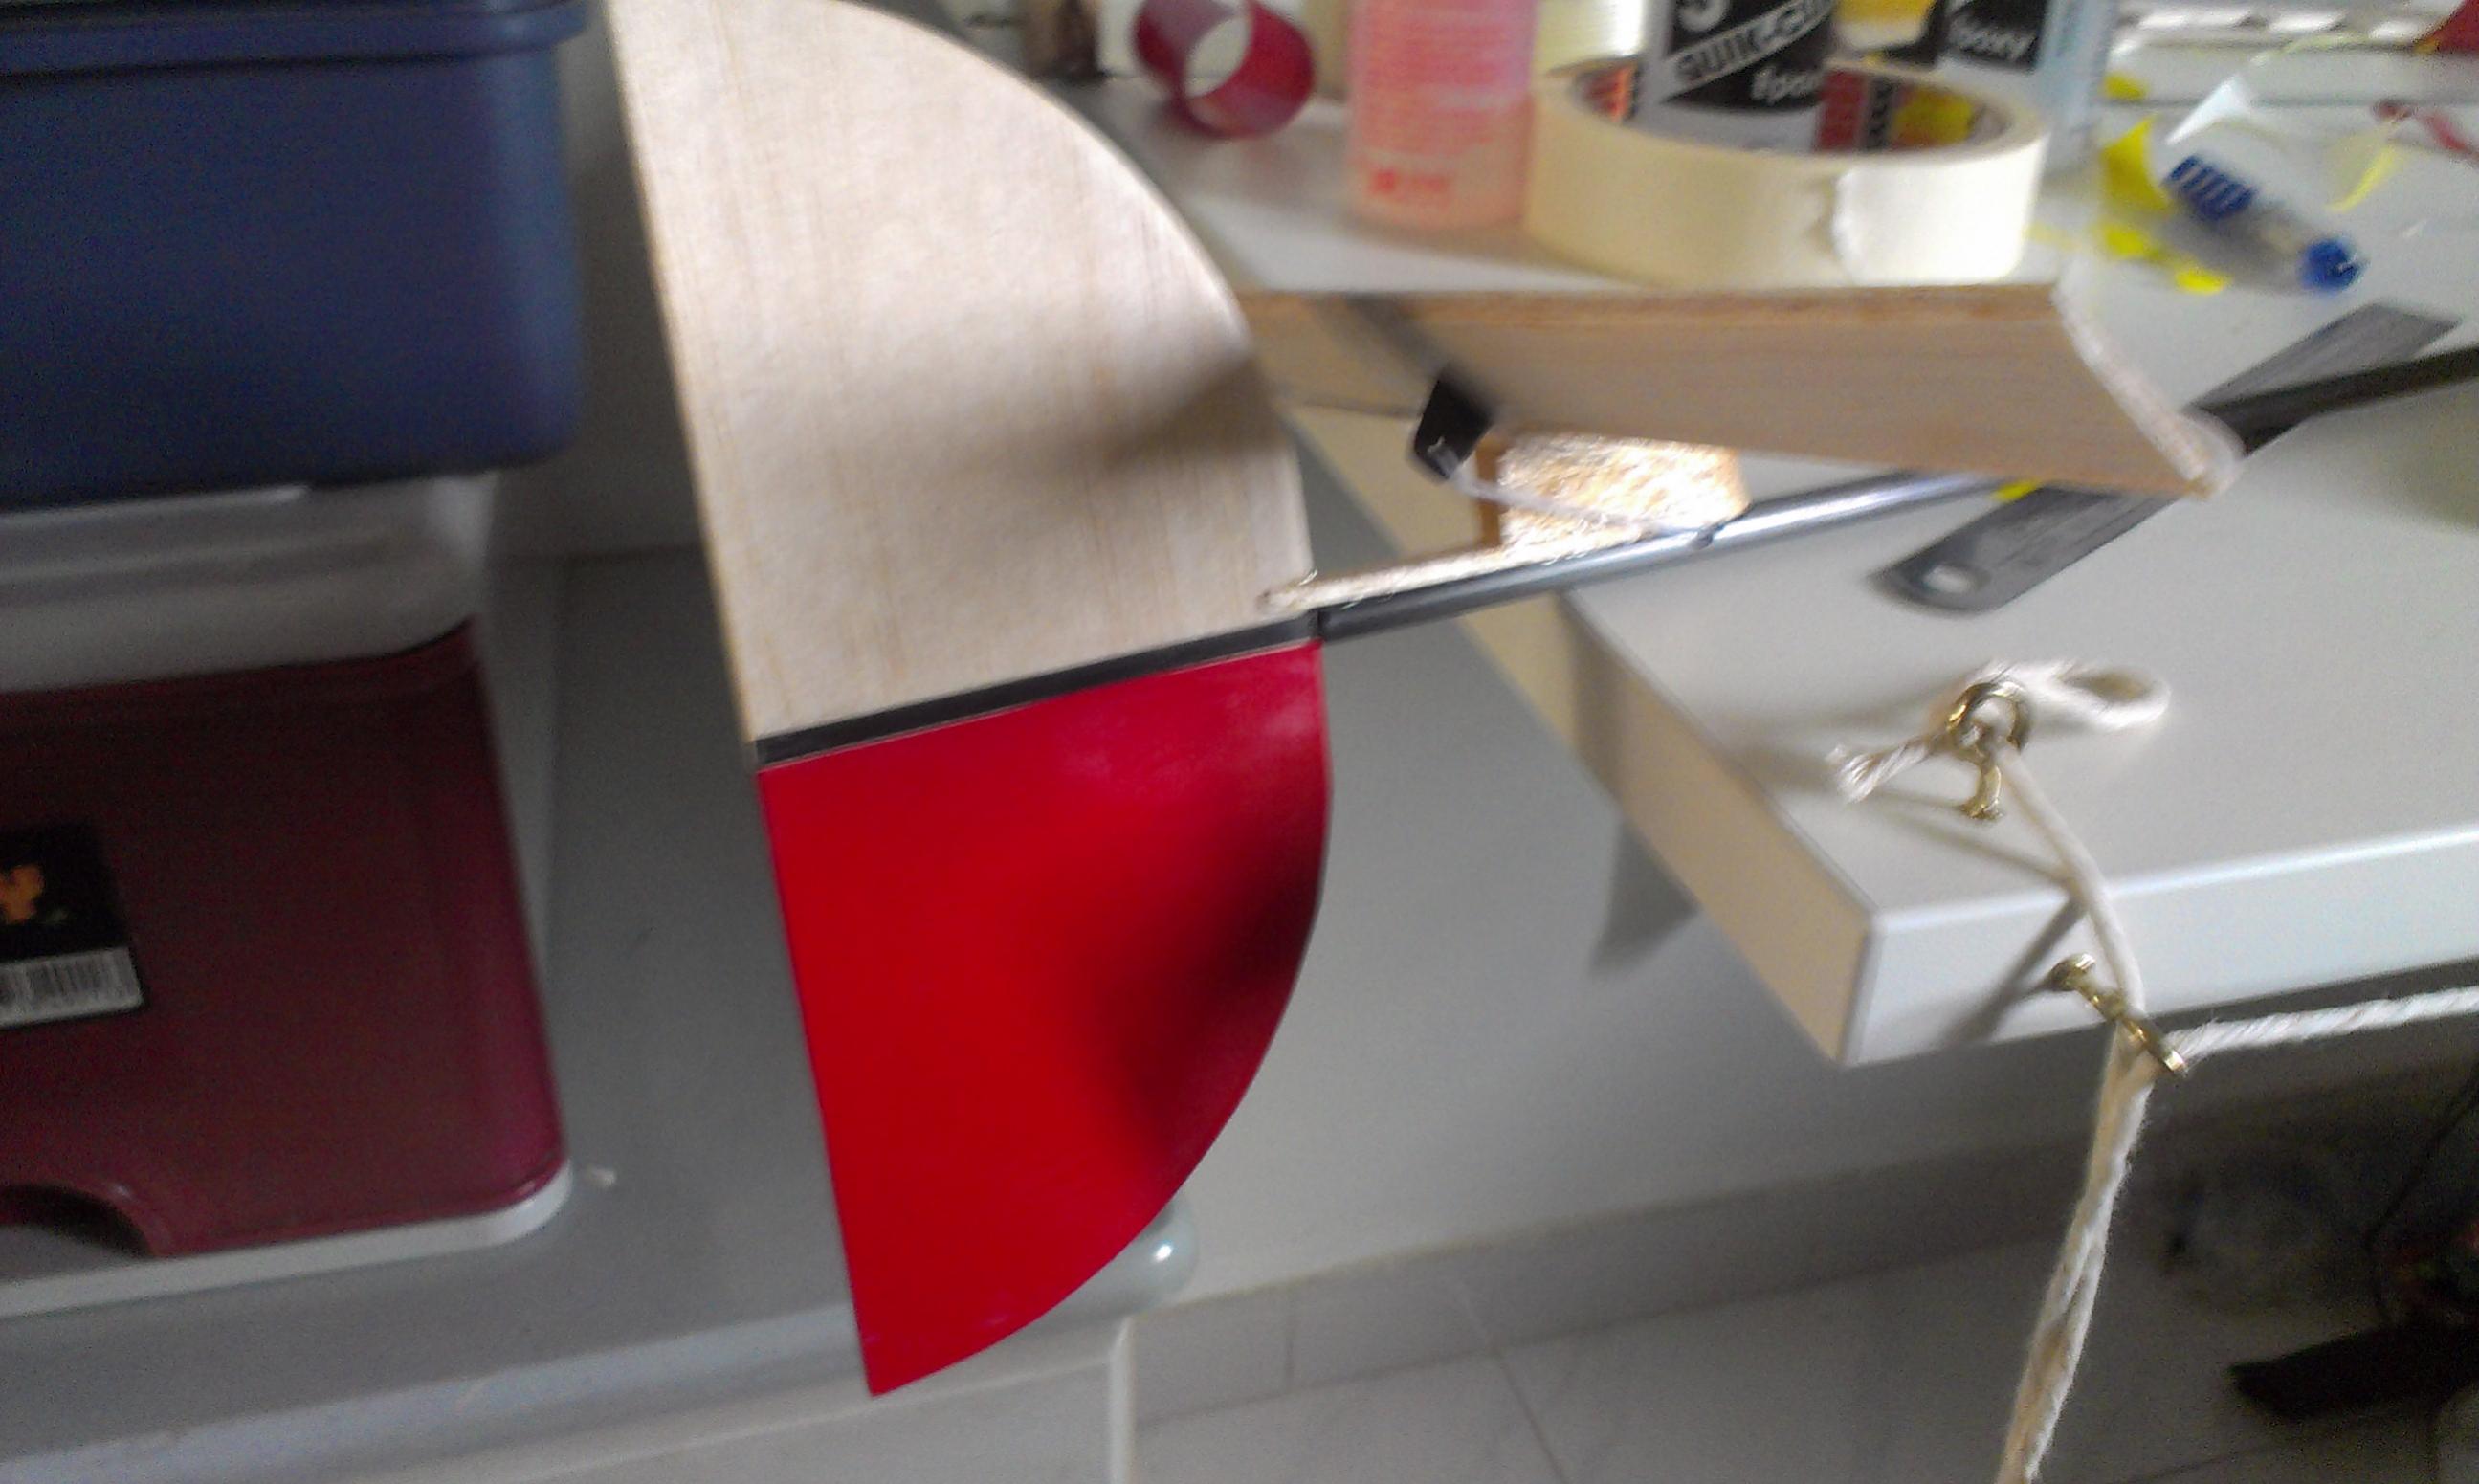
    Ok, now the part where weight saving is really critical....the tail assembly. too heavy means need to add weights to the nose..not something i wanna do....the boom is also 6mm carbon tube. for the tail surfaces i use 3mm balsa, keep it simple. simple = light weight. to install the vert stab, i use 3mm carbon strip on both sides and insert(epoxy) into the tube(boom).
    Click image for larger version

Name:	2012-12-18 20.02.03.jpg
Views:	1
Size:	345.1 KB
ID:	986850 Click image for larger version

Name:	2012-12-18 20.07.25.jpg
Views:	1
Size:	295.0 KB
ID:	986851

    for the elevator, i use a pull spring setup. the mounting pylon is carved out from balsa.
    Click image for larger version

Name:	2012-12-18 22.38.01.jpg
Views:	1
Size:	313.9 KB
ID:	986852 Click image for larger version

Name:	2012-12-18 22.38.48.jpg
Views:	1
Size:	261.4 KB
ID:	986853 Click image for larger version

Name:	2012-12-18 22.39.11.jpg
Views:	1
Size:	306.3 KB
ID:	986854

    the horizontal stab is epoxied into place and the string for pull spring is pulled through the boom.
    Click image for larger version

Name:	2012-12-19 10.26.11.jpg
Views:	1
Size:	486.0 KB
ID:	986855

    The entire tail assembly is only 20g! pretty darn good!
    Click image for larger version

Name:	2012-12-19 10.27.05.jpg
Views:	1
Size:	337.5 KB
ID:	986856

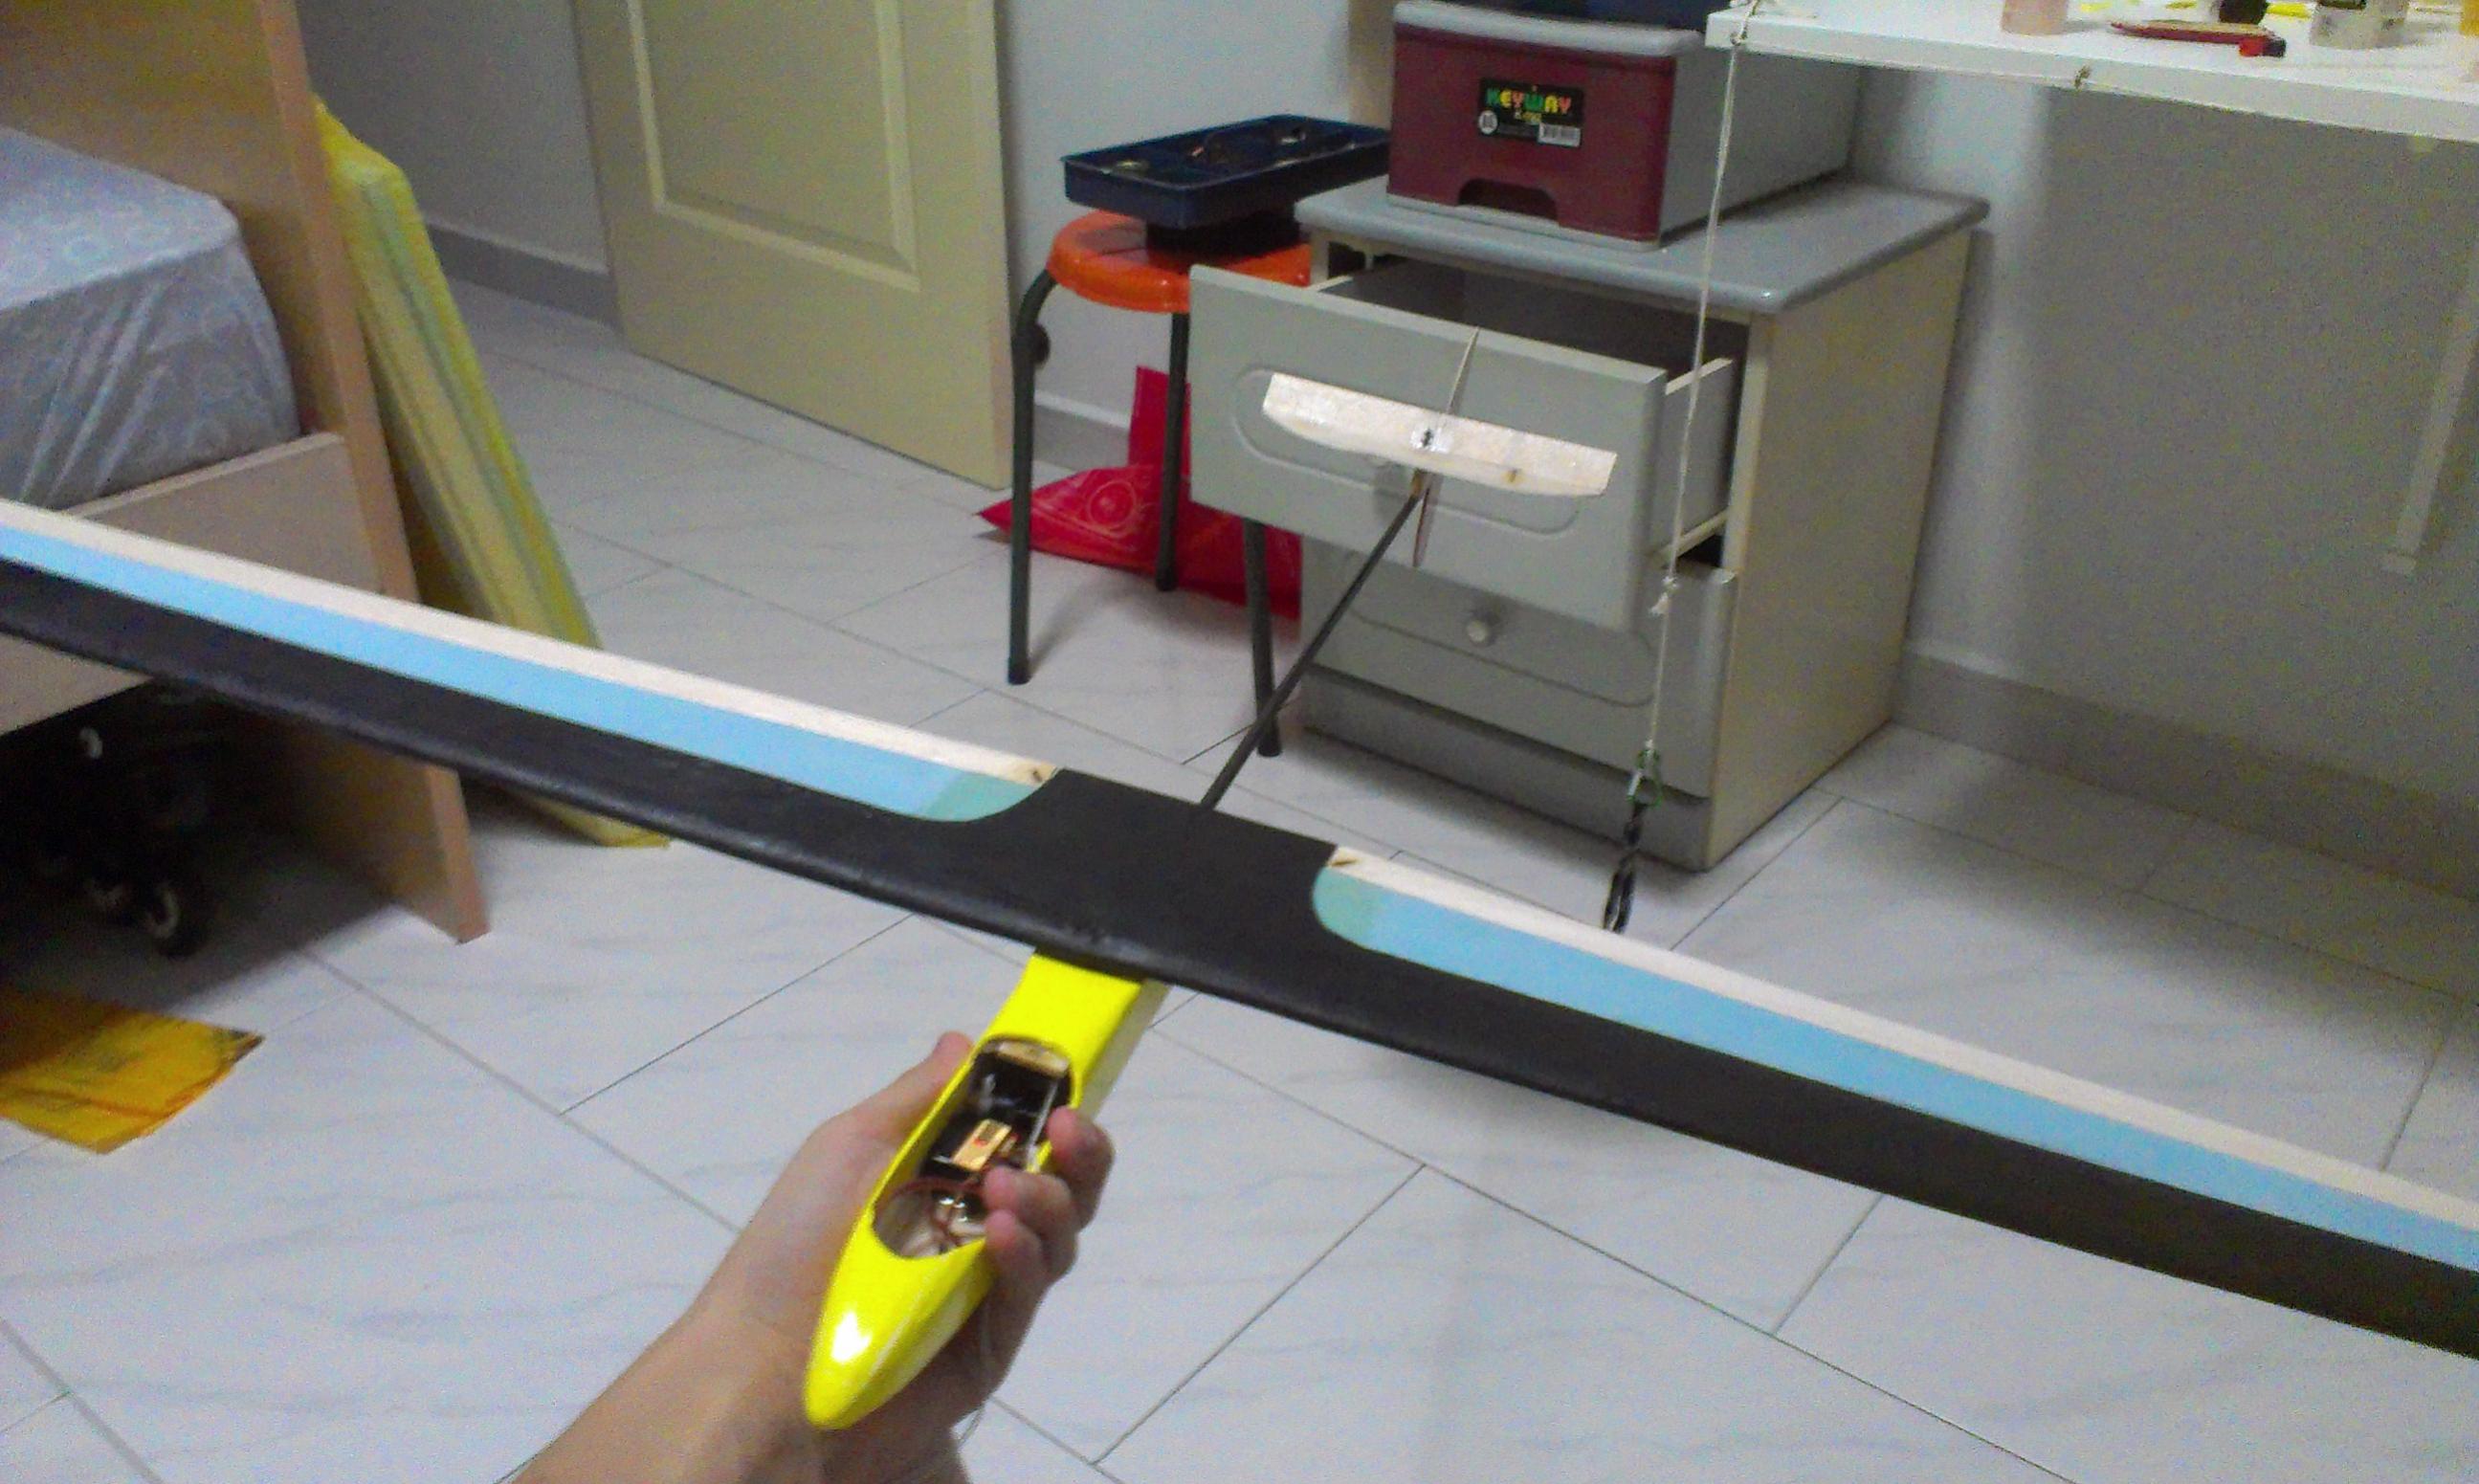
    I painted the wing's top with black, bottom red stripes to be highly visible in the air.
    Click image for larger version

Name:	2012-12-19 12.33.23.jpg
Views:	1
Size:	276.0 KB
ID:	986857

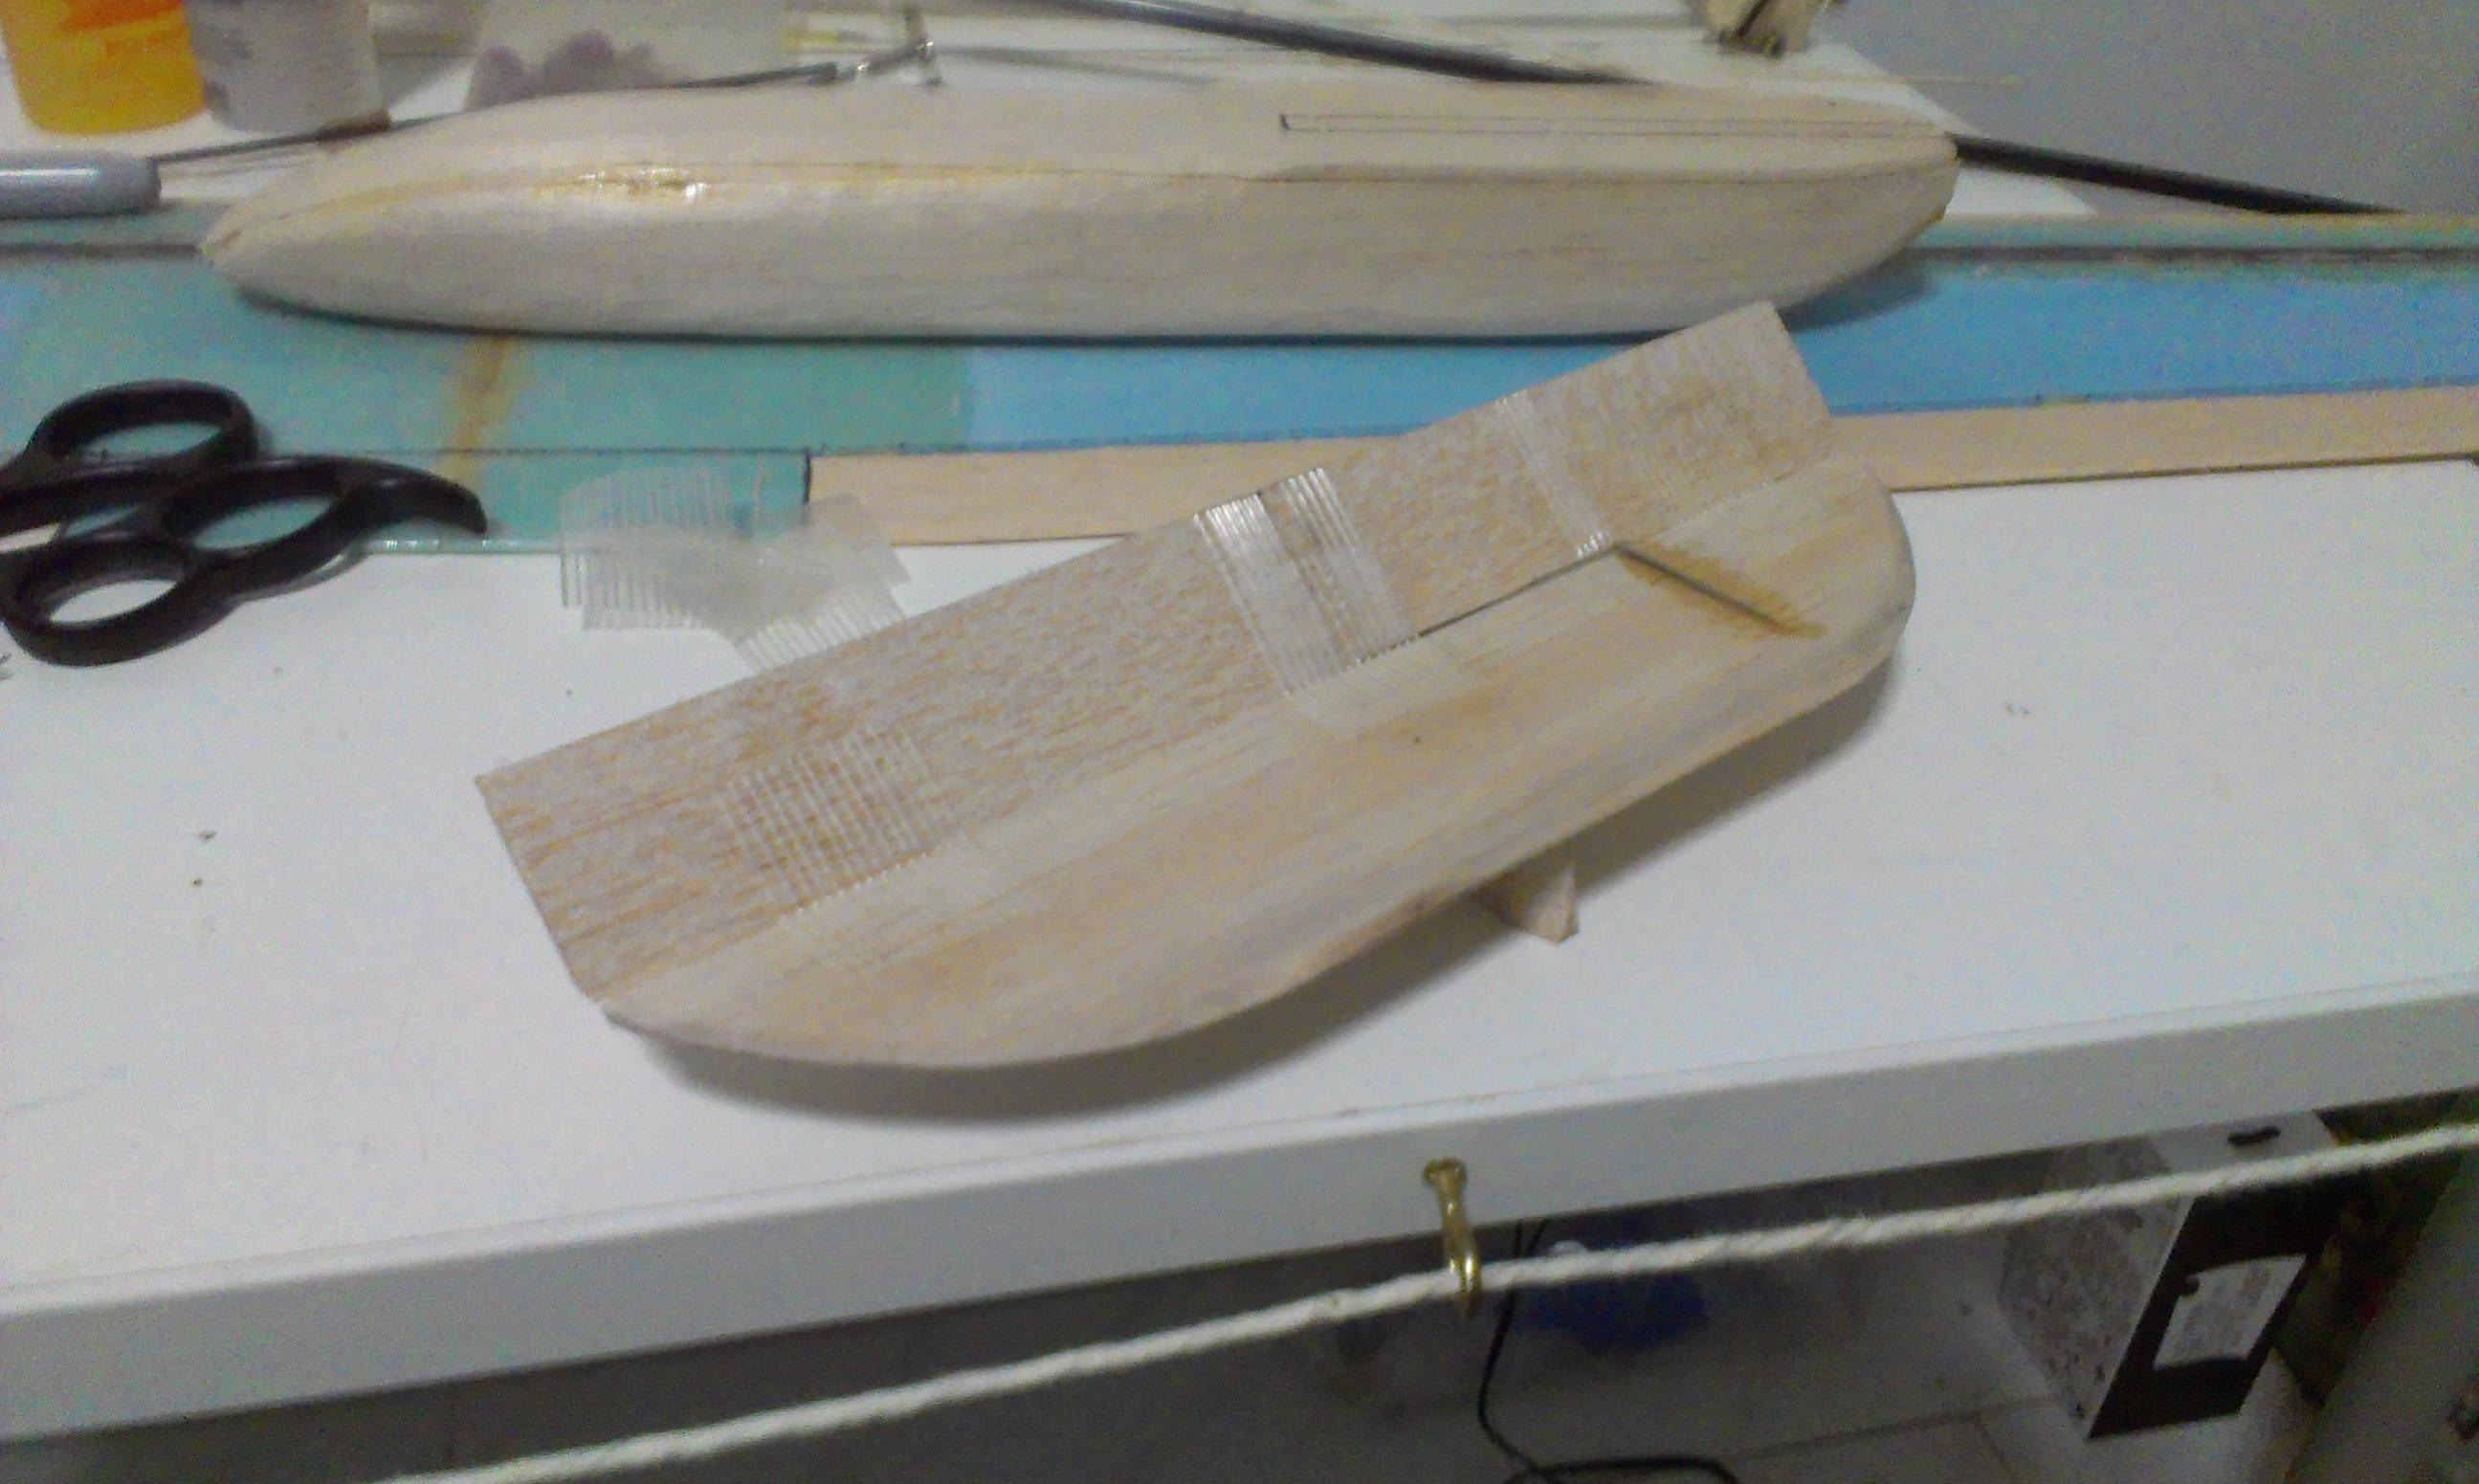
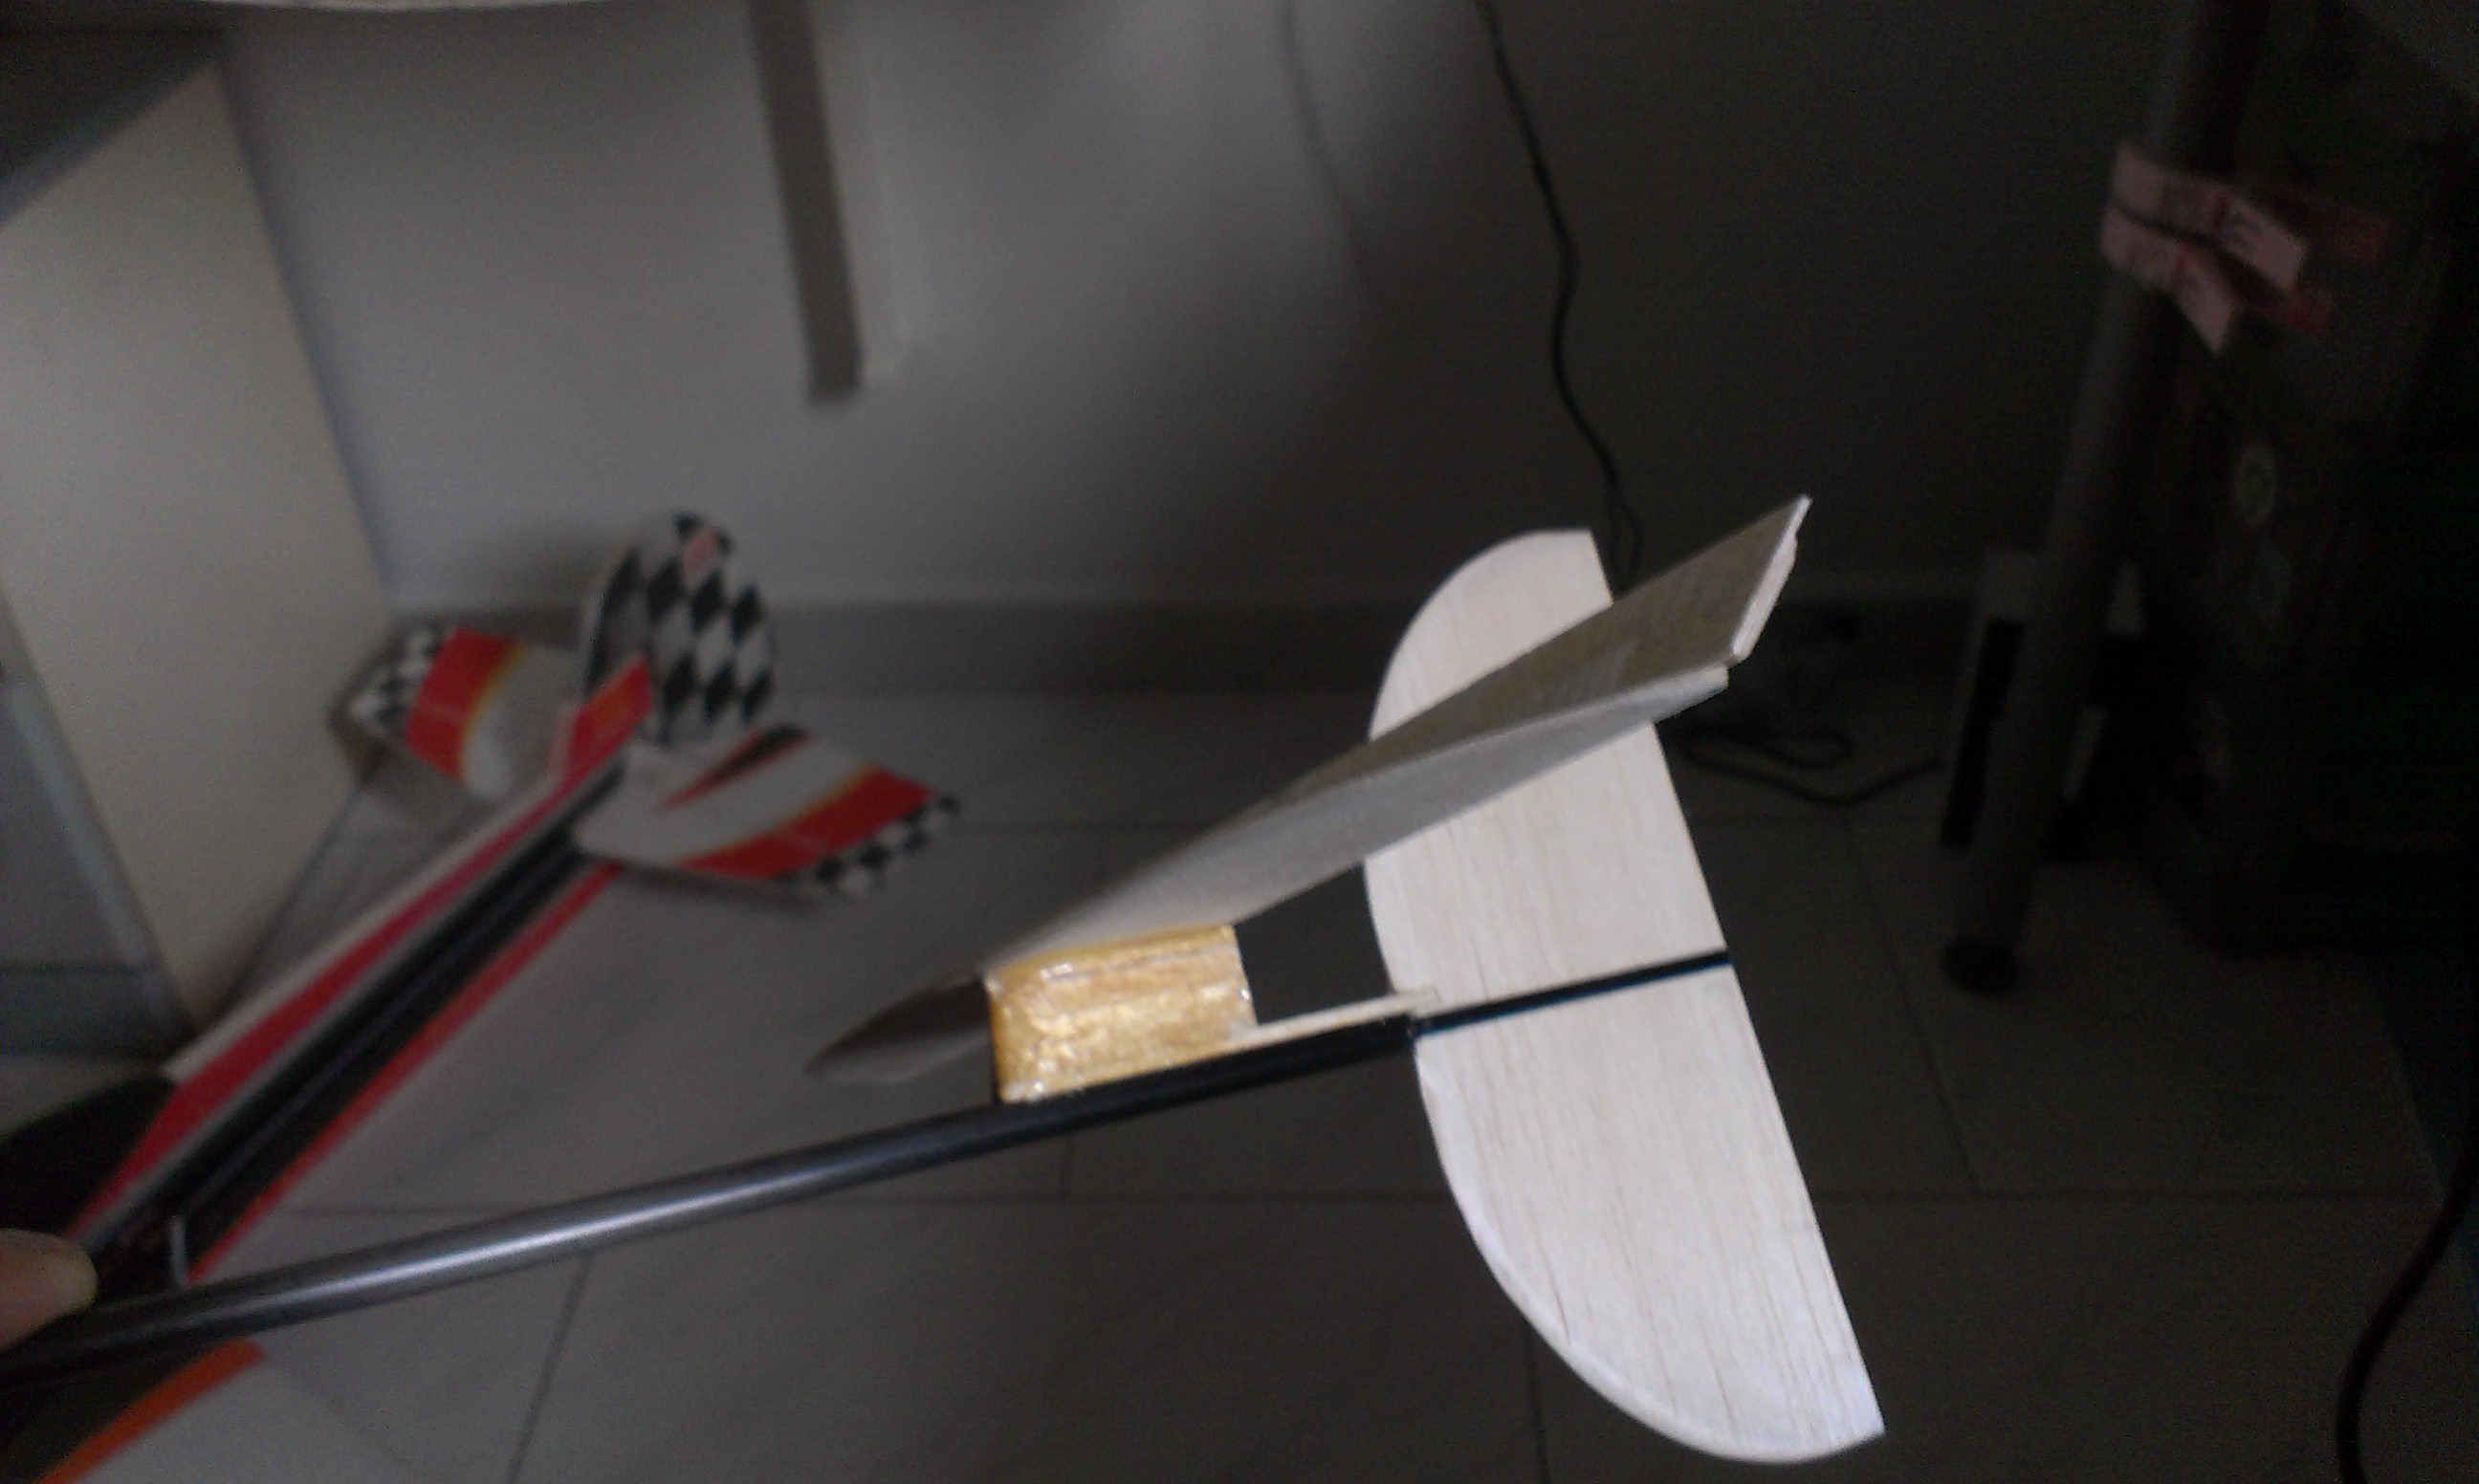
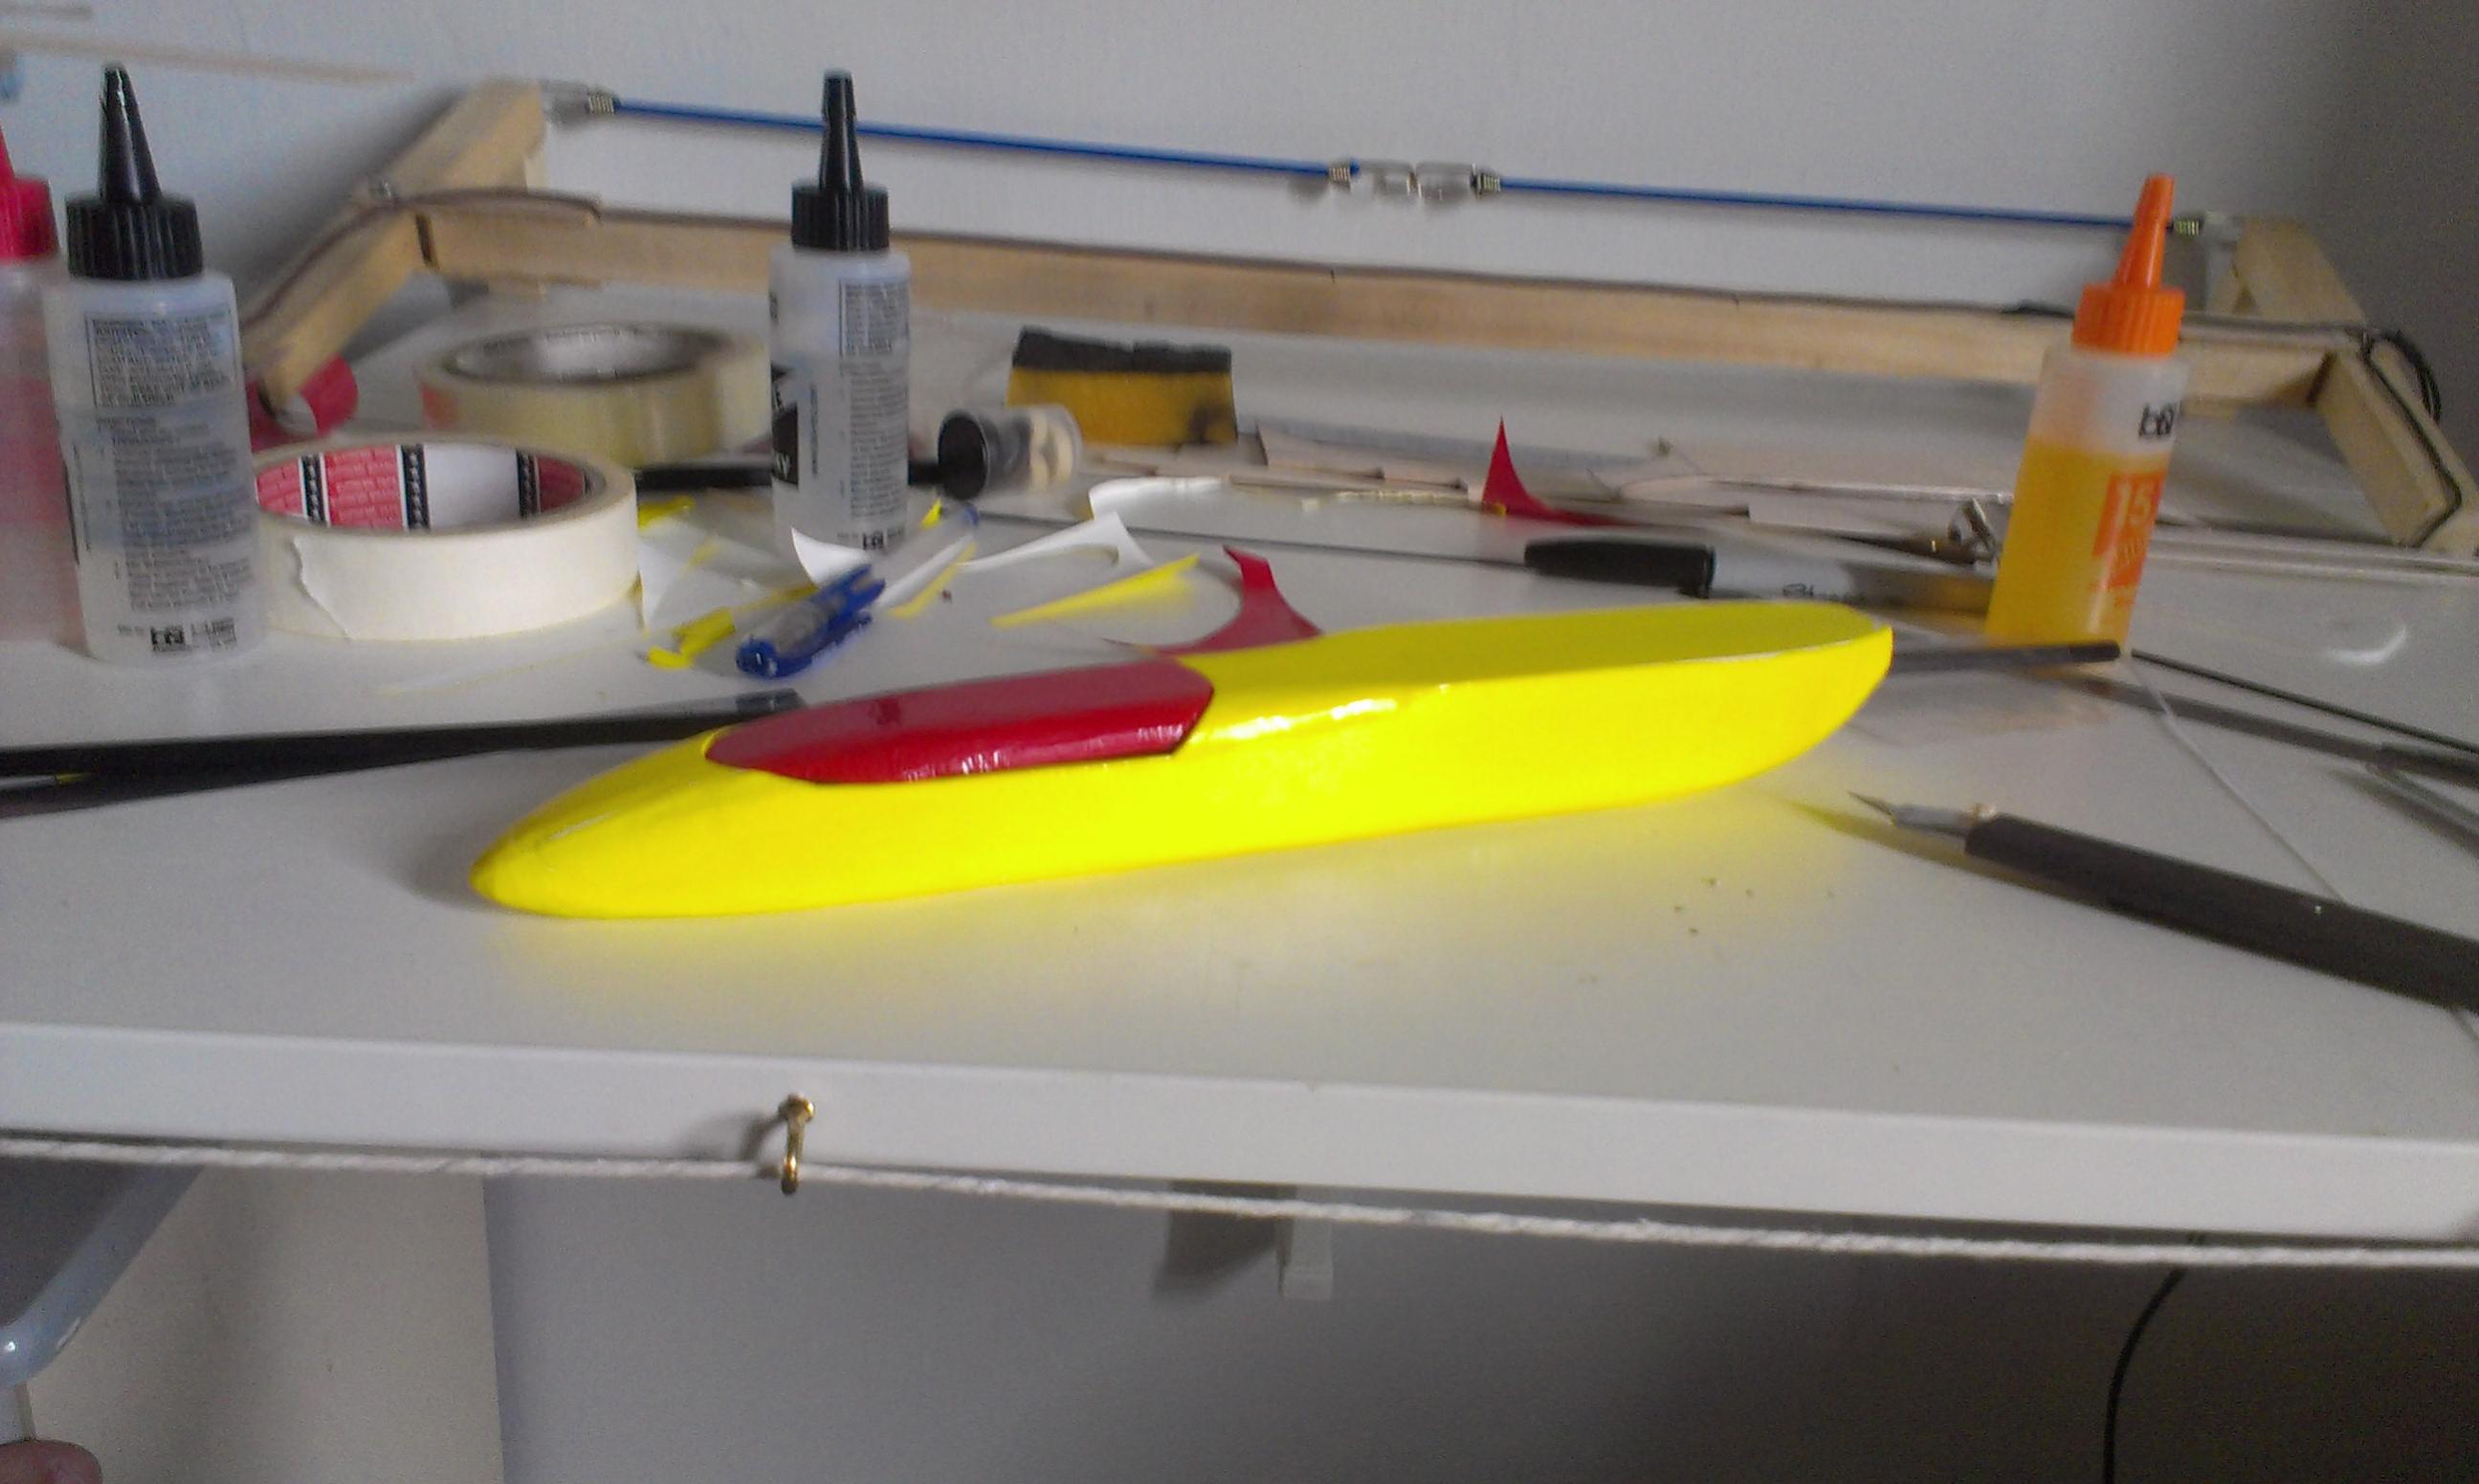
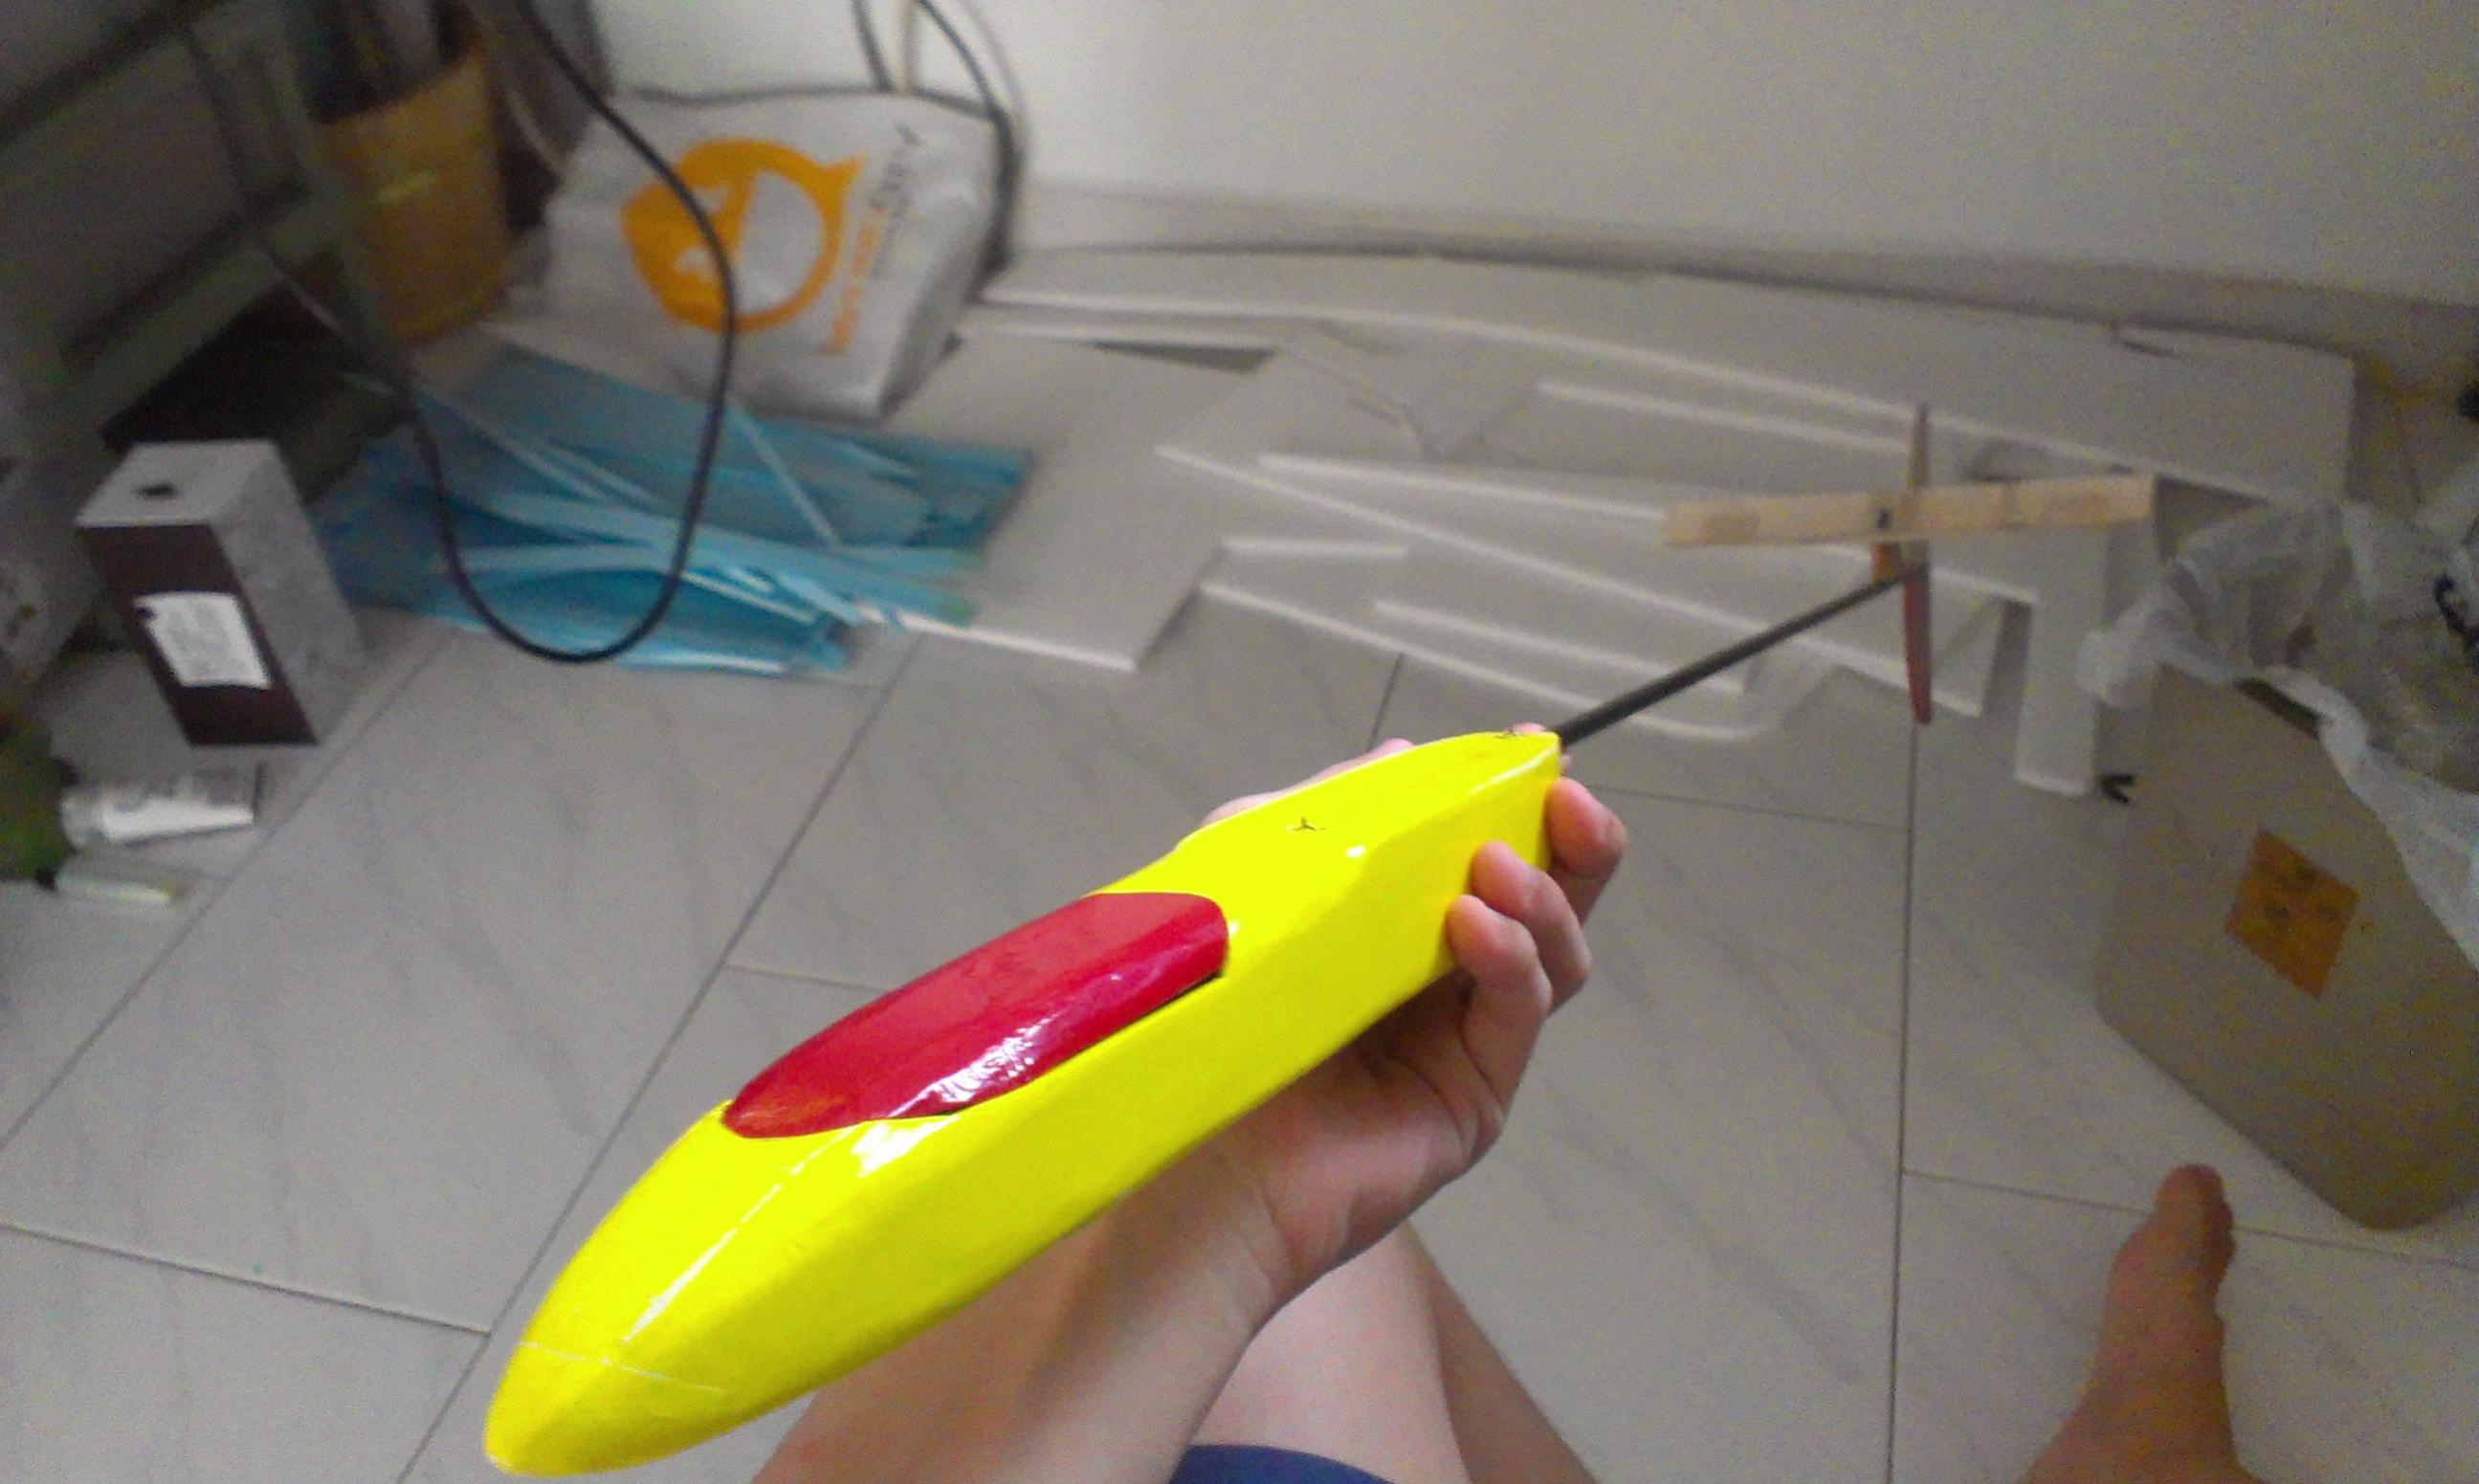
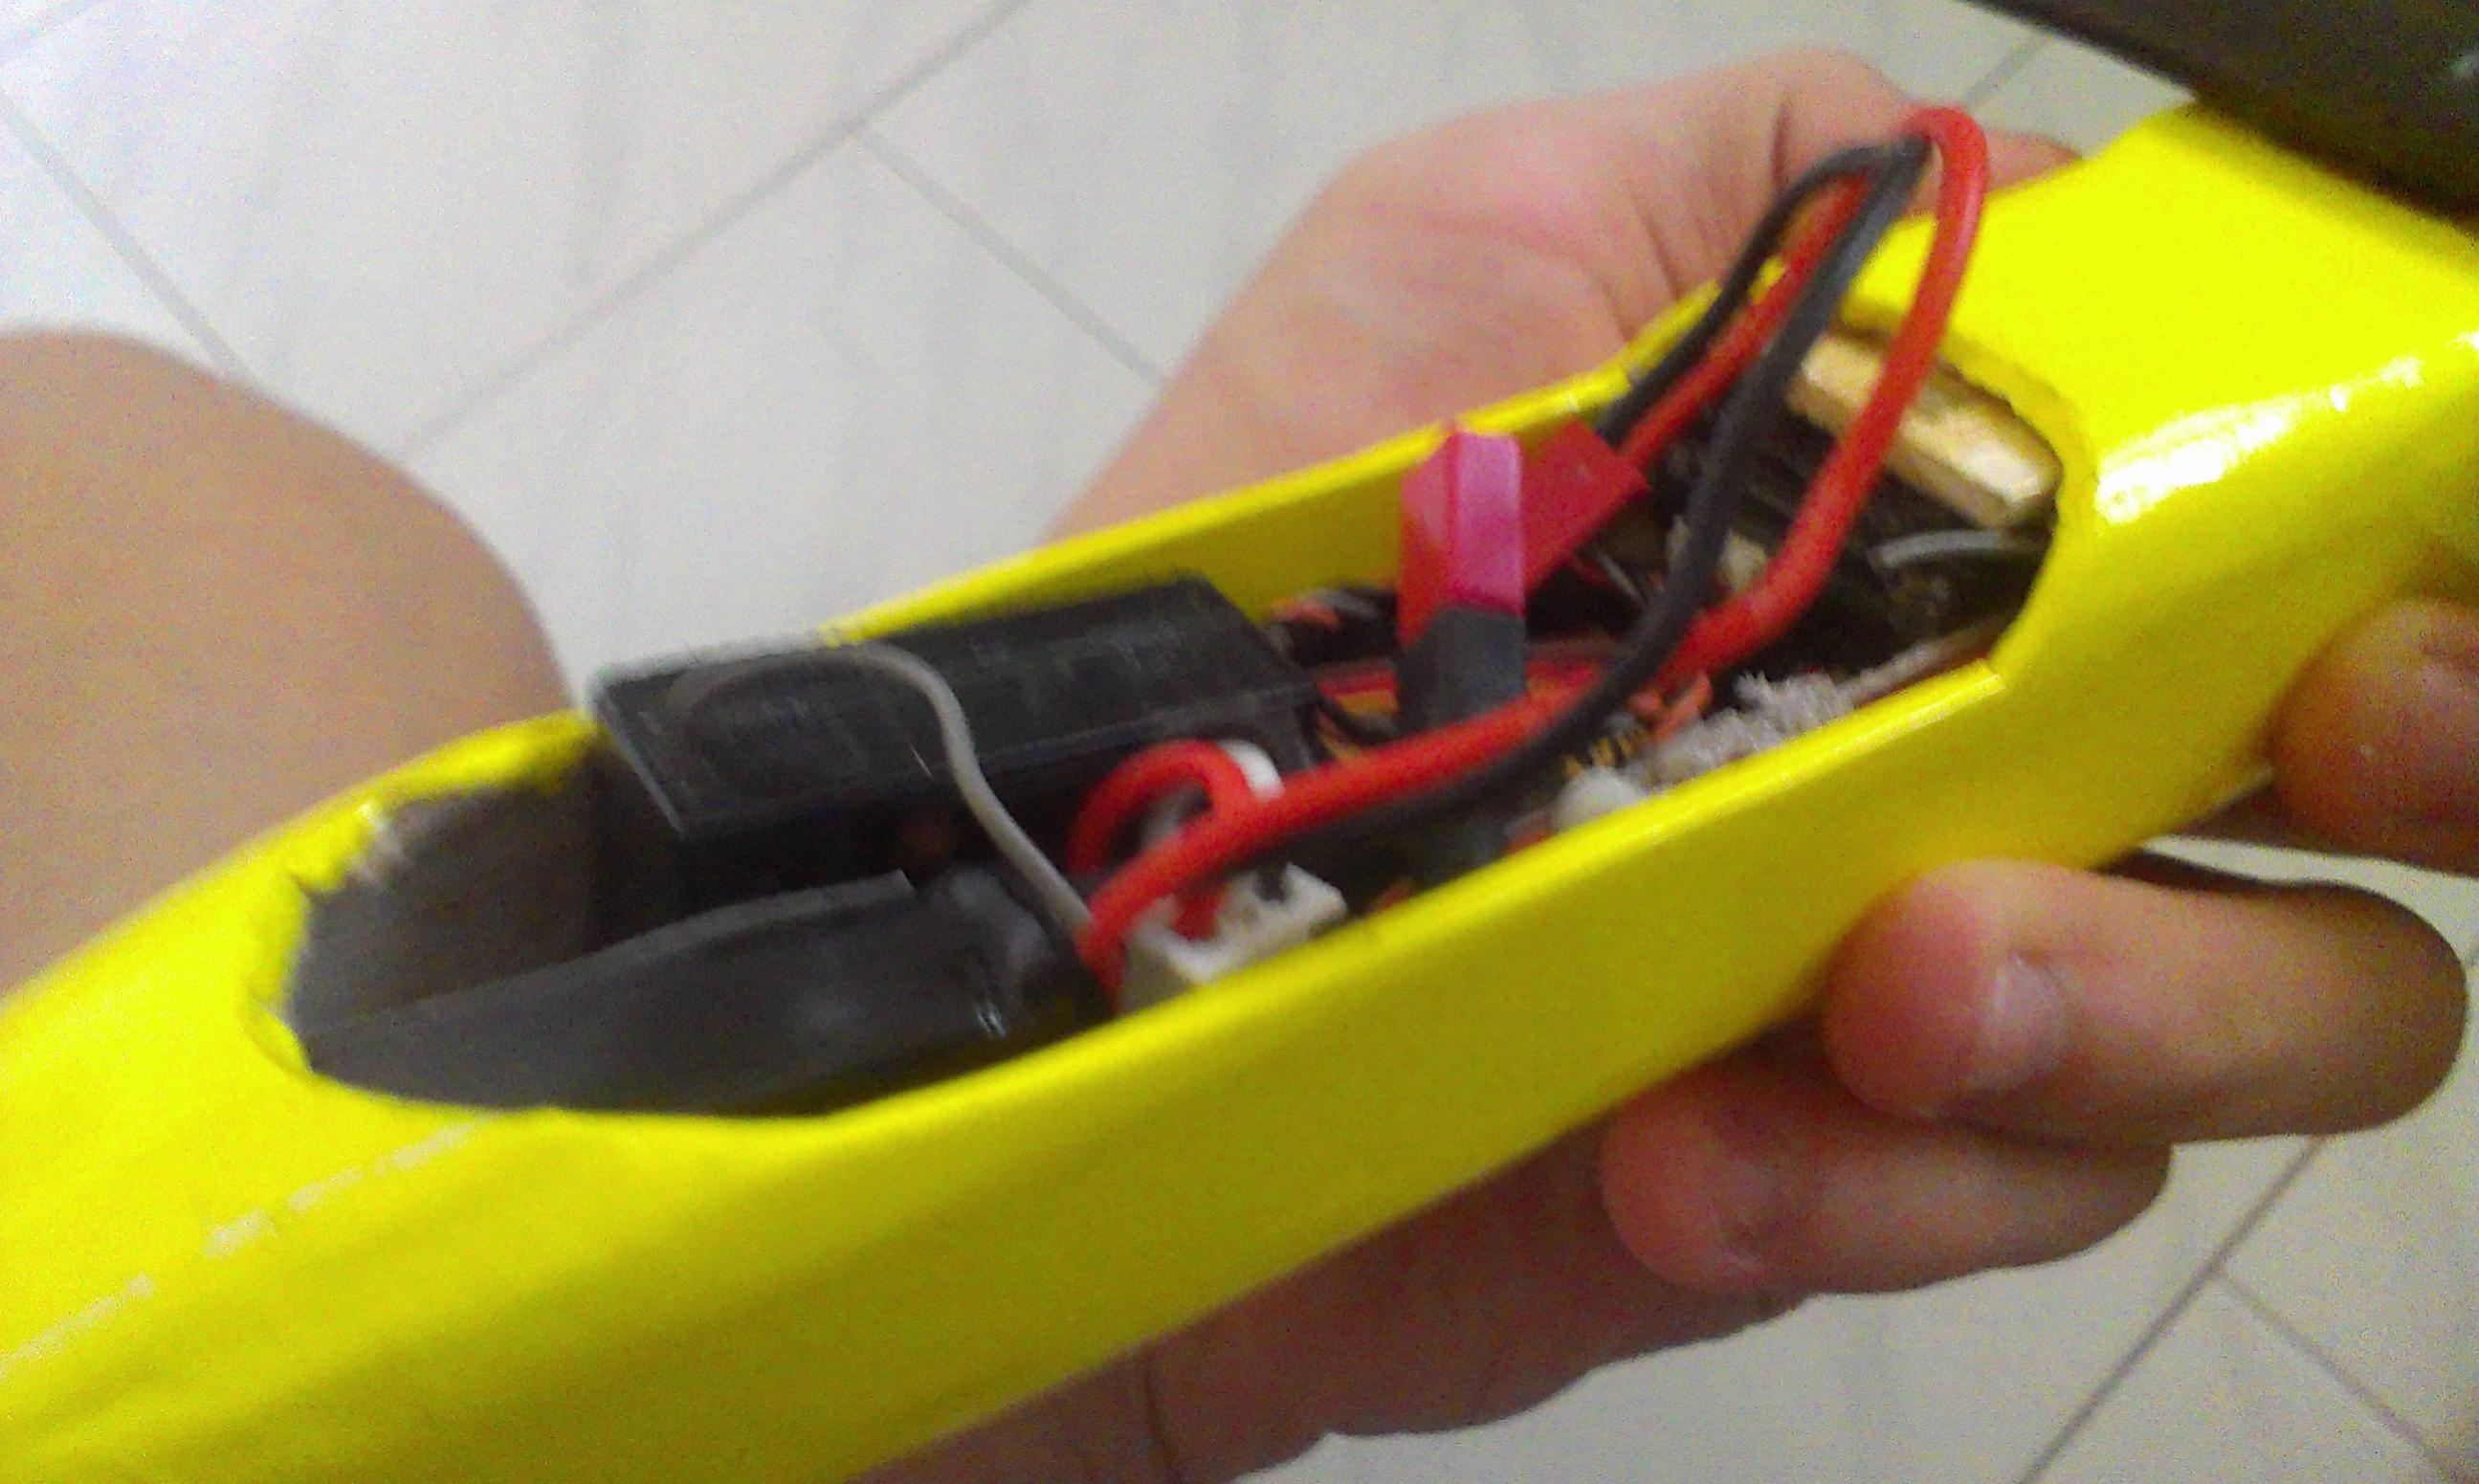
    Now all thats left is the pod....i use 3mm balsa for this. it is a simple box construction with the front and back soaked in hot water to soften for bending into final shape. Its carved and sanded to shape and covered with monokote.
    Click image for larger version

Name:	2012-12-20 12.17.03.jpg
Views:	1
Size:	253.9 KB
ID:	986858

    the hatch is held on with a screw. Since the bottom half of the vert stab will be in contact with the ground quite often and i dont want it getting wet...answer to that, monokote
    Click image for larger version

Name:	2012-12-20 12.20.11.jpg
Views:	1
Size:	259.6 KB
ID:	986859

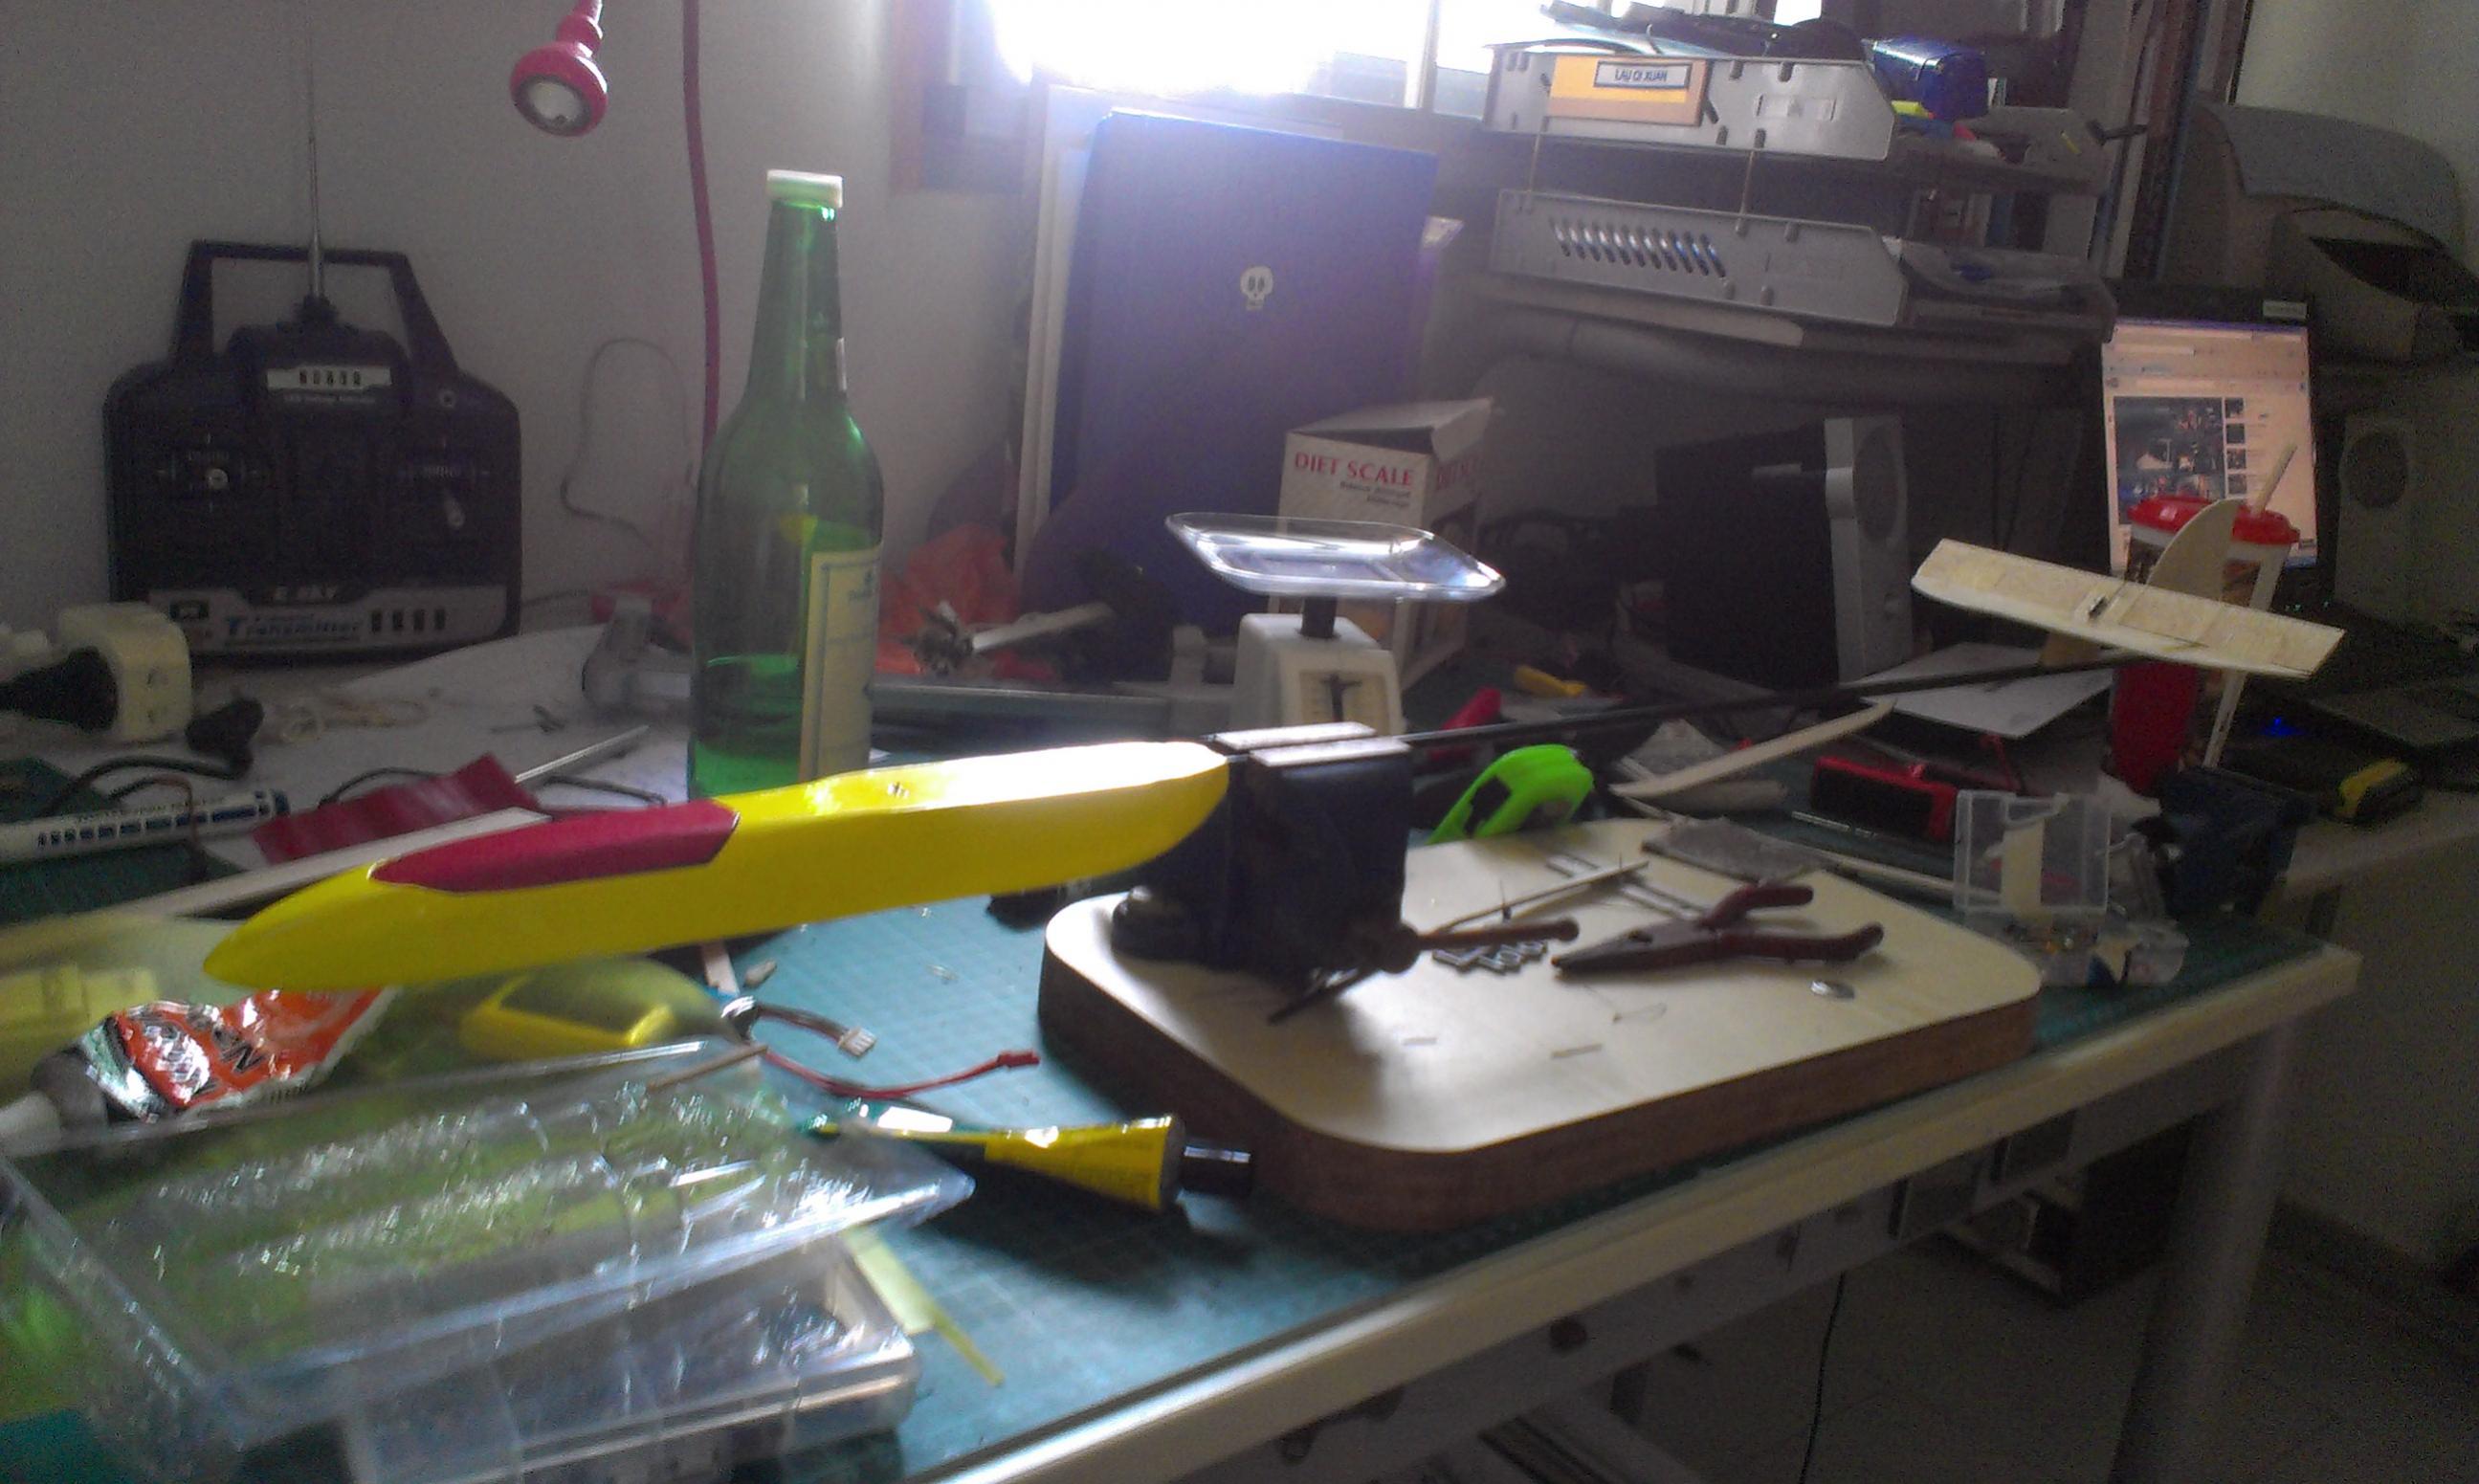
    Now its just assembling all the major parts toghther
    Click image for larger version

Name:	2012-12-20 14.45.05.jpg
Views:	1
Size:	332.0 KB
ID:	986860 Click image for larger version

Name:	2012-12-20 14.45.38.jpg
Views:	1
Size:	319.9 KB
ID:	986861 Click image for larger version

Name:	2012-12-21 00.20.32.jpg
Views:	1
Size:	410.1 KB
ID:	986862 Click image for larger version

Name:	2012-12-21 00.20.51.jpg
Views:	1
Size:	372.6 KB
ID:	986863 Click image for larger version

Name:	2012-12-21 14.30.47.jpg
Views:	1
Size:	382.0 KB
ID:	986864 Click image for larger version

Name:	2012-12-21 14.31.08.jpg
Views:	1
Size:	374.4 KB
ID:	986865

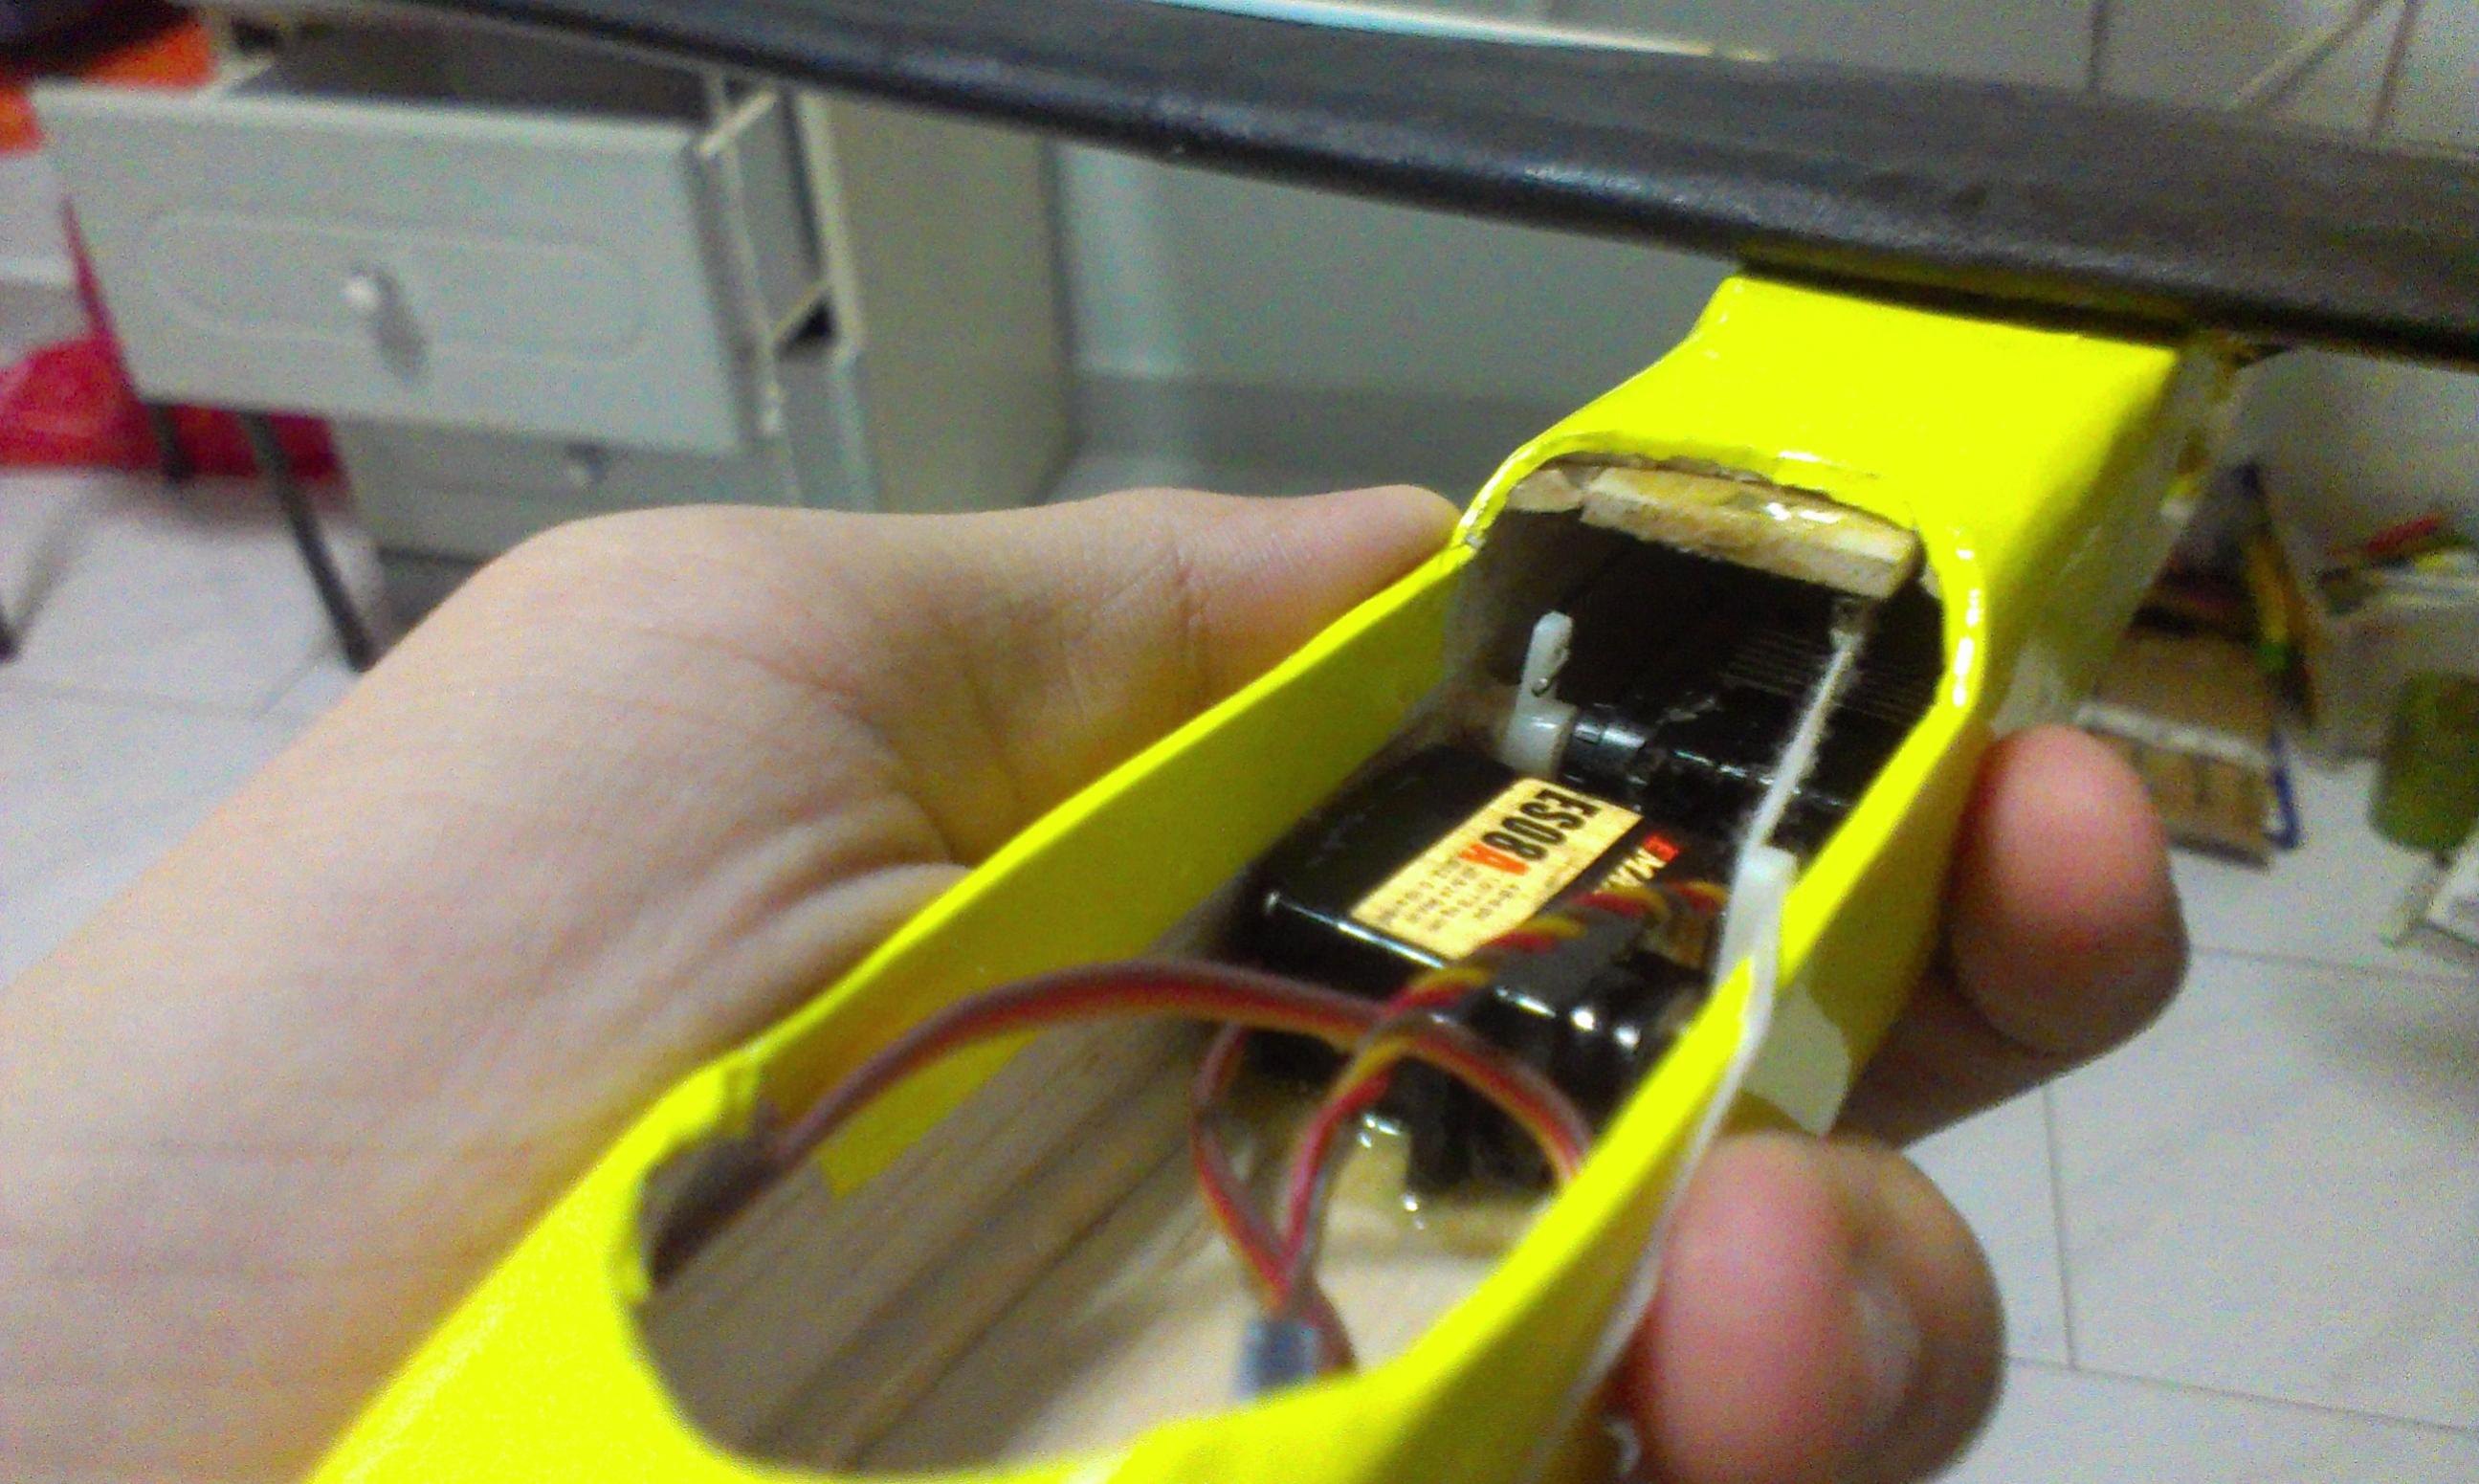
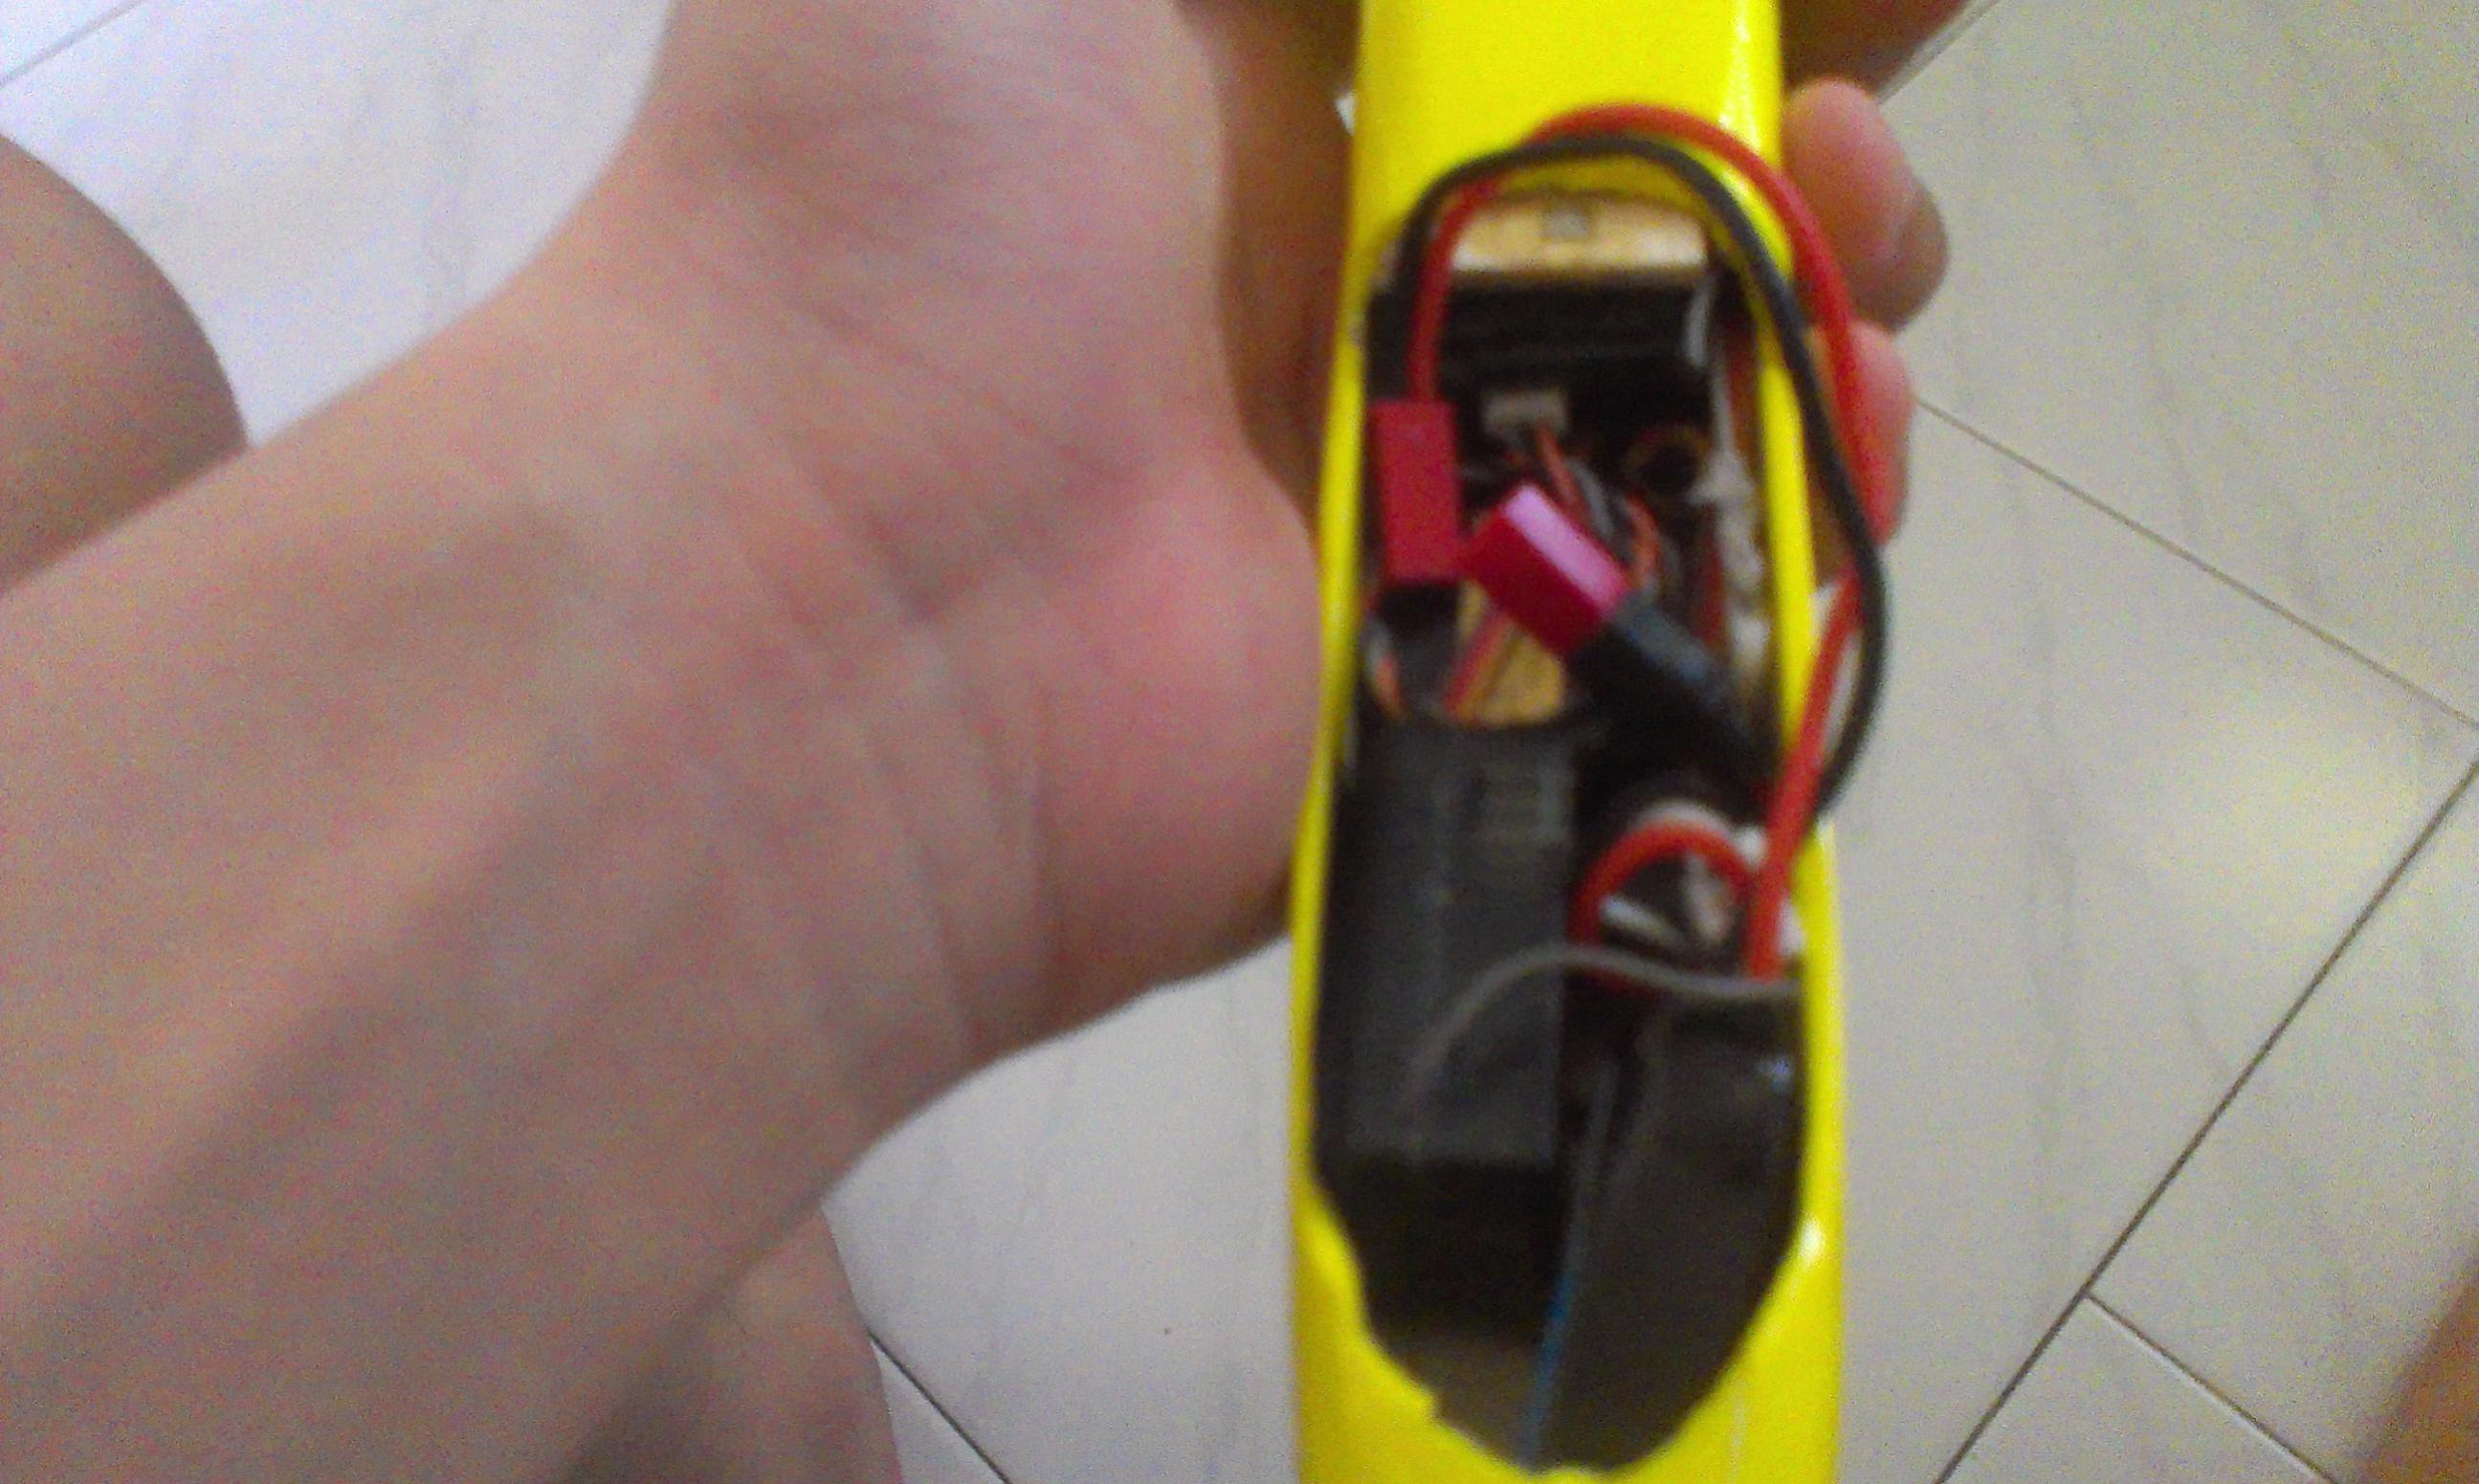
    the biggest problem i have with this build, how to squeeze everything into the pod =] Click image for larger version

Name:	2012-12-22 00.10.56.jpg
Views:	1
Size:	344.3 KB
ID:	986866
    One week of building later~ DLG finally completed!


    #2
    Nice!


    Great build! Hope she flys as well as she looks.
    You are still a newbie when your heartrate is governed by your headspeed...

    Comment


      #3
      Wow, great job! Hope you have lots of fun with your model.

      Just a thought for longevity of your model. The side forces against the rudder, rudder/boom joint, boom, boom/pod joint are very high in full strength DLG launches. You may consider whether these parts need to be reinforced for your model.

      Or perhaps just do it the experimental way and reinforce only the things that weaken with use. Whatever you choose, you have taken the first step in bringing your flying to the next level.

      Cheers

      Comment


        #4
        hi janson,

        Wow, great job on the scratch build.

        James has a good point in terms of strength. Forces is tremendous during launching and the tail assembly is the one that will take alot stress. So for staters, do launch lightly and stregnten where needed.

        Also, if you ever need to join your wings again (touch wood), I would suggest to have some dihedrals.

        I'm not sure how the launch peg is mounted. Is it connected to your wing spar?

        Hope you reply with a maiden report soon.


        SG Fr3ak League : www.facebook.com/#!/groups/SG.Fr3aK.League
        BR Slopers : www.facebook.com/groups/BRslopers

        Comment


          #5
          Not just maiden report. Only a video will do it justice!
          You are still a newbie when your heartrate is governed by your headspeed...

          Comment


            #6
            Few observations

            1. The tail boom looks a bit too small. Your tail will wag on a hard launch

            2. Strengthen your rudder. I recently broke my fireworks rudder in half a week ago on the launch. It does take a lot of stress.

            Remember the tail must be stiff in order to straighten the plane so you don't waste energy on the launch and reduce your launch height.
            Do you feel the RUSH....!!!!

            Comment


              #7
              Looking at your pod length to boom length ratio, and the position of your servos and batts, you may eventually discover you have to add weight to the tail fins to get a good cg. If that actually happens you might want to consider lenghthening the boom instead. Perhaps by sticking you 6mm OD tube into a length of 6mm ID tube. Then you will have a "tapered" boom! And maybe your tail fins will have more authority too?

              Have fun experimenting and one day we might all be buying models from you!

              Comment


                #8
                Originally posted by sherchoo View Post
                hi janson,

                Wow, great job on the scratch build.

                James has a good point in terms of strength. Forces is tremendous during launching and the tail assembly is the one that will take alot stress. So for staters, do launch lightly and stregnten where needed.

                Also, if you ever need to join your wings again (touch wood), I would suggest to have some dihedrals.

                I'm not sure how the launch peg is mounted. Is it connected to your wing spar?

                Hope you reply with a maiden report soon.
                Thanks! yea....noticed the boom shaking when i kicked the wings(by accident ) tells me somthing about how the boom will behave during launch. Dihedrals? yup, straight wings are unstable! the dihedrals will appear in my next dlg scratch build. As for the launching peg, i drilled a hole through the carbon spar and the peg sticks in nice and firm secured with epoxy of course.
                Anyway, the plane is just unstable in flight...launching the plane presents no wing flex, but thats when i am launching. Ronald helped me during the maiden, according to him, theres some wing flex(could be the ailerons though...the balsa is weak!) This dlg is really one tough little plane! failed a launch (just got into dlg, still need tons of practice) and the plane went straight into the ground nose first and it was standing vertical on its nose! pulled it out from the grass and throw again =] This dlg will be good for a beginer learning how to launch. at least it dont break when crashed. for pros looking for a plane that can remain in the air forever, forget it...

                Comment


                  #9
                  Oh, and can anybody give some advise on launching? wonder why is my launch getting from soso --> lousy --> bull crap. On the maiden on my dlg, Ronald taught me quite alot on the launch. that time still ok lar...but like magic uh, a few days later i seem to throw straight and after that, worse, throw down to the ground! i think really need help alr....so, any good advise?

                  Comment


                    #10
                    Hi Janson,

                    Nice scratch build. For reference on future scratcb builds you can also look at the quickflick and the dl50. Those are tried, tested and proven designs, so i doubt you will go wrong.

                    Regarding launches, my advise is to simply go slow. There is no need to run into the rotation neither do you need a hop or jump when starting out. Concentrate on keeping your launch arm straight and focus on the footwork which gives you a gradual increase in rotational speed. If you want do join us for our regular dlg funflies. We will more than happy to guide you along.

                    Cheers,
                    Adnan
                    Take what you've got and fly with it - Jim Henson
                    ... no plane will allow a pilot to recover from stupid. You still have to do those piloty things... - Joe Wurts
                    Electric things run on smoke. Let the smoke out and they won't work.


                    sigpic

                    Comment


                      #11
                      Adnan gives great advice.

                      One other point for you to consider/observe. If you were already starting to be able to launch ok and relatively consistently, then the fault could also lie with the plane.

                      With the javelin nose plants, something could be damaged or loose.
                      - are your surfaces still neutral? For spring/string controls, proper knots will still tighten and lenghten or if you are not using proper knots, they slip out.
                      - Servo horns can slowly rip out because of the high forces generated on launch (happened to my composite rudder!)
                      - servos may be loose.
                      - Your tail boom may have shifted

                      Good luck and hope you find a solution

                      Comment


                        #12
                        Thanks for all those advise! the plane was fine even after going into the ground...checked everything and its all in good condition. i just don't get why is it that my launch seems so off...instead of throwing straight up, i am sort of throwing near level to the ground...
                        Hey Adnan, yup, my next scratch build will be a combinition of Steigeisen and DL50 from mountain models.

                        Comment


                          #13
                          Good that your plane is not damaged.

                          I'll leave it to the the guys who can all launch higher than me to advise on launches.

                          Allow me to suggest one more plane set up point to consider. If you have been trimming out your plane by adjusting your cg and adding or removing nose weight and adjusting the stab trim, any change in stab trim would also affect your Launch angle to Some extent.

                          Good luck

                          Comment

                          Working...
                          X