Announcement

Collapse
No announcement yet.

Caraway 1.4m glider kit Build - some notes

Collapse

Zenm Tech Pte Ltd

Collapse

Visit Zenmtech at rc.zenmtech.com

X
 
  • Filter
  • Time
  • Show
Clear All
new posts

    Caraway 1.4m glider kit Build - some notes

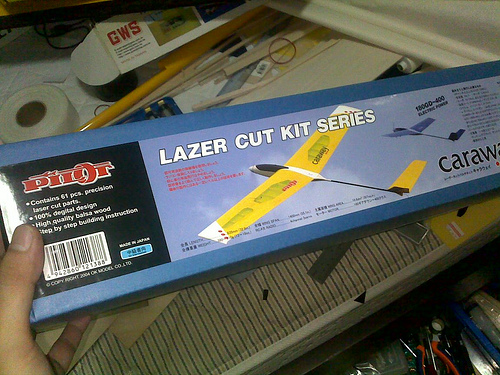
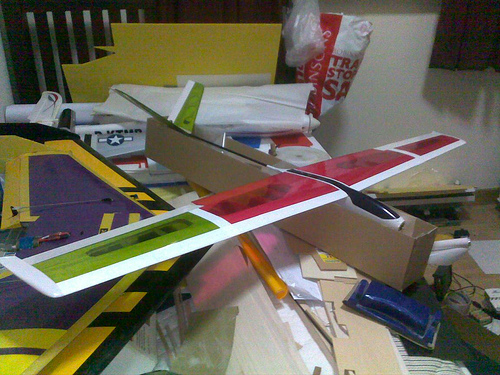
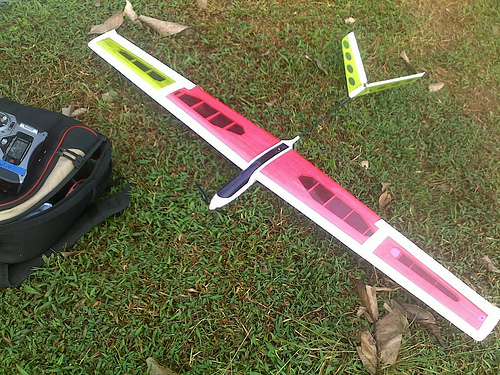
    In Dec I bought a Caraway Glider kit from our local Singapore Hobby Supplies. The Caraway is a very reasonably priced glider kit that looks pretty good too. It's 1.4 m span and V-tail.


    The purpose of posting this is to encourage this building aspect of the hobby.

    1) It is not as difficult as you think but

    It is another part of the hobby. If you like building plastic model airplanes, you might find the actions of breaking parts out of the sprue and fitting them together quite familiar.

    The things you need;

    1) white glue and CA glue
    2) pins
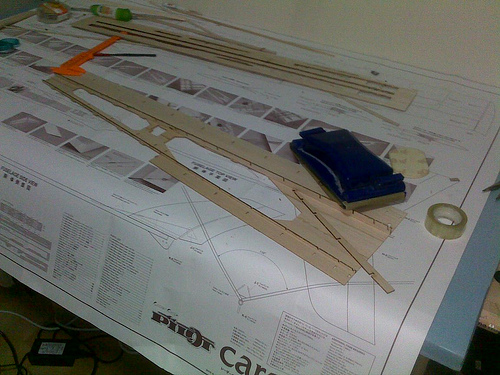
    3) a big, flat piece of blue foam to put your plan on
    4) some wax or rice paper to protect your plan


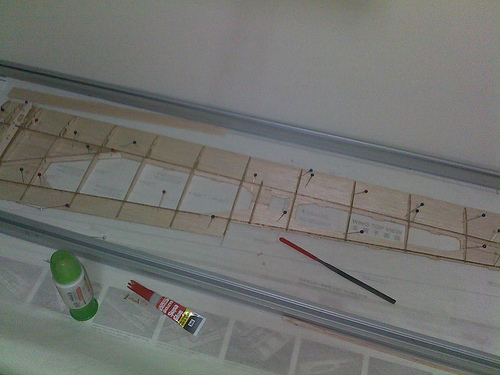
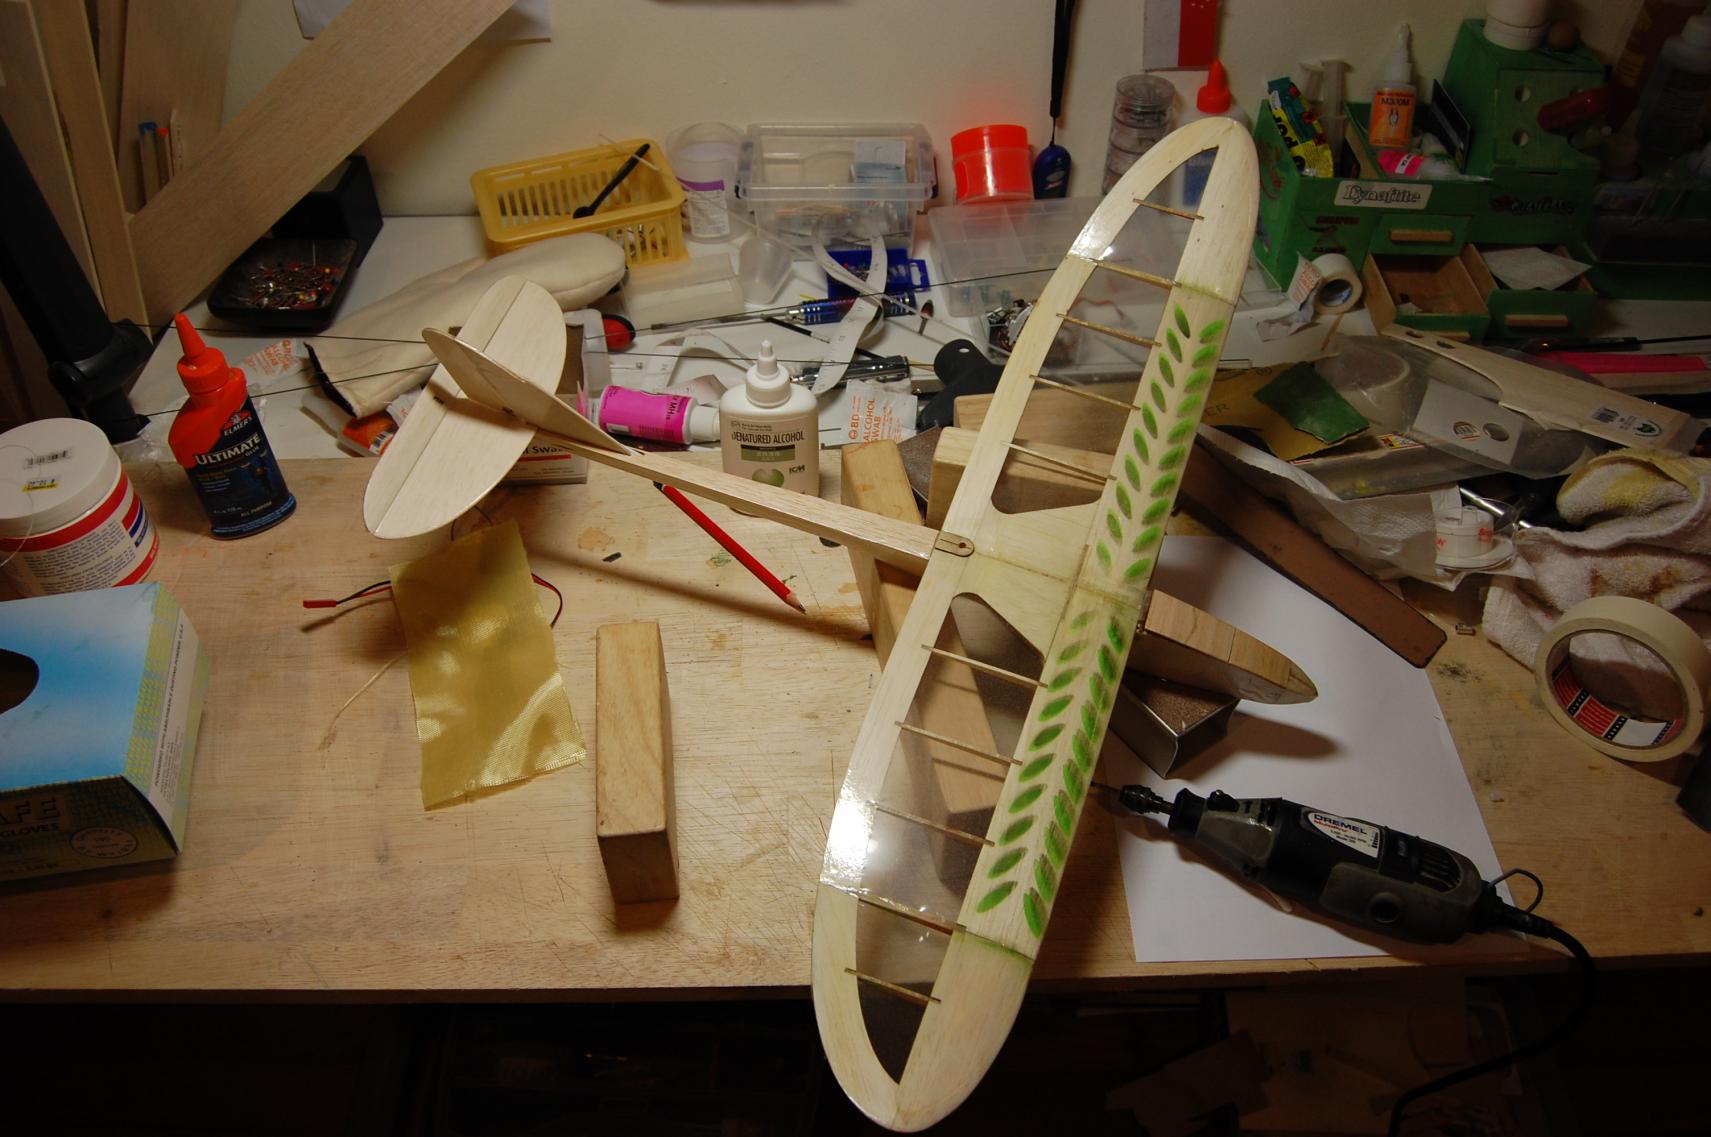
    So, first step, take out parts from the wood template - and then fit together using white glue. Pilot model kits are really good in that they fit together like a jigsaw. Pin together and wait to dry.


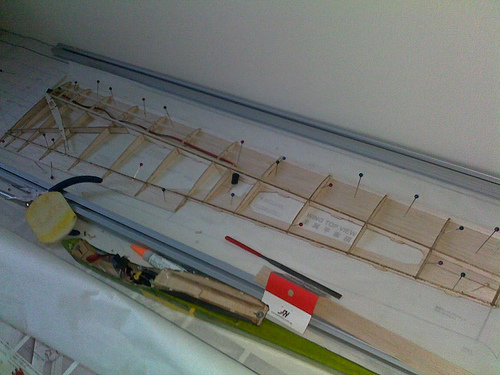
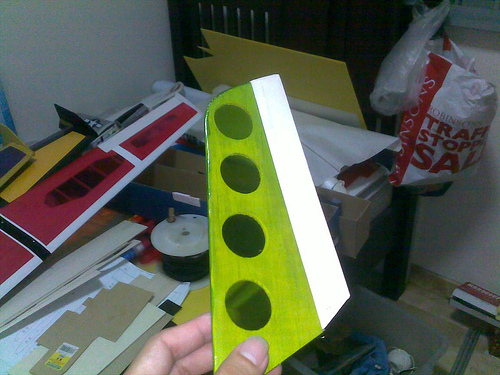
    Thread the servo extension through.


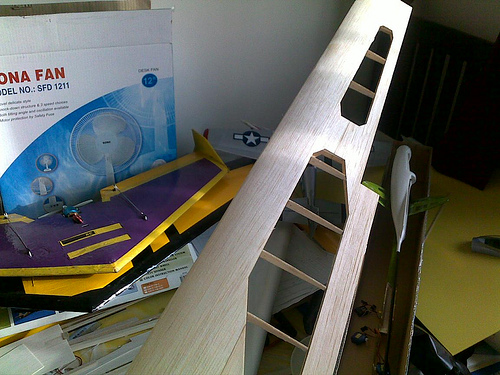
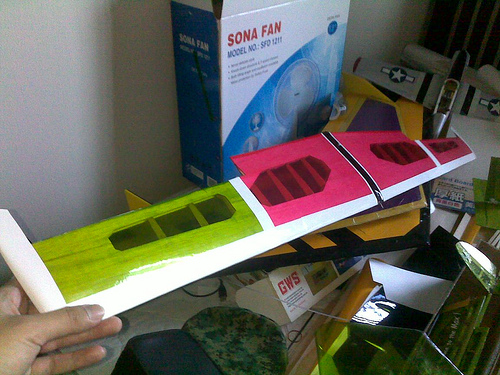
    Fit top panels together, then glue on. You may need to compress them with weights to ensure the top panel sticks. I use old magazines.

    to be continued....
    "Always fly with a responsible attitude. You may think that flying low over other people’s heads is proof of your piloting skill; others know better. The real expert does not need to prove himself in such childish ways..." - the Multiplex Build Manual

    #2


    Once the first wing is up, then the second wing. It goes together really fast because all parts fit together.


    When both sides are done, epoxy both sides together, make sure you have the dihedral correct. Cover with lightweight covering film. I used coverlite. However, this covering has the very irritating effect of sticking to itself, so I wasted a lot of covering. Perhaps I should have used another covering but I wanted things light.

    I also used Monokote Trim to put in some highlights, but it is HEAVY (well, compared to the coverlite covering anyway)


    Next step, tail parts. The tail is made of 3mm balsa. I lightened it somewhat by putting in holes.


    Epoxy the tail parts too to the fuselage. The fuselage is made of plastic and comes pre-built for you. So, the plane has reached the ARF stage. It is now servo-less and has no electronics.

    by the way, I took

    2 nights to fit the wings together
    1 night to cover
    1 night to fit the tail feathers up
    So that's about a week and it's very slow cos I only took 1 - 2 hours per night.

    to be continued.
    "Always fly with a responsible attitude. You may think that flying low over other people’s heads is proof of your piloting skill; others know better. The real expert does not need to prove himself in such childish ways..." - the Multiplex Build Manual

    Comment


      #3
      Looking good. What are you going to power her with?
      To win........one must not lose.

      Confucius

      Comment


        #4
        First, the modifications;

        The wings are very thin, 8% unspecified airfoil (it's in Japanese so I can't read)

        So, I used the rather thin Tahmazo TS-1002 8mm Servo 1.1kg/0.14S for the wings.

        For the tail, by right it is supposed to be a elevator-only V-tail. That would not do for me so I used also the same servo for an elevator and rudder V-tail.

        For the power system, I wanted to keep the entire system light. The original setup was for a Speed 400 motor and 8 cell 500 mah nicad.

        I tried to get the more modern equivalent.

        That means getting a brushless motor and battery.

        Battery I chose a Rhino 3 cell 460 mah from our favourite Hong Kong hobbyshop.

        Motor....I ran through a few combinations before I came to the right one.

        If anyone are interested in getting this glider, this is what I recommend;

        1) The glider only accepts a 30mm folding spinner to fit perfectly. 30 mm folding spinners - you can buy the ones from Jethobby, SHS and NTC. I bought the Aeronaut folding spinner from NTC that has a 6x3 prop.

        Next problem, 30 mm folding spinners max shaft size seems to be only 3mm.

        So you need to have a motor shaft size of 3mm or you need to drill the hole.

        So after ding-donging here and there trying to get the best combi;

        I fitted another old Aeronaut folder 7 x 4.5 on a Topband 1400 kv motor


        This gives me about 90 - 100 watts per pound, pulls the glider about 50 - 60 degrees and gets me to an acceptable height in about 20 seconds.

        The 1.4 m glider weighs about 350 grams.

        to be continued
        "Always fly with a responsible attitude. You may think that flying low over other people’s heads is proof of your piloting skill; others know better. The real expert does not need to prove himself in such childish ways..." - the Multiplex Build Manual

        Comment


          #5
          Maiden was uneventful.

          I had waited for the end of an afternoon rain shower to bring it out. When the air is perfectly still, it is easy to see the original charcteristics.


          The Caraway weighs 340 gms, and has a wing area of 307 sq inches. This gives it a Wing loading of 5.63 oz / sq ft and wing cube loading of 3.9.

          The glider has a very good glide but I have to tweak the angle with a bunch of clicks downward. It pulls about 45-60 degrees skyward on full throttle, drawing about 8-9 amps. Thermals well, a bit fast, also a little too light and can be tossed around by turbulence.

          It does not seem to do well in windy conditions, though.

          Still, I'm rather satisfied with the flights.

          Here's what you might need if you want a Caraway;

          1) Motor - or TowerPro 1600kv of the same size or this from Jethobby

          2) Propellor - APC spinner and folding prop drilled for 3mm shaft - 8x4 generic folder for the 1400 - 1600 kv motor

          3) Servos - I use 4 x 4.7 gm Tamazo from SHS

          4) ESC - use a 18 amp Hobbywing bought from Jethobby

          5) Kit from SHS

          6) Battery - 3 cell 460 mah from Rhino, our fav HK hobbyshop.
          "Always fly with a responsible attitude. You may think that flying low over other people’s heads is proof of your piloting skill; others know better. The real expert does not need to prove himself in such childish ways..." - the Multiplex Build Manual

          Comment


            #6
            I remember a few of us built another of Pilot's small motor gliders - the Nutmeg - and none of us could keep it airborne for any length of time in anything other than absolute dead calm. Maybe indoors would be a nice place to fly that plane. Nice kit to build but too light and the recommended brushed motor and cell pack then was marginal on power. With today's brushless and lightweight lipos, it may do better. Pilot now calls it the Nutmeg 2. They may have enlarged it perhaps.

            Congrats on your successful maiden.
            To win........one must not lose.

            Confucius

            Comment


              #7
              Help on Caraway V-Tail

              Hi Sunstorm,

              I would like to kindly seek your assistance/advice about your Caraway glider build. I noticed in your forum post that you used 2 servos for the v-tail.

              1. Could you kindly share how you mounted the servos, as in did you expand the original servo mount(side-by-side)
              2. Also how did you route the pushrods to the tail, since there is only one slit at the end of the carbon boom.

              Please kindly advise, and if it is not too much trouble, please pm me some pictures of how you setup the above.

              Many thanks!

              Comment


                #8
                Hee, hee,
                I got one of these for Christmas and it's next up on deck for building. Soon as I clear off the building board.
                Yours looks great!

                Built the Pilot "Mint" last year. At 60cm span it's a tiny thing but does well on the slope with a Parkzone brick. I fly it in real close.

                -David-

                Comment


                  #9
                  Man, I love the mint. I think I'll buy a new one!

                  I've also built the bigger cousin, the Peppermint! Unfortunately it was downed by a faulty receiver. Thinking of getting a new kit.... just thinking...
                  "Always fly with a responsible attitude. You may think that flying low over other people’s heads is proof of your piloting skill; others know better. The real expert does not need to prove himself in such childish ways..." - the Multiplex Build Manual

                  Comment


                    #10
                    Was it worth adding the rudder???

                    Comment


                      #11
                      Rudder functions are rather limited but they do come in useful sometimes....but rarely - like the still air of an early morning.

                      You can do without it. I, for one MUST have rudder.
                      "Always fly with a responsible attitude. You may think that flying low over other people’s heads is proof of your piloting skill; others know better. The real expert does not need to prove himself in such childish ways..." - the Multiplex Build Manual

                      Comment


                        #12
                        Originally posted by Deedubya View Post
                        Was it worth adding the rudder???
                        I would, if you are seriously hunting for thermals. Rudder control allows the glider to turn at shallow bank angle, which is useful in circling in weak lifts. Banking and yanking with ailerons and elevator alone, bleeds off precious airspeed and wasting a lot of energies and useful lifts.

                        Besides this, rudder is more effective than ailerons at lower airspeeds, especially when a glider flies at minimum sink rate.

                        Comment


                          #13
                          sorry to hijack your thread, but i would like to ask if there is any rc making/building (either from kits like 'ok pilots' or scratch build) courses in singapore?
                          Controller: Spektrum DX6i
                          Fix Wing: 3DHS Edge 540 41", World Models Zero Fighter EP.
                          Rotary Wing: Align Trex450 Pro.

                          Comment


                            #14
                            not that I know of....

                            I know, let's go visit Joe Yap during CNY with 'offerings of oranges'... then the 'God of Scratch building' would bestow upon us his wisdom and skill, har har har!
                            "Always fly with a responsible attitude. You may think that flying low over other people’s heads is proof of your piloting skill; others know better. The real expert does not need to prove himself in such childish ways..." - the Multiplex Build Manual

                            Comment


                              #15
                              Originally posted by rayshaw23 View Post
                              sorry to hijack your thread, but i would like to ask if there is any rc making/building (either from kits like 'ok pilots' or scratch build) courses in singapore?

                              Scratch building classes? It has always been my dream of running a class after retirement. I am not an expert, but would like to share the joy of scratch building and be able to be stick around to learn more also.
                              You'll have to wait for a few more years though.

                              MS

                              Comment

                              Working...
                              X