If this is your first visit, be sure to
check out the Rules and Help. You may have to register
before you can post: click the register link above to proceed. To start viewing messages,
select the forum that you want to visit from the selection below.
Is there any more kits un-claimed for. I'd like one too.
Cheers
RandomTask
Take what you've got and fly with it - Jim Henson
... no plane will allow a pilot to recover from stupid. You still have to do those piloty things... - Joe Wurts
Electric things run on smoke. Let the smoke out and they won't work.
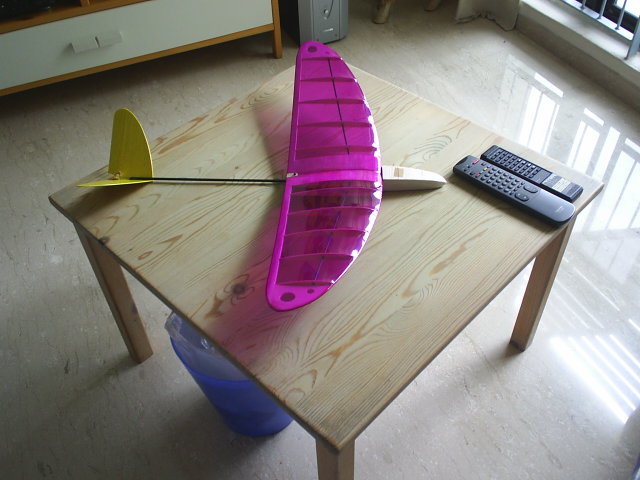
You know what? Just barely another few hours after I posted this thread, I've completed the first Bug, which is meant for Johnnie Wong. Only needs radio and will be ready to fly.
That was lightning fast... this morning posted abt building one and halfway through the day one kit is done...
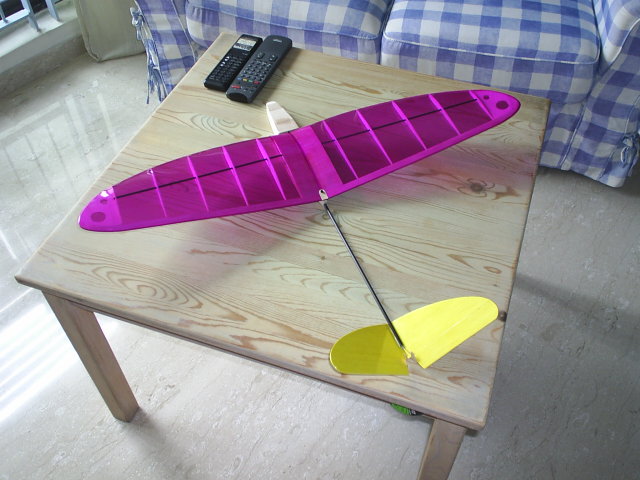
And it is quite a cute looking plane too.
Cheers
RandomTask
Take what you've got and fly with it - Jim Henson
... no plane will allow a pilot to recover from stupid. You still have to do those piloty things... - Joe Wurts
Electric things run on smoke. Let the smoke out and they won't work.
Hehe...Actually, the plane was built over the past few days. The wings were built within an hour on Friday evening. On Saturday evening, I spent another hour on building the fuselage pod and wings covering. Today I spent about 2 hours covering the fuselage, final rigging and assembly.
Okay, I'm starting the building sequence proper now.
With the 'kit' ready, everything is a breeze.
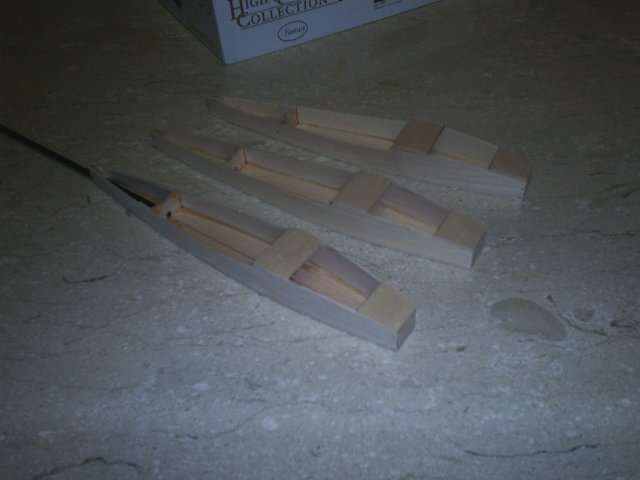
I started off the fuselage construction, which is really a breeze.
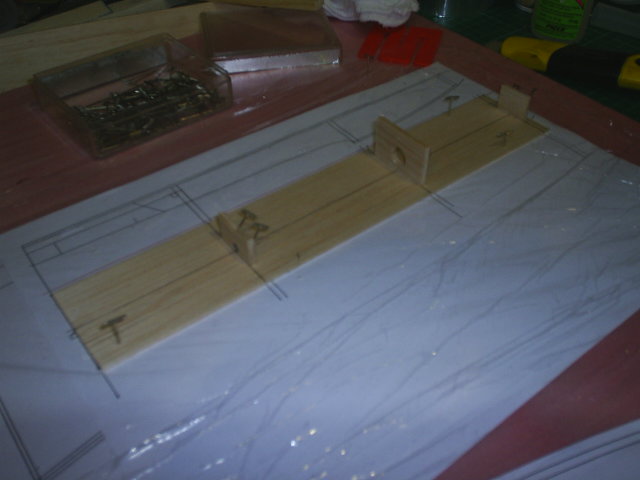
Picture 1:
Pin the fuselage bottom sheet on the plan with the formers locations marked. Pin the formers ( only 3 off ) to the bottom sheet.
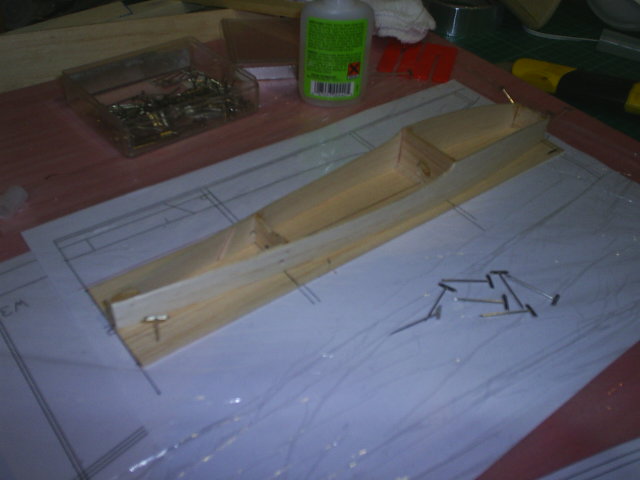
Picture 2:
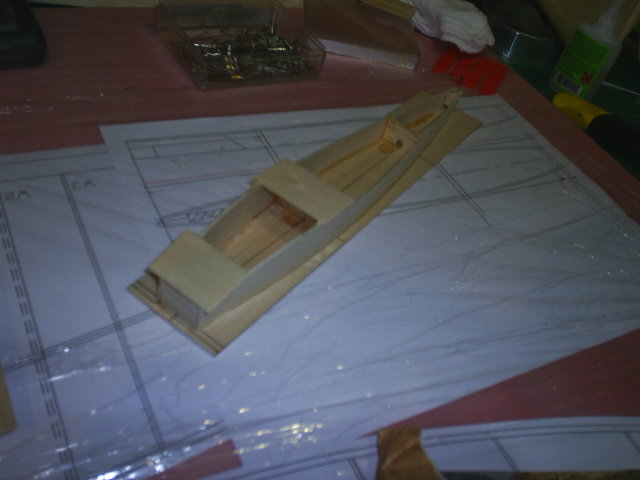
The fuselage side panels had thier doublers previously glued in place and former locations marked. a small balsa wedge is glued onto the tail of one of the panels. Pin them onto the last 2 formers and check for alignment before tacking them down with a drop of CA. Once okay, pin the tail ends together, check for alignment and glue them down with CA. Next, tack and glue the forward ends to the first former. Once happy, glue the entire perimeter down to the bottom sheet.
Picture 3:
Glue stips of 1" x 1/16" balsa onto the top of the foward fuselage sections. Unpin the whole assembly, trim and sand down the edges.
Picture 4:
Sand the hole in the tail end to fit the carbon boom and the basic fuselage is done. All these within 10-15mins and I easily whopped 3 off within 45 minutes.
Take what you've got and fly with it - Jim Henson
... no plane will allow a pilot to recover from stupid. You still have to do those piloty things... - Joe Wurts
Electric things run on smoke. Let the smoke out and they won't work.
RC Groups - the most active Radio Control model community: electric and fuel rc airplanes,rc helis,rc boats and rc cars. Features discussion forums, blogs, videos and classifieds.
Thanx!
SLOPE SOARING NOT A CRIME
The irresistible desire, for the irresistibly desired
RC Groups - the most active Radio Control model community: electric and fuel rc airplanes,rc helis,rc boats and rc cars. Features discussion forums, blogs, videos and classifieds.
Thanx!
I second that.
Cheers
RandomTask
Take what you've got and fly with it - Jim Henson
... no plane will allow a pilot to recover from stupid. You still have to do those piloty things... - Joe Wurts
Electric things run on smoke. Let the smoke out and they won't work.
RC Groups - the most active Radio Control model community: electric and fuel rc airplanes,rc helis,rc boats and rc cars. Features discussion forums, blogs, videos and classifieds.
Thanx!
SLOPE SOARING NOT A CRIME
The irresistible desire, for the irresistibly desired
Any chance of me getting one. This will be my first foray into unpowered gliding or soaring. Please, please please. Been away from the computer for the past week and missed out on the nano falcon orders. Well let me know.
Go back in one piece to fly another day. Having fun yet?
36.39mhz
40.77mhz


Comment