Recently, my course manager discussed with me on how to motivate our students to take up aeromodelling. Apart from setting up a few trainers with buddy cord system, RC model aircraft building is also in the menu.
However, there are many factors which will determine the building session will be a successful one or a flop. Student's initial attention span is usually quite short and they'll want to see quick results rather than to spending time on lengthy sessions to build and just to destroy the craft in few seconds, which will almost definitely kill thier interest instantly.
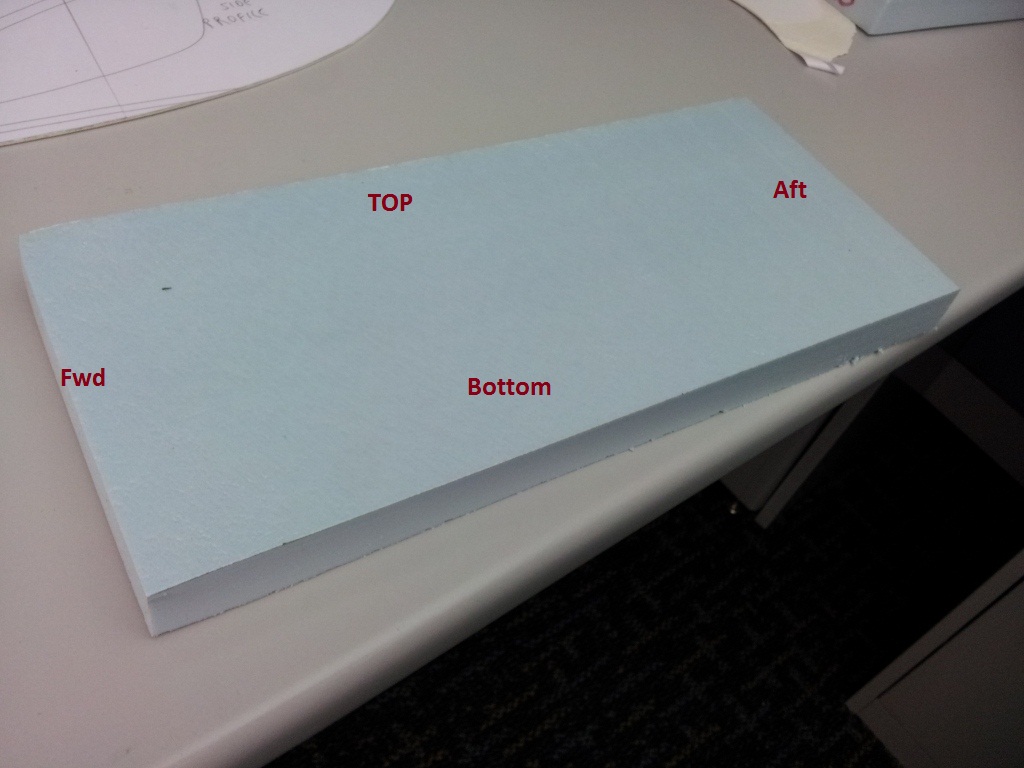
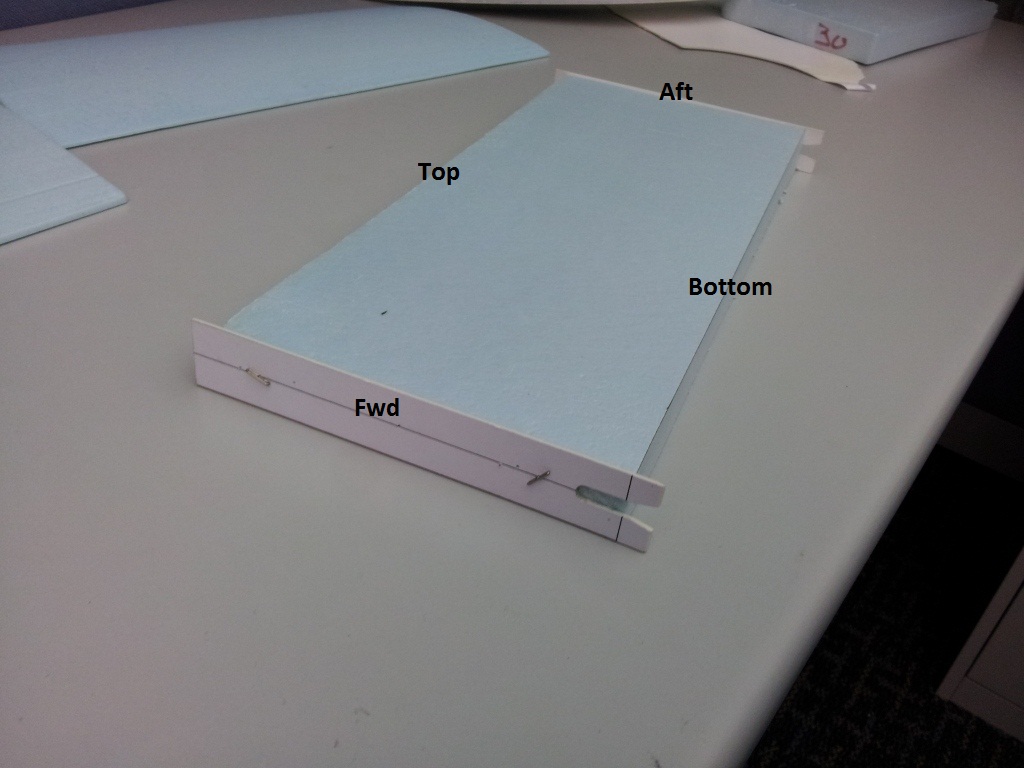
While balsa planes are ideal airframes technically, the complicated structures often put them off even before getting started, although some of the my students enjoyed the fruit of their labour. Recently, one of the 2 teams taking part in Flugtug has purchased tonnes of 1" think blue foam and have many surplus lying in the clubroom. They take up quite a some spaces and blocking part of the walking path within the room. Before anyone suggested to get rid of them, I see this opportunity to come up with a simple trainer aircraft design which is largely made up from 1" blue foam. I probably have enough foam to build a 100 of them.
This project is designed for beginner builder and flyer, although I also hope that some advance pilots may show interest to build one for themselves. And so, the design should meet the following criterias;
1) Easy to build
2) Easy to fly
3) Does not need elaborated and expensive tools
4) Raw materials readily available
5) Good looking
6) Safe to operate
7) Ergonomical to operate
I had previously came up with designs with pusher props for safety and ergonomical reasons, but somehow, their outlines are simply too boring. When I take a second look at them, they look not much different from commercially available pusher prop trainers like Sky Surfer, Cloudfly, Easystar,etc.
One day, I was surfing the internet, looking at Autogyro designs, something really caught my eyes, and being a pusher, all I need is to redesign the fuselage and tail to accept a pair of fixed wings and the empennage.
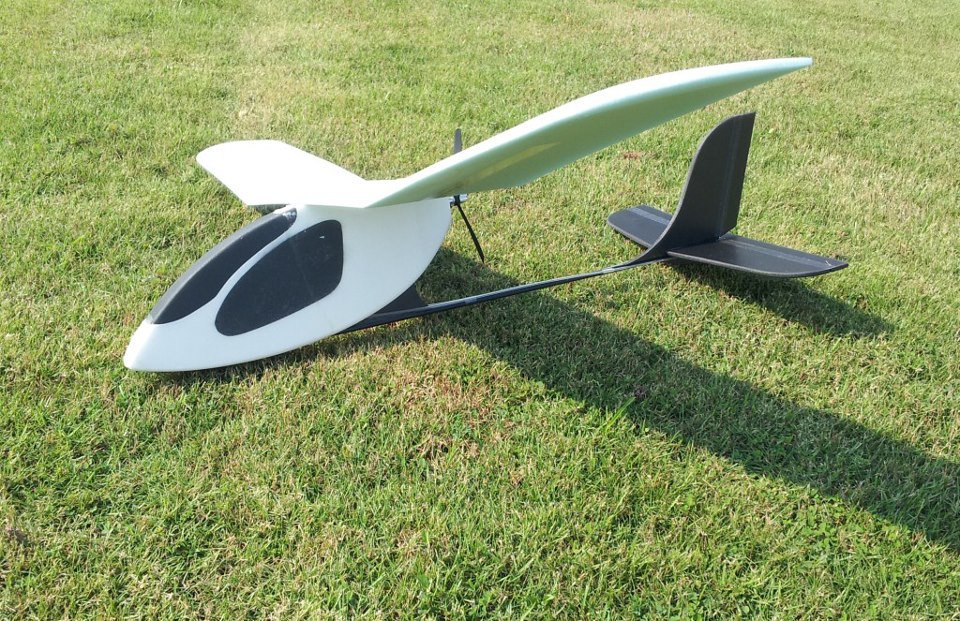
I was so excited with the pleasing outlines, that I took just a few days from drawing to fabrication. The original has a V-tail and had since been replaced by a conventional empennage, due to 2 crashes from severe dutch rolling. The motor is a 20gram HK outrunner 2000kv spinning a 3 bladed 6x3 prop. The ESC is Hobbywing 10amp and fed by a 2S 850mah Lipo. For simplicity, the design only needs 2 pieces of 5gram servos for rudder and elevator.
I have flown it on a fully charged pack, all the way till the BEC low-voltage cutoff sets in. The total flight time was 23 minutes with wild aerobatics like loops and rolls. Yes, it rolls in rudder pretty well.
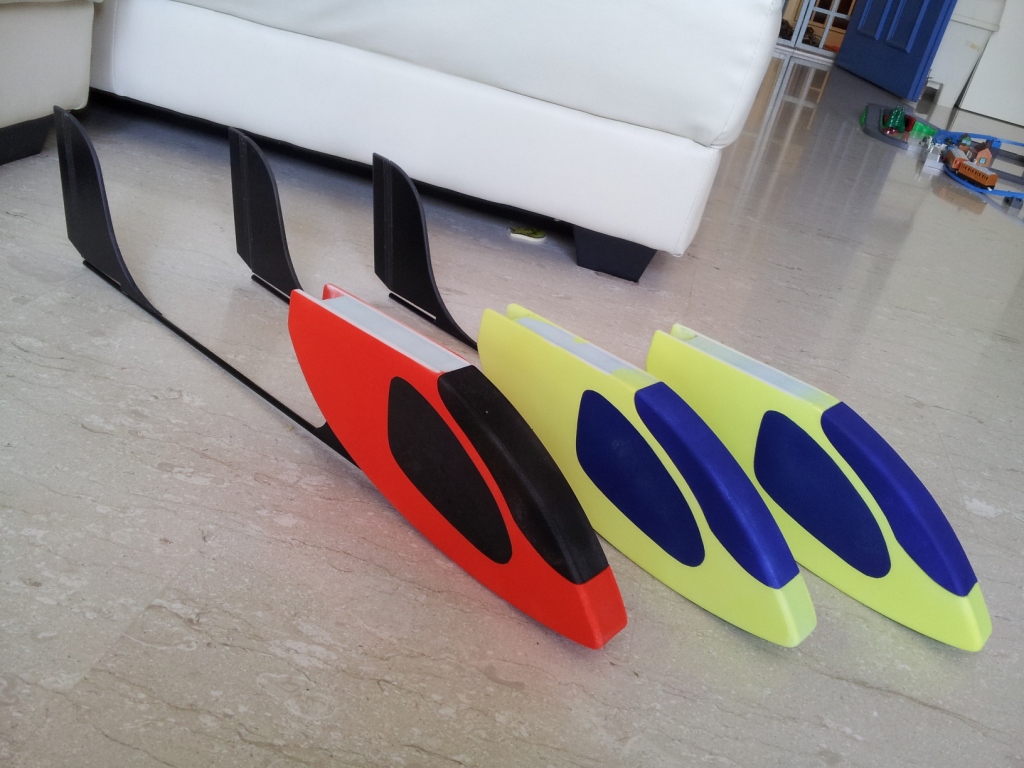
From the picture, you can see the repair glue joint. It was induced during the second and most violent crash into a tree. Currently, I am building another 3 fuselages for the club. I really like the way the paintjob turns out to be.
As for the name, I wanted something cute and appropriate. From the looks of yellow and orange fuselage, they match well with the various types of Canary I have seen from the internet.


However, there are many factors which will determine the building session will be a successful one or a flop. Student's initial attention span is usually quite short and they'll want to see quick results rather than to spending time on lengthy sessions to build and just to destroy the craft in few seconds, which will almost definitely kill thier interest instantly.
While balsa planes are ideal airframes technically, the complicated structures often put them off even before getting started, although some of the my students enjoyed the fruit of their labour. Recently, one of the 2 teams taking part in Flugtug has purchased tonnes of 1" think blue foam and have many surplus lying in the clubroom. They take up quite a some spaces and blocking part of the walking path within the room. Before anyone suggested to get rid of them, I see this opportunity to come up with a simple trainer aircraft design which is largely made up from 1" blue foam. I probably have enough foam to build a 100 of them.
This project is designed for beginner builder and flyer, although I also hope that some advance pilots may show interest to build one for themselves. And so, the design should meet the following criterias;
1) Easy to build
2) Easy to fly
3) Does not need elaborated and expensive tools
4) Raw materials readily available
5) Good looking
6) Safe to operate
7) Ergonomical to operate
I had previously came up with designs with pusher props for safety and ergonomical reasons, but somehow, their outlines are simply too boring. When I take a second look at them, they look not much different from commercially available pusher prop trainers like Sky Surfer, Cloudfly, Easystar,etc.
One day, I was surfing the internet, looking at Autogyro designs, something really caught my eyes, and being a pusher, all I need is to redesign the fuselage and tail to accept a pair of fixed wings and the empennage.
I was so excited with the pleasing outlines, that I took just a few days from drawing to fabrication. The original has a V-tail and had since been replaced by a conventional empennage, due to 2 crashes from severe dutch rolling. The motor is a 20gram HK outrunner 2000kv spinning a 3 bladed 6x3 prop. The ESC is Hobbywing 10amp and fed by a 2S 850mah Lipo. For simplicity, the design only needs 2 pieces of 5gram servos for rudder and elevator.
I have flown it on a fully charged pack, all the way till the BEC low-voltage cutoff sets in. The total flight time was 23 minutes with wild aerobatics like loops and rolls. Yes, it rolls in rudder pretty well.
From the picture, you can see the repair glue joint. It was induced during the second and most violent crash into a tree. Currently, I am building another 3 fuselages for the club. I really like the way the paintjob turns out to be.
As for the name, I wanted something cute and appropriate. From the looks of yellow and orange fuselage, they match well with the various types of Canary I have seen from the internet.


 nice and cute build joe yap.
Comment