Announcement

Collapse
No announcement yet.

Modding a Free Flight Mini Mustang

Collapse

Zenm Tech Pte Ltd

Collapse

Visit Zenmtech at rc.zenmtech.com

X
 
  • Filter
  • Time
  • Show
Clear All
new posts

    Modding a Free Flight Mini Mustang

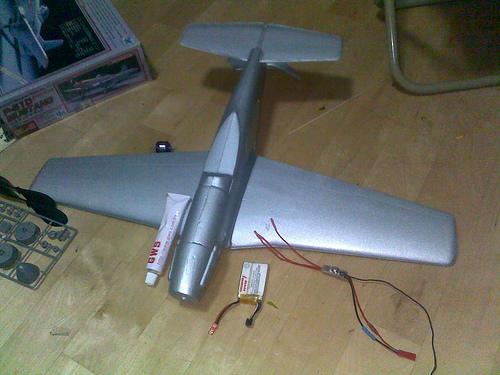
    Hi guys this is my current project.

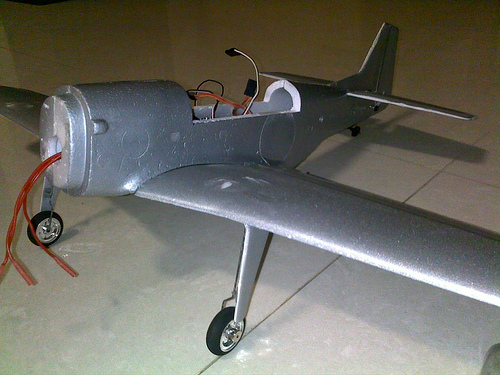
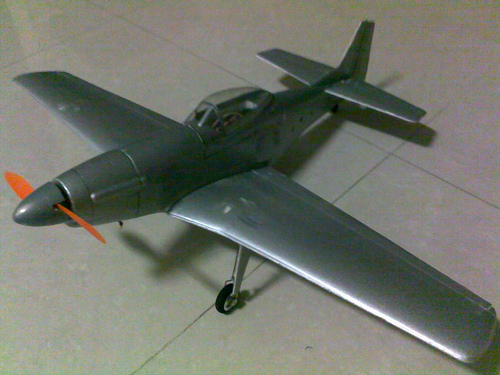
    Currently there are some kits of a free-flight Mustang on the market. It is a very small aircraft, about 26 inch wingspan and is supposed to be a free-flight one, meaning you launch and let the airplane fly.


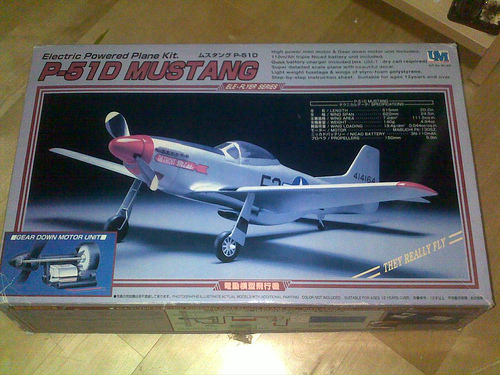
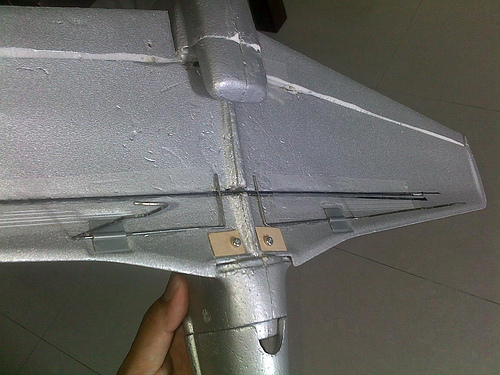
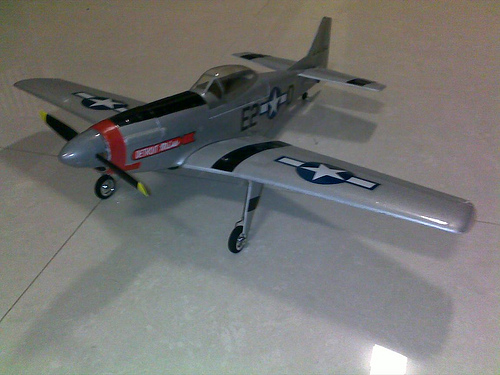
    I first saw this kit at That Hobby Shop a few years ago and later on at Hobby Point at Sengkang Rivervale mall. It's quite a unique kit, so I thought maybe I'll buy it to mod to a 4 channel airplane. It would also be cool to own one of the smallest Mustangs on the market.


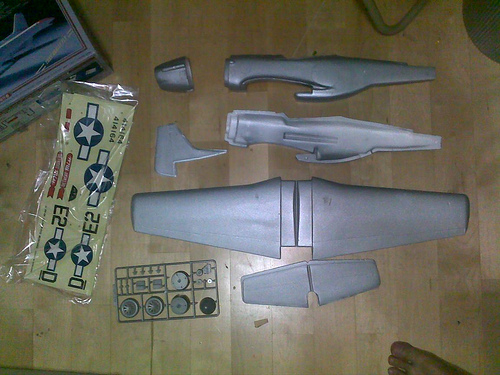
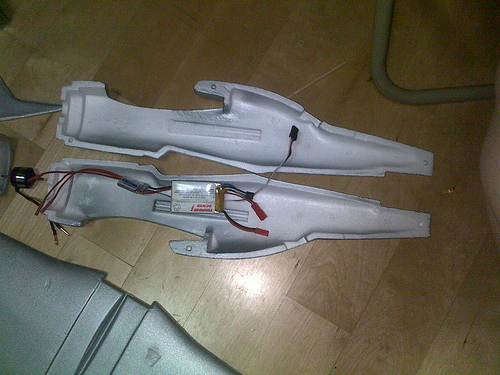
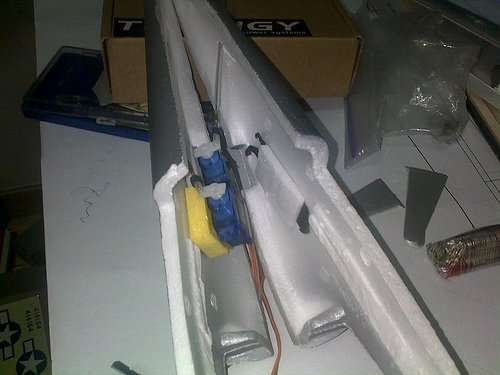
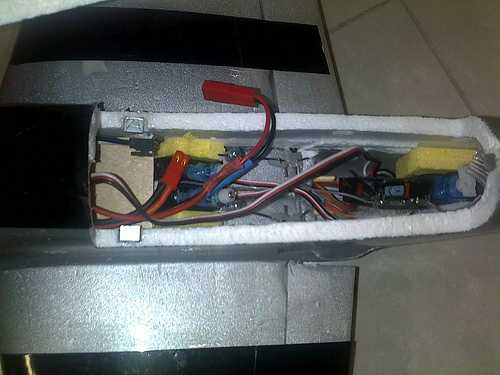
    Opening it up, you get the standard assortment of foam parts associated with ARFs....


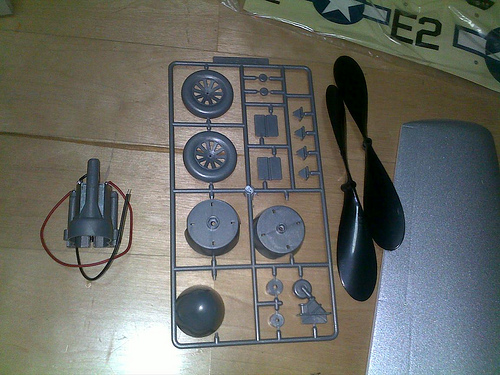
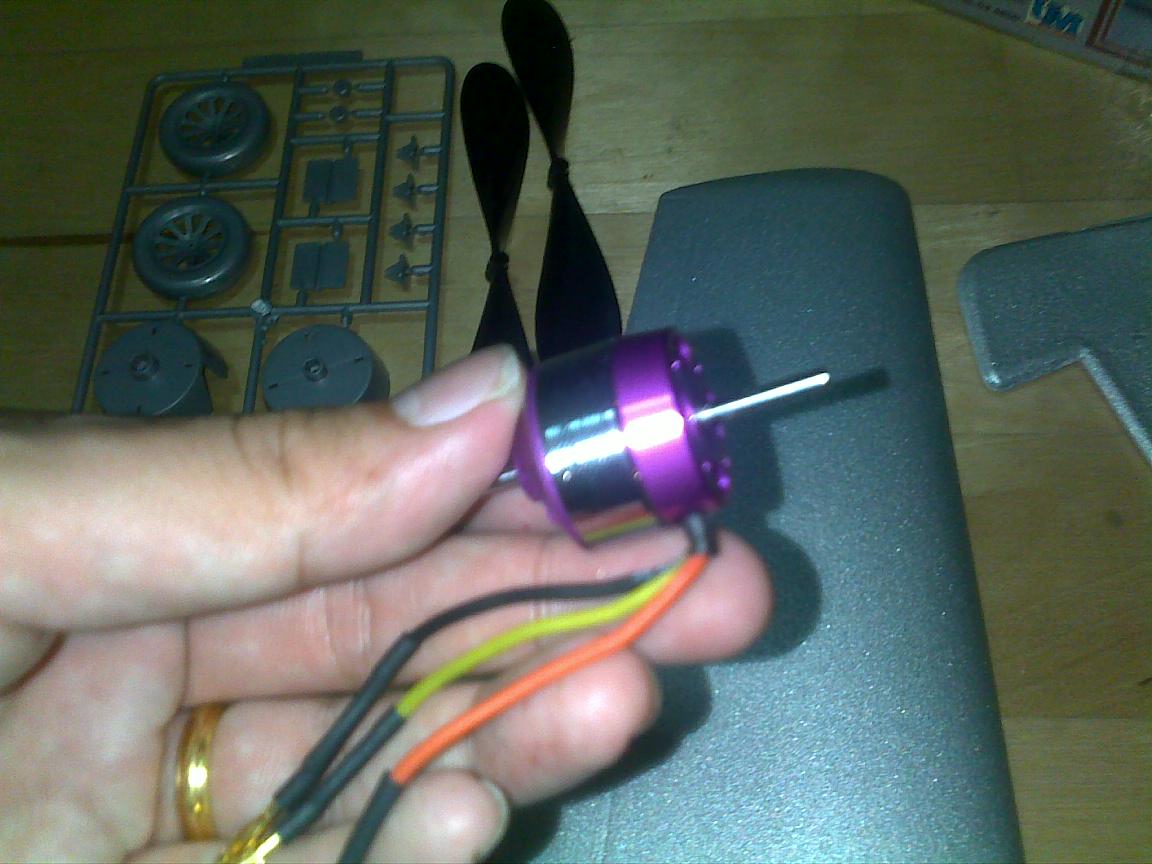
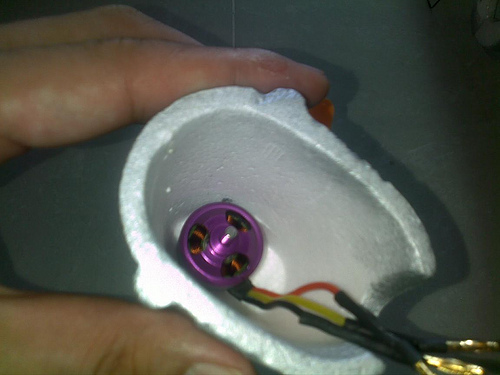
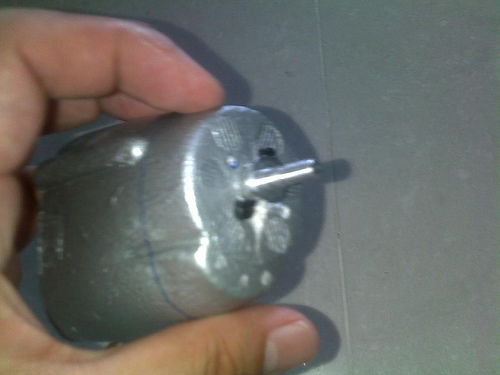
    Plastic parts on a sprue. Cool! Reminds me of model airplane arf. At the side is a motor with gearbox. It would be discarded later as I would use a brushless motor. Propellors also would be replaced.


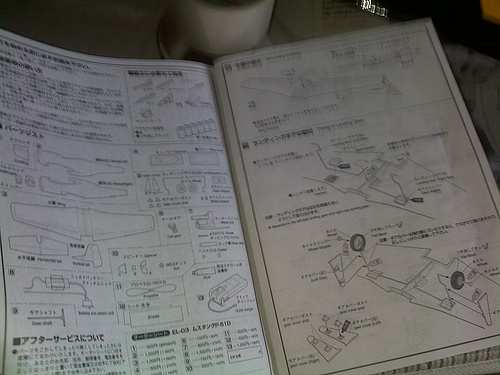
    Instructions are in Japanese. Actually I didn't really bother with them due to the high levels of modding involved.


    Information about the Mini-Mustang:

    Length: 515 mm (20.2 in)
    GW/EL MUSTANG Series

    Wing Span: 622 mm (24.5 in)

    Wing Area 7.2 dm² (111.5sq. in.)


    All in one , Free fly .

    Flying Weight


    140 g (4.9oz.)

    Wing Loading 19.4g/dm² (0.04oz/ sq. in.)


    Power System MABUCHI FK-130SZ.


    Propeller 150mm (5.9 in.)

    Battery Required 3N-110mAh

    This Mustang is located at the GWS website: http://www.gwsus.com/english/product/airfly/el03.htm

    and there's been some writeups on RCgroups on it.


    "Always fly with a responsible attitude. You may think that flying low over other people’s heads is proof of your piloting skill; others know better. The real expert does not need to prove himself in such childish ways..." - the Multiplex Build Manual

    #2
    It's about time to start to assemble the mustang. This is a dry-fit assembly so that you can see how large the mustang is, which is quite small. I had 2 thunder power 2s 480 mah batts around, so I'll use them to power this mustang. Pair that with 10a ESC.


    The issue here is that the mustang has no aileron, elevator, servo wells and so on, so you have to cut them out yourself. This also means you have to buy some 3rd party accessories.


    First you can decide where to put all the items in the fuse...e.g. battery, esc, servos, etc. Do note where you put these items as an unplanned fuse is like unpacked luggage.


    The motor is a small 2000 kv motor from H obby C ity. You can get an equivalent from JetHobby.

    Factory Spec.
    Kv: 2100rpm/v
    Lipo Range: 2-3 cell
    Suggested prop: 5x3~6x3
    Best current range: 3~7A
    Weight: 26g
    Shaft: 3mm
    Stator: 18 x 6mm


    First you need to think about where to mount the elevator and rudder servos. I have used my leftover 5gm servos from another project. Cut depron, mount on the inner fuse side with epoxy.


    Then you need to drill holes in the fuse...to fit in the elevator and rudder linkage rods. Linkage rods are wires within small plastic tube. Available from all shops in Fook Hai.


    Once linkage are put on servos, you can seal the fuse sides already. Make sure you test the servos and linkage movements beforehand. I used another piece of depron to 'clamp' the servos together. Problem - any servo failure would indicate I have to remove both servos together.


    When done, cut out and bevel the elevator and rudder and epoxy them on. I use tape to link them, it is recommended that we use proper hinges.

    more to come later.
    "Always fly with a responsible attitude. You may think that flying low over other people’s heads is proof of your piloting skill; others know better. The real expert does not need to prove himself in such childish ways..." - the Multiplex Build Manual

    Comment


      #3
      Sorry, can I have editing functions. I realised I put in a wrong size photo. Moderator help please.
      "Always fly with a responsible attitude. You may think that flying low over other people’s heads is proof of your piloting skill; others know better. The real expert does not need to prove himself in such childish ways..." - the Multiplex Build Manual

      Comment


        #4
        nice one Julian! Can't wait to see it maiden!

        Comment


          #5
          Cool!

          Hi Sunstorm,

          Interesting subject, and this wingspan/size is of particular interest to me.

          So did you get it at that Sengkang mall shop recently? Is it a plastic-model shop? Roughly how much did the kit cost?

          I'll be following this thread with interest All the best towards a successful project and maiden :>

          Cheers!
          ... It's in the Details... :>

          Comment


            #6
            Yo bro Sunstorm,

            That’s a nice one.
            Got a few question for you.
            How much you pay for the kit? Is there other model? Still have?

            Thanks.
            Share the joy of flying . . .

            Comment


              #7
              Hi, these are the answers: to Crafter and Vin.

              I bought it from Hobby Point or Hobby (something) at Rivervale mall for about 43 dollars (yeah, ripoff, har har).

              The store is not a plastic model store, it's a toy store that happens to sell RC items. It sells bicycle accessories and other items too. The shop is well known by fliers in the northeast for being.....expensive.

              Is there any other model? There was 1 or 2 kits left but you had best try your luck online if they are out.
              "Always fly with a responsible attitude. You may think that flying low over other people’s heads is proof of your piloting skill; others know better. The real expert does not need to prove himself in such childish ways..." - the Multiplex Build Manual

              Comment


                #8
                There are no other variants of these kind of small planes already.

                So the mustang is the only kind of model left.
                "Always fly with a responsible attitude. You may think that flying low over other people’s heads is proof of your piloting skill; others know better. The real expert does not need to prove himself in such childish ways..." - the Multiplex Build Manual

                Comment


                  #9
                  Great attempt Sunstorm. Hope that all works out well and you get a great flying model. Are you going to fly it indoors?
                  To win........one must not lose.

                  Confucius

                  Comment


                    #10
                    Nice one sunstorm. Al the best!
                    Did you know that dolphins are so intelligent that within only a few weeks of captivity, they can train humans to stand at the very edge of the pool and throw them fish.

                    Comment


                      #11
                      Update:


                      Need to create space within the mini Mustang. So using thin plywood, I created 2 shelves. 1 shelf is for the battery to sit on. The other is for the wings screws to screw into, so that the wings wont detach.


                      Now for the wings. You need to set dihedral, and put in a reinforcing piece of carbon rod. The wings are just very thin, they are just 5mm painted depron with some undercamber molding and some airfoil shape. I just used a screwdriver to dig a channel for the carbon rod to sit in. Secure with tape.


                      Cut the ailerons out, of course.


                      Fit in the aileron control rods or aileron set. This is for scratch builders. I bought the Du-Bro ones for park flyers. The white patch on the wings are filler. The wings were already damaged in the package. Just a minor dent.


                      Then, make sure the aileron rods can move freely within the fuselage. If else you may need to do some adjusting. By right you should have set the position of the rods beforehand.


                      When this is done, set the position of the servos and join all linkage rods accordingly. Rem to test servo and aileron movement.

                      Once done, and all is good, make sure everything fits and moves around well when the wing is dry-fitted into the fuse. Make sure test everything well and epoxy / mounting tape the servos so that no wiggles occur. The yellow pieces of depron will be pressed against the fuse sides so that servo movement will not occur. The result is that the servos are 'clamped' against the fuse sides again.

                      more to come later.
                      "Always fly with a responsible attitude. You may think that flying low over other people’s heads is proof of your piloting skill; others know better. The real expert does not need to prove himself in such childish ways..." - the Multiplex Build Manual

                      Comment


                        #12
                        Once servos on wings is done....we go on to attaching the wing to the fuse. Here's the detail. Screw on 2 self tapping screws - the screws packed with servos would do fine. See picture. Epoxy landing gears on.


                        At this point, you can fit in ESC too. The plane looks like this at this point. The nosecone is not done yet. But the landing gear is done. The wheels included are plastic. I replaced them with chrome wheels for better look and scale. I also use Du Bro tail wheel assembly. However to Mustang fans and scale fanatics, there is a mistake in the way I glue on the landing gear. Can you tell what it is?


                        The nosecone is a slip on one that is meant to be glued on. I shall mount the motor inside.


                        To my great relief, I had made some holes for the mounting screws on the nose. It fits the motor. However this photo is incomplete in the sense that I also have installed a small ply firewall to prevent the mounting screws from ripping open the nose cone.


                        Ensure all connections are secure and the motor is spinning the right way. Then epoxy or glue on the nosecone. I also have incorporated the spinner in the kit to the mustang. For this, I use a GWS 6x5 prop. Later on I will change the prop for a more scale black one. But Mustangs use 4 bladed props anyway. Ah well.


                        Looks good....

                        more to come later.

                        Gliding the lily, as Multiplex puts it.
                        "Always fly with a responsible attitude. You may think that flying low over other people’s heads is proof of your piloting skill; others know better. The real expert does not need to prove himself in such childish ways..." - the Multiplex Build Manual

                        Comment


                          #13
                          Landing-gear covers?

                          Originally posted by Sunstorm View Post
                          .... However to Mustang fans and scale fanatics, there is a mistake in the way I glue on the landing gear. Can you tell what it is? ....
                          Hi Sunstorm,

                          My favourite WWII fighter happens to be the Mustang.

                          Since you asked, looks like you got your landing-gear covers mounted upside-down. Oooops! Hee hee.

                          Hey, but don't don't beat yourself up about it. I guess it's correctable? Interesting project anyway, and thanks for sharing. Maiden-flight approaching?

                          Cheers!
                          ... It's in the Details... :>

                          Comment


                            #14
                            Gliding the Lily


                            After putting on the decals, you get a very nice looking little plane.


                            Mini gauges, a very nice touch.


                            But that's not all. Prior to this you have to arrange the internal equipment to ensure everything is tidy.


                            Plane with a shoe for scale.

                            Maiden Report -

                            The plane can fly and is controllable, although it is prone to stall issues.

                            I'm still tweaking it. Did about 4 very short <2 min test flights on it already, still tweaking.

                            I owe you guys a video, ok?
                            "Always fly with a responsible attitude. You may think that flying low over other people’s heads is proof of your piloting skill; others know better. The real expert does not need to prove himself in such childish ways..." - the Multiplex Build Manual

                            Comment


                              #15
                              Yes a video will deserve us alot

                              With this smallish scale plane, I think it is more difficult to fly.. if you can manage to fly it in a community center's badminton court, it will be great though..

                              But I am skeptical about you placing a giant size shoe beside your plane..
                              I'm Remotely Controlled ...

                              Comment

                              Working...
                              X