Announcement

Collapse
No announcement yet.

1:7.5 scale DG-300 Elan

Collapse

Zenm Tech Pte Ltd

Collapse

Visit Zenmtech at rc.zenmtech.com

X
 
  • Filter
  • Time
  • Show
Clear All
new posts

    1:7.5 scale DG-300 Elan

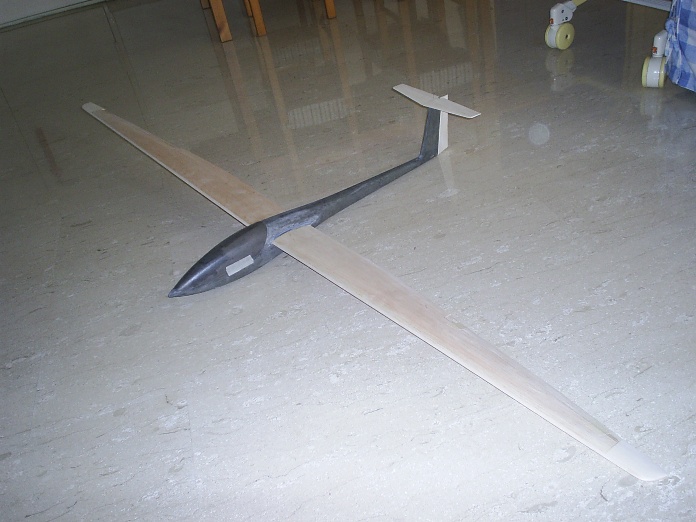
    After successfully designed and built my 1:10 scale Duo Discus sailplane last year, I wanted to build another 2 metre scale sailplane this year.

    To justify the purchase of my expensive scale sailplane documentation, I settled on the DG-300 15 metre class German glider. The main reason being that the scale counterpart is aerobatic ( ego driven ) and yet is also capable of high-performance gliding. Although the MDM-1 Fox looks like another good cadidate, it is too popular and many people has already modelled it. The DG-300 kits are far less common.

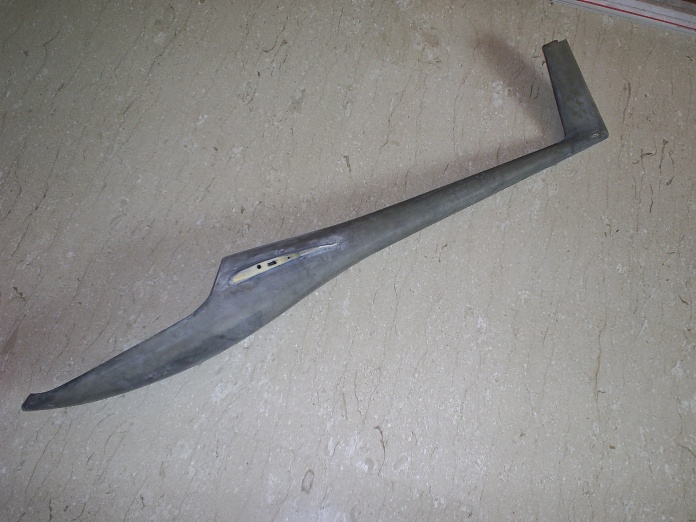
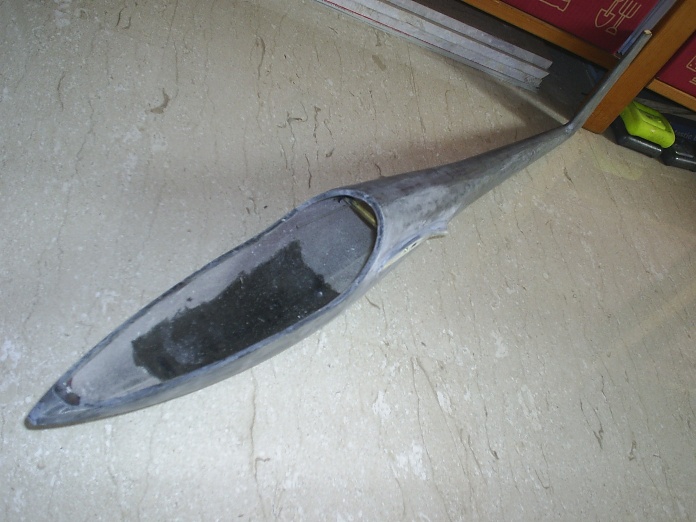
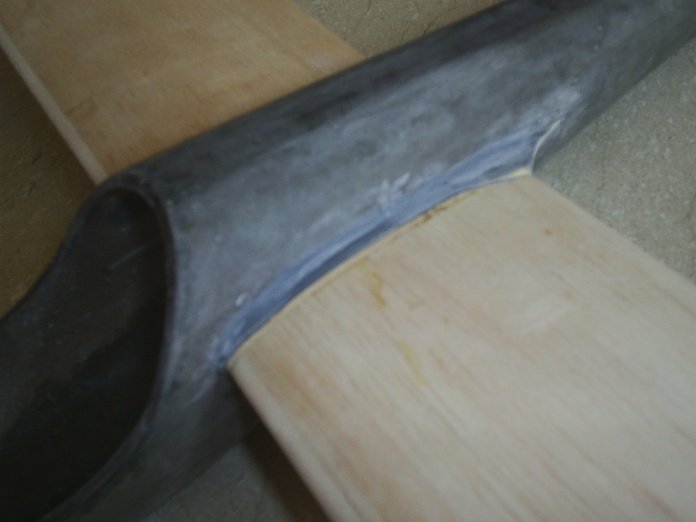
    In the back of my mind, I also want to use it for aerotowing during off season, and thus, I decided to build the fuselage with monocoque hollow fibreglass moulding, for the enormous space to accomodate tow release mechanism.

    This is a picture of the fullsize DG-300.


    #2
    I started off this project by impulse and so, I did not take much pictures during the build. So, I'll just give some simple notes along the way instead.

    The fuselage plug is hot wire cut from pink polystyrene foam. I use templates to cut the plan and side profiles like I did on the Duo Discus.


    Again, I hot wire cut the inner cavity of the plug. This time, the cavity is not meant for providing spaces for the radio equipment. Since I'm using the 'lost-foam' one off moulding technique, this cavity is to make the solvent penetrates faster into the foam later. I laid 2 layers of 3oz/sqft glasscloth and finished it with a last layer of 3/4oz/sqft cloth. After the resin has cured, I smoothen the surface with sandpaper, before pouring paint thinner to take out the foam.

    The wings are my usual balsa sheeted with foamcore sandwich construction. The foam core is cut from white styrofoam and skins are 1/32" balsa sheets. The wingtips are carved from solid balsa. The wing root has a brass tube to receive the steel joiner. It is supported by a basswood root rib and a plywood sub-rib embedded within the core. This will prevent the tube from being torn off during hi-G manouvers. Also, the root section has glasscloth reinforcements incorporated during the balsa sheeting procedures. The aileron servos had thier extension wires soldered and installed into troughs cut on the underside of the wings. The troughs are later sealed up with balsa strips. The servos are permanently adhered into thier wing cavities.

    The tailplane and rudder are from solid balsa, and the canopy is moulded from fibreglass as well, along with the fuselage.

    Comment


      #3
      Wow Bro! So cool, i must learn from you the aerodynamics liao. Thanks for the advise at the other thread.

      Originally posted by joe yap
      I started off this project by impulse and so, I did not take much pictures during the build. So, I'll just give some simple notes along the way instead.

      The fuselage plug is hot wire cut from pink polystyrene foam. I use templates to cut the plan and side profiles like I did on the Duo Discus.


      Again, I hot wire cut the inner cavity of the plug. This time, the cavity is not meant for providing spaces for the radio equipment. Since I'm using the 'lost-foam' one off moulding technique, this cavity is to make the solvent penetrates faster into the foam later. I laid 2 layers of 3oz/sqft glasscloth and finished it with a last layer of 3/4oz/sqft cloth. After the resin has cured, I smoothen the surface with sandpaper, before pouring paint thinner to take out the foam.

      The wings are my usual balsa sheeted with foamcore sandwich construction. The foam core is cut from white styrofoam and skins are 1/32" balsa sheets. The wingtips are carved from solid balsa. The wing root has a brass tube to receive the steel joiner. It is supported by a basswood root rib and a plywood sub-rib embedded within the core. This will prevent the tube from being torn off during hi-G manouvers. Also, the root section has glasscloth reinforcements incorporated during the balsa sheeting procedures. The aileron servos had thier extension wires soldered and installed into troughs cut on the underside of the wings. The troughs are later sealed up with balsa strips. The servos are permanently adhered into thier wing cavities.

      The tailplane and rudder are from solid balsa, and the canopy is moulded from fibreglass as well, along with the fuselage.

      Comment


        #4
        The major parts are quite straight forward and not too much challenges. However, the wing root fairings nearly drove me crazy. I spent the entire week just to get it right. I started off by glueing balsa ribs onto the fuselage, and a lot of trimming and sanding to get the alignement correct with the wings. After that, I mixed the epoxy with lots of talcium powder to make a putty, and spread it around the joints.

        After a lot more sandings, the shape is out but there are some more voids to be filled. Again, I mixed another batch of epoxy putty to fill them up. Then followed by futher sanding. Finally, I laid a layer of glasscloth/epoxy matrix on the rib face to seal up the balsa grain. A final rub down with fine sandpaper got everthing in place.

        Comment


          #5
          Now, I have the nyrod sheaths, balsa fin post, hardwood tailplane mount epoxied in place. To check everything is aligned, I dry assembled the major parts. Everything looks fine. Currently, AUW is 12 oz(340gm) and I'm targetting the final AUW to be around 18oz.

          Comment


            #6
            Originally posted by hoppie
            Wow Bro! So cool, i must learn from you the aerodynamics liao. Thanks for the advise at the other thread.
            You are welcome, Hoppie. My point is that you don't have to re-invent the wheels. Don't follow mistakes people has done. I have learnt from the hard way.

            Comment


              #7
              Originally posted by joe yap
              You are welcome, Hoppie. My point is that you don't have to re-invent the wheels. Don't follow mistakes people has done. I have learnt from the hard way.
              actually my idea came from rcgroups, they actually have a long list of SS threads and even youtube. So i just thought i might be able to follow wat they did and build myself a aileron trainer that can glide too.

              Comment


                #8
                Gotta take it from Joe Yap, he's DA MAN when it comes to building.
                "Always fly with a responsible attitude. You may think that flying low over other people’s heads is proof of your piloting skill; others know better. The real expert does not need to prove himself in such childish ways..." - the Multiplex Build Manual

                Comment


                  #9
                  Originally posted by hoppie
                  actually my idea came from rcgroups, they actually have a long list of SS threads and even youtube. So i just thought i might be able to follow wat they did and build myself a aileron trainer that can glide too.
                  My friend,

                  The RC Group is also free for everybody to post and there are a lot of people there also repeating mistakes which has been known, like everybody else here. So, you have to be selective.

                  These days, people rarely build there own planes. ARF designers have done thier homework to come up with models of thier intended uses. However, these models usually will not be good for anything else other than thier intended uses. So, putting a more powerful powerplant usually do more harm than good for them. The end result is that the consumer usually have to buy expensive carbon strips/rods, f/g tapes and turn their planes into Frankenstien before they can be flown successfully. Sometime, the efforts are not really justified as the additional cost and time incurred can sometime be substituted with another model which are designed for such purposes at lesser cost and headaches.

                  So, experiements are good, but don't go about doing them blindly. Understand what you want better and you can judge for yourselves which alternatives can yield better results.

                  Just ask among yourselves that how many trainers do each of you own before you can solo with perfect take-offs and landings? For me, I need only 2 good designs, but in fact the first model was lost by radio interference. I completed my novice stage with my 2nd model, which was almost as good as new without any need to receive any form of repair, before I passed it on to someone else when I moved on to my low-wing trainer.

                  Comment


                    #10
                    This evening, I spray painted the fuselage exterior with a few coats for matt gray automotive primer. It'll be wet sanded down later. This is to fill the low spots of any irregularities on the surface. If done properly, you can achieve near mirror finishing later on.

                    Comment


                      #11
                      Thanks bro for the advice, wat was ur high wing trainer you used? I have a Supercub but that does not have ailerons and my frend actually cut the ailerons but not effective when we tried. I then bought a Busy Bee, a pusher plane, that was a failure could not even take off. Dun really know how to tweak it also so put it aside and got a slowstick instead.

                      Comment


                        #12
                        Originally posted by hoppie
                        Thanks bro for the advice, wat was ur high wing trainer you used? I have a Supercub but that does not have ailerons and my frend actually cut the ailerons but not effective when we tried. I then bought a Busy Bee, a pusher plane, that was a failure could not even take off. Dun really know how to tweak it also so put it aside and got a slowstick instead.
                        Those days, we don't buy ARF as they cost at least twice the price of a balsa kit. This is the picture of the California 28 kit, my first trainer. Took me 2 months to build.

                        My 2nd model is MK's Happy 20S. Sorry, I can't find any picture. Looks similar though.

                        Comment


                          #13
                          Originally posted by joe yap
                          Those days, we don't buy ARF as they cost at least twice the price of a balsa kit. This is the picture of the California 28 kit, my first trainer. Took me 2 months to build.

                          My 2nd model is MK's Happy 20S. Sorry, I can't find any picture. Looks similar though.
                          So sorry to intercept your thread, this plane looks like Nitro, u started off nitro? BTW, where do you usually get your balsa kit? I can't find balsa plane that is cheap enough. The foam plane i got range from 28 to 50, i got a crap Busy Bee at $120 though

                          How much is a Balsa plane? Someone quoted me HappyBoy for almost 200 or more than that.

                          Comment


                            #14
                            How much is a Balsa plane? Someone quoted me HappyBoy for almost 200 or more than that.[/QUOTE]

                            Just for interest, anyone know what are included in teh Happy Boy deal selling in SH, motor, esc, servo etc... For what, $200.

                            Comment


                              #15
                              $200 bucks for a balsa plane is not too bad...Id rather pay for that than $200 bucks for a foam plane..$200 bucks can get you a very good balsa airframe actually. And if you ever tried building a balsa plane from scratch....Youd find $200 bucks is too little if you were to sell it. Thats why most planes are built from china...some good, some better...you get what you pay for.

                              Its jus that different companies and hobby shops price their stuff quite widely.

                              One of the best trainers I have ever flown besides a E starter and TT Piper cub is a Telemaster...a great flyer if you can get one locally...check this out and see the video...http://www.hobby-lobby.com/mini-telemaster.htm

                              Better still you can buy the kit and build one!!!...even cheaper...http://www.hobby-lobby.com/telemaster-mini.htm

                              It may be an old design....but it will better than any new design out there...
                              Do you feel the RUSH....!!!!

                              Comment

                              Working...
                              X