Announcement

Collapse
No announcement yet.

Sig Four Star 120 Build

Collapse

Zenm Tech Pte Ltd

Collapse

Visit Zenmtech at rc.zenmtech.com

X
 
  • Filter
  • Time
  • Show
Clear All
new posts

    Sig Four Star 120 Build

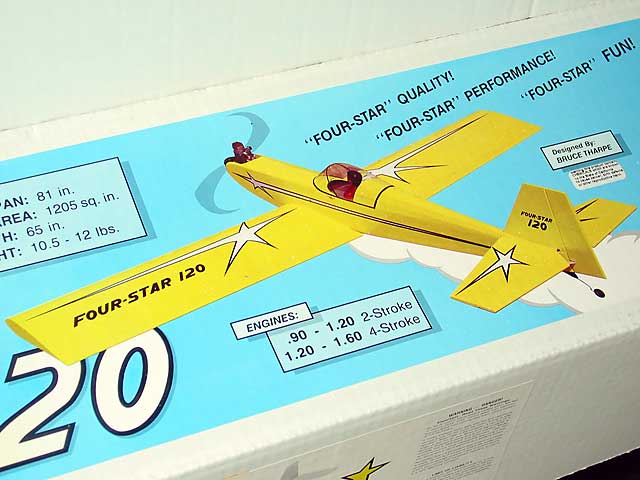
    Now that I gotten the Pilot Zero type 22 ready for her maiden flight, I can get on with what I've been itching to build - the Sig Four Start 120. The power plant for it will this little (well not so little) gem from MVVS. With the pipe it'll be an overkill but a 3rd party sports exhaust from Bison is going to set me back US$95 so I'll stick with the pipe for now.


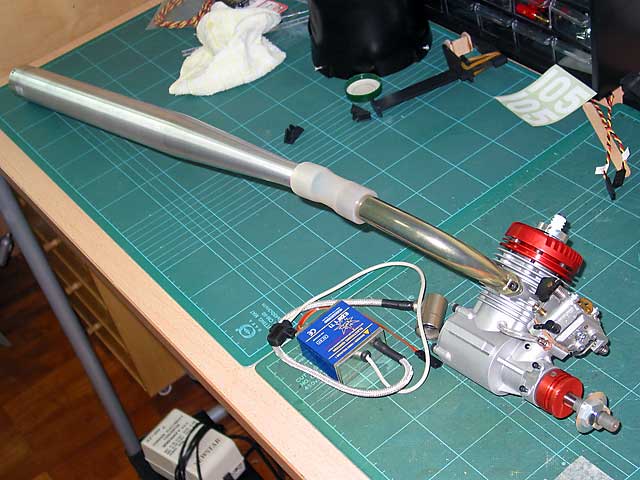
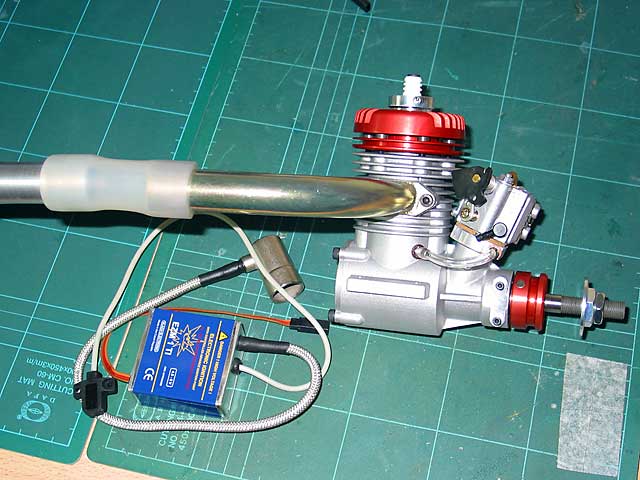
    The MVVS IFS 26 is a petrol engine. Runs on 40:1 gasoline (95 Ron) and 2 stroke oil. From what I've read, it'll haul 16x11 to 18x6 props with impunity. To top it off, the fuel will be cheap. As I am only a so so pilot, I like to fly these slow flying sport planes so the cheaper cost per flight will be much welcome. A glow 4 stroke nitro engine will cost something like $4 per flight in fuel. With one of these, it'll only be cents per flight. A bonus is the reliability and cooler running of gasoline engines.

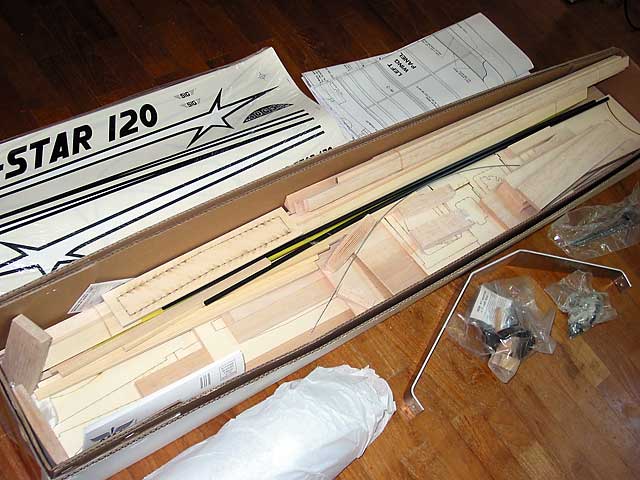
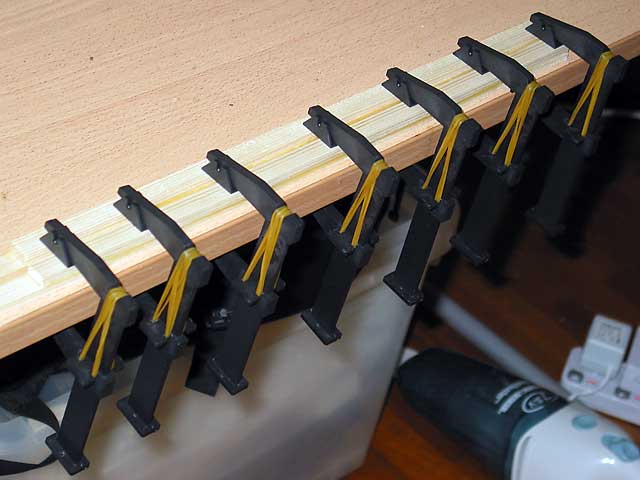
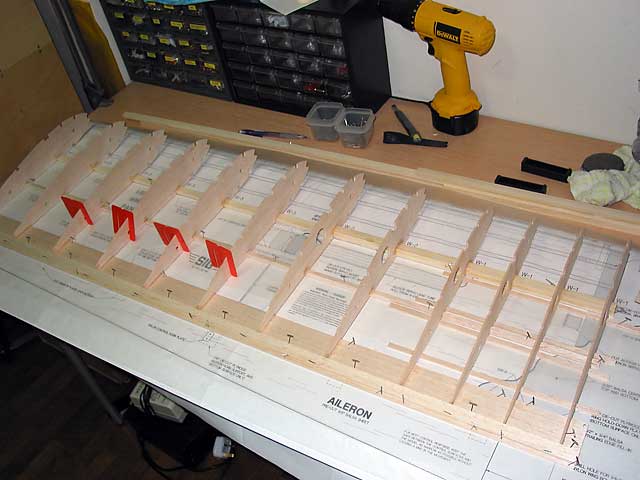
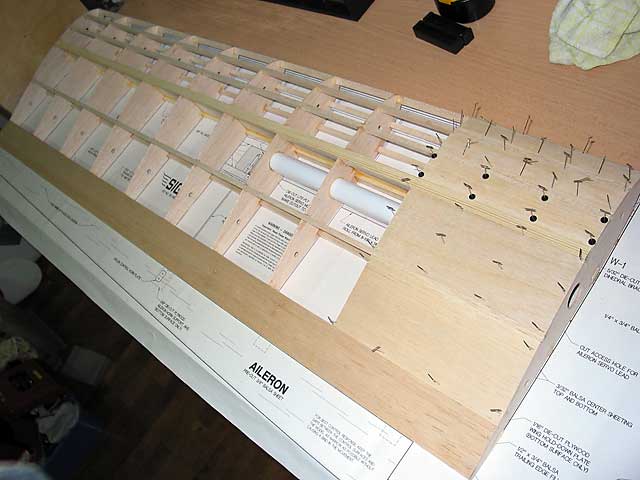
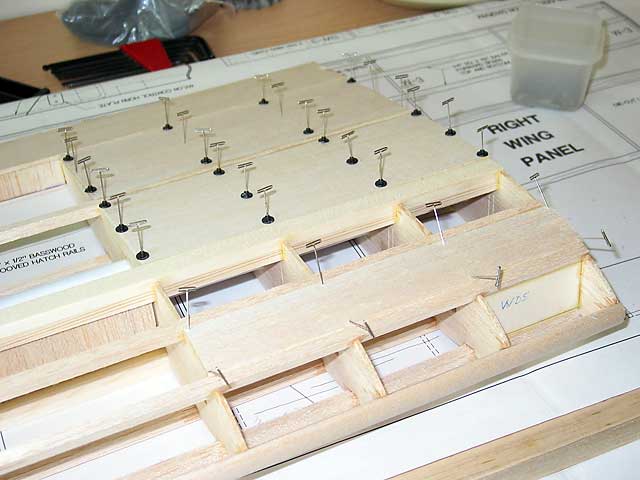
    The Sig Four Forty series have developed a reputation for good flight characteristics and it looks like it'll be a fast building plane too. The box is filled with good quality balsa and laser cut parts look to be help in the building speed with its greater accuracy (die crushing seems now to be thing of the past). The kit is very complete with a several bags of hardware included down to hinges, engine mount and all screws and bolts. I will however be swapping out all the imperial bolts and replacing them with metric ones.

    .


    I'm going to start on this project on Monday.
    To win........one must not lose.

    Confucius

    #2
    steady, another thread to closely monitor.

    Comment


      #3
      hello tony! i would like to know more info on the MVVS engine.. how much does it cost?

      cool thread i must say!
      this hobby is a compulsion/addiction/disease

      Comment


        #4
        Originally posted by rifqi
        hello tony! i would like to know more info on the MVVS engine.. how much does it cost?

        cool thread i must say!
        I bought mine NIB from another modeller. If you buy the standard set ie. with a free can type muffler, it should be around S$500 plus postage. The tuned pipe is the most powerful option but is costly. But its a work of art so its worth every cent. I'm using it not for the power but to keep oil residue off the plane so I will have less of a job to clean it after each flight.

        Its has a capacity of 26 cc or 1.6 ci. Output is 3.8 hp.
        Last edited by Tony; 08-05-2006, 12:35 PM.
        To win........one must not lose.

        Confucius

        Comment


          #5
          Open the box and this is what greets you.


          The kit is very complete. Almost everything you will need to build this plane except for the wheels, covering, engine, rc and glues is in the box. Things like clevises, pushrods, throttle cables, hinges, every nut, bolt and screw, an engine mount, and horns. This is a fairly sizeable model and the weight of the kit shows it. The box is not very large but its heavy. The balsa wood provided is of a fairly firm and medium density. For parts like leading edges, trailing edges, spars, ailerons etc, a firm and medium/heavy density balsa is provided. I like this. The quality of wood is good and is consistent. Nothing worse than finding that some sheets are good and others of poor quality. Worse still is finding varying quality on the same sheet of balsa.

          A heavy duty aluminium U/C is provided. This is a hefty heavy duty gear and looks to be able to absorb a good number of not so good landings which I have a tendency for.

          Being an American kit, all screws and nuts etc are imperial. This can be a headache as one needs to carry a separate bunch of spares and tools like cap screw drivers etc to the flyings site. I will try to replace as many as possible with metric sizes as I can.

          The ply parts are laser cut. The quality of ply is very good being of firm multi ply and not like the more common powdery stuff that has a tendency to chip, flake and fall apart.

          The plans are not rolled. But its nothing a good iron and an ironing board won't cure. The building instructions is very detailed. Every step is described in clear concise style accompanied by a photo for every step. The instruction booklet includes a good number of construction tips. All of these are very useful to learn as they will come in handy when building other kits. The design is a fairly simple square box design and should be a good first kit for a first time builder. The Sig Four Star family has a 40 sized version which is ideal for a first time builder.

          To top it off, Sig includes a booklet on the basics of radio control. You would be quite willing to pay to buy this booklet as the information included on trimming, balancing, radio adjustment etc etc etc are very pertinent to beginners, yet its provided free with the kit.


          To get on with the construction, I shall start with the wing. This is the part that has the most number of parts and will help to remove much of the clutter in the kit box so it'll be easier to hunt for the rest of the parts.
          To win........one must not lose.

          Confucius

          Comment


            #6
            Wing construction starts with making up the spruce main spars. These are substantial pieces of hardwood and you do need to keep them straight or end up with a warp that is impossible to remove.


            Wing construction on the way. The design style is very old school. Ribs, a primary spar and lots of secondary spars (1/4 in square). Sheeting is only applied to the centre section. This makes it much easier for first time kit builders as D-tube leading edge construction can very easily be built crooked unless you do it right.


            Here is the basic left wing waiting for glue to dry. The servo mounts and cover have yet to be installed but that will be done after the basic right wing is built.

            To win........one must not lose.

            Confucius

            Comment


              #7
              tony, willing to sell the book? or can i make i copy of it? i think i need some tips for maidens.
              JR 9x
              Raptor 50 SE
              Raptor 90 3D
              Mini-Titan


              Superb machine!

              Piper Warrior 2 Pa-28-161
              Lycoming O-320-D3G 160HP

              Pilatus PC-21
              Pratt & Whitney PT6A-64B 1600SHP

              Comment


                #8
                I'll make a copy for you in return for Kuay Chap or Bak Kut Teh lunch.
                To win........one must not lose.

                Confucius

                Comment


                  #9
                  The central ribs needs sheeting. This took more time than I had anticipated as its not done in a single sheet but is done panel by panel between each of the spars.


                  The wing joiner is a bit fussy to fit. It was necessary to make up a tool from scrap lite ply and a scrap piece of sandpaper to be able to reach into the central ribs to clear the way for the ply wing joiner to fit in. After some fiddly sanding and scraping, the ply piece finally fell into place.


                  Here, the wing is being dry fitted. The two wing panels need another round of final sanding first before they are joined together. I'll do that tomorrow.

                  To win........one must not lose.

                  Confucius

                  Comment


                    #10
                    Originally posted by Tony
                    I'll make a copy for you in return for Kuay Chap or Bak Kut Teh lunch.
                    NO PROBLEM!!! by the way did you catch wed or tues's makan places lost and found? where is the teochew kua chap featured in that show?
                    JR 9x
                    Raptor 50 SE
                    Raptor 90 3D
                    Mini-Titan


                    Superb machine!

                    Piper Warrior 2 Pa-28-161
                    Lycoming O-320-D3G 160HP

                    Pilatus PC-21
                    Pratt & Whitney PT6A-64B 1600SHP

                    Comment


                      #11
                      I missed the programme. But the Bak Kut Teh at Rochore Centre (coffee shop) directly opposite Fu Lou Shou is quite good. Their Hoon Tng (small intestitines) are great too. Just let me know when. Slurp Slurp Slurp
                      To win........one must not lose.

                      Confucius

                      Comment


                        #12
                        Kway Chap Ong at Macpherson is super good too...let's go!!
                        TREX 500 ESP
                        Futaba T12FGH

                        Comment


                          #13
                          brandon im Dave

                          wow... Kway Chap Ong at Macpherson is famous... but i stay west no change to go ... if not joking count me in leh... er... brandon got go must call me k?

                          opps more building more building

                          For building is 1/2 the fun of this hobby

                          Comment


                            #14
                            Alright - we have Kuay Chap feast then read the Sig booklet and chit chat session after. Just name the day (or to be more precise - evening cos I will be starting work next week after 2 months medical leave).
                            To win........one must not lose.

                            Confucius

                            Comment


                              #15
                              This time, the wings and centre ply brace are being glued for real. I use 30 min epoxy because it is very fluid and flows better into the joints and any cracks.


                              Here, the wing is on its side because I want the epoxy to form a fillet against the main spars. Putting it on the tip too soon will have the epoxy flow downwards and form a big pool at the bottom. Pins are used to maintain the alighnment of the two wing panels.


                              The two white tubes you see inside the wing are made from rolled paper and are meant to be channels for the aileron servo wires to run.

                              Once the wing is joined, it will be time to get started on the tail bits ie tailplane, fin, rudder and elevators.
                              To win........one must not lose.

                              Confucius

                              Comment

                              Working...
                              X