Announcement

Collapse
No announcement yet.

Greetings fellow fliers!

Collapse

Zenm Tech Pte Ltd

Collapse

Visit Zenmtech at rc.zenmtech.com

X
 
  • Filter
  • Time
  • Show
Clear All
new posts

    Greetings fellow fliers!

    Hello everyone! This is my first posting here. I'm glad to discover that there's a forum for Singapore fliers and other RC related hobbies.

    I've been interested in model aviation since my secondary school days. Back then it was quite expensive to get into the hobby. It was fun designing, building and flying my own small RC planes. Since returning to the hobby again in 2004 after a hiatus of 5 years, I haven't built anything of my own design since 1999.

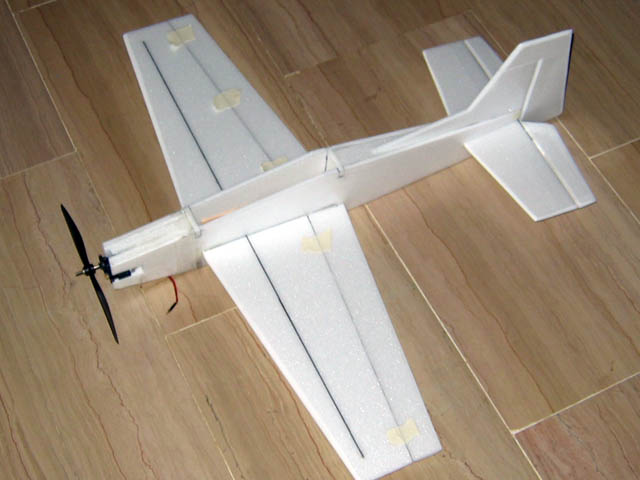
    I am now fully into electric RC aviation and even dabbled with aerial photography using my 1st Estarter! My previous planes are the GWS-Estarter, ME-109, Tiger Moth, all decomissioned. Right now I have another spare Estarter and a Tucano of my own design.

    I live at Ang Mo Kio and was one of the long time Bishan Flyers before they shut down the operation. The story goes that one of the flyers crashed his plane into a flat at Bishan scaring the living daylights of a toddler sitting in the living room. The window was smashed and you can imagine the fright and trauma the girl went through. After that incident and a newspaper report, the park permanently banned RC flying. Though it was a loss back then for RC flyers, I think it was a good move because the situation at Bishan was getting out of control, there was no regulation and no flying rules. There were many crashes though non-life threatening but still very serious. I still remember gas planes wings snapping in mid-air, spectacular helicopter crashes, one helicopter actually flew into the shelter with other flyers sitting underneath it, but they managed to run before the helicopter hit them. Though the atmosphere back then was friendly and everyone was helping each other out, there are still a few "rogue" flyers who fly recklessly.

    With electric flying, the safety margin is increased slightly, but still flying electric planes can be dangerous. When I first started flying, I love flying my plane as high as it would go, but now with electrics and a longer flight time, I don't have to do that anymore, besides, I can't see the orientation properly anyway. Electric flying is really the way to go for land scarce Singapore.

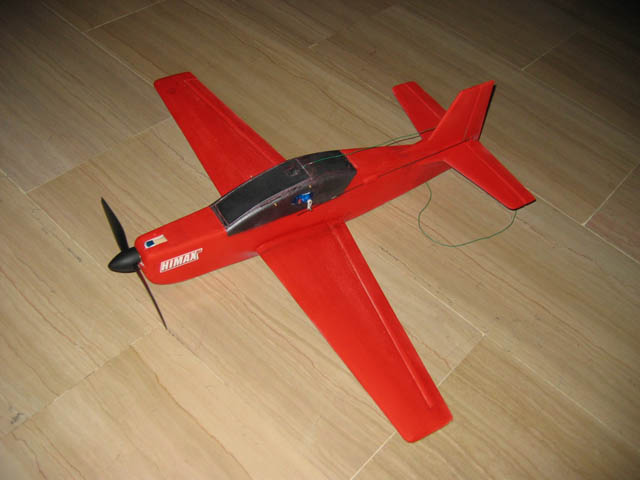
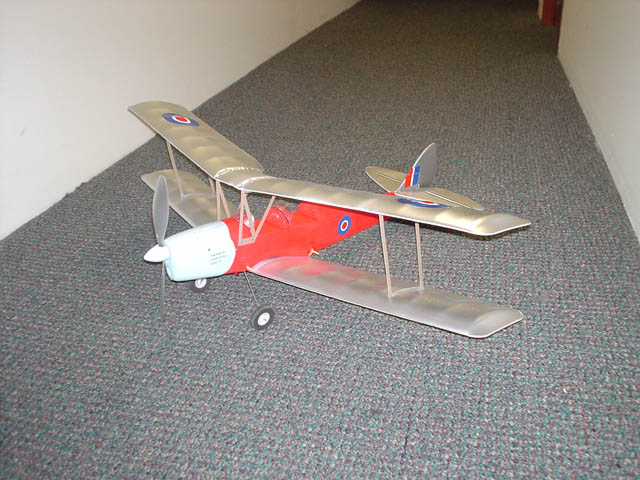
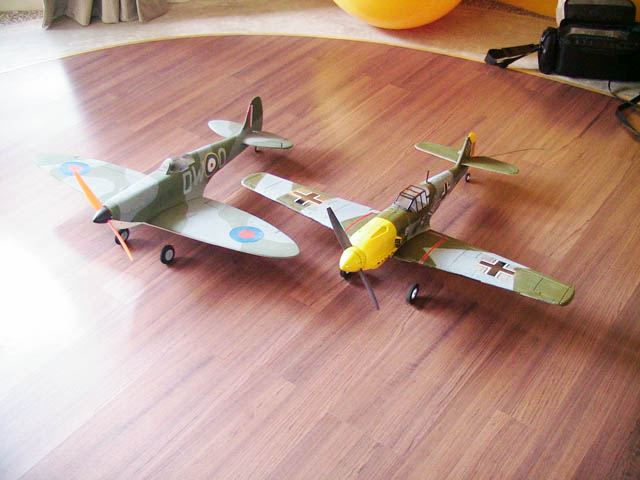
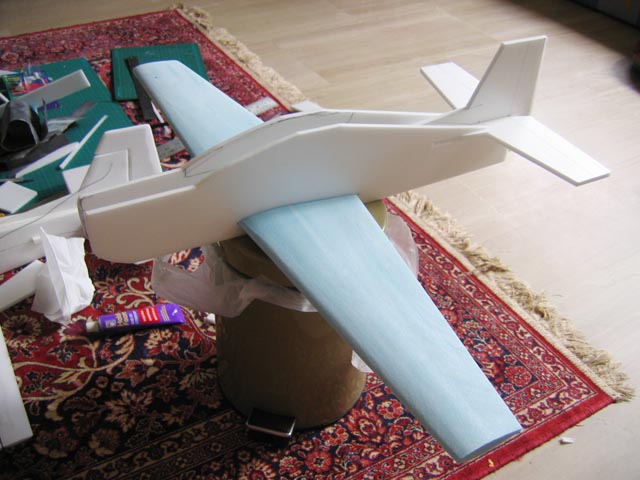
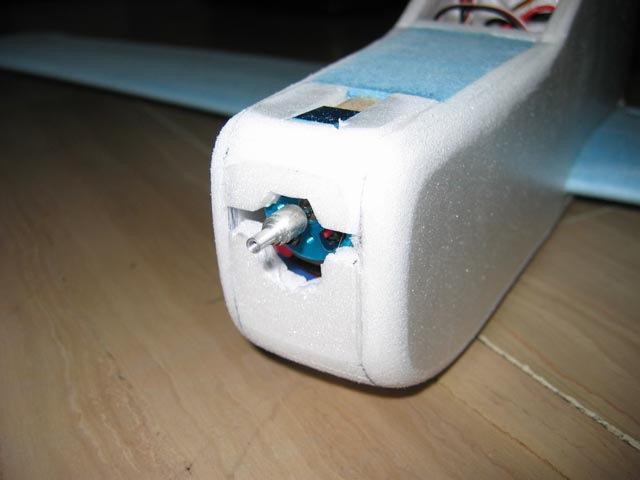
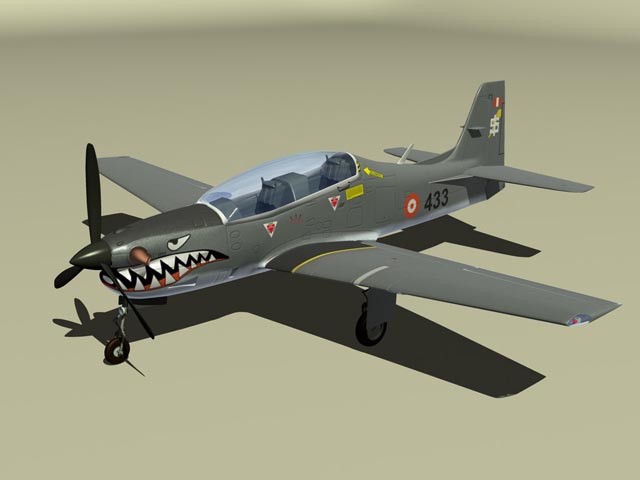
    Attached are the pictures of my Homebuilt Tucano, TigerMoth and ME-109 posed with my friend's Spitfire.


    #2
    Beautiful planes you got there buddy. Welcome to DH

    there are many flyers around Singapore, Woodlands to Tampines To Jurong West.

    Some bishan flyers go woodlands now while some at Jurong I guess.

    I do might want to warn about posting aerial photography as it is deemed illegal.

    i love your tucano. nicely built and finished

    Which character are you test by

    Comment


      #3
      Hi Alamin2!

      Thanks for your comments and advice!

      Yup, I'm aware about posting aerial photos online, but you have to think about the irony, with Google Earth 3D, I can see anything that's not hidden over sensitive areas. My aerial photography days are over once I transferred my miniAC motor to the ME104.

      Here are more pictures of my Tuc! I love building with Depron and Blue Foam they are really wonderful building materials compared to Balsa. It is so easy to shape and construct. I also find that it is quite easy to repair crash damage. My only complaint is that it dents rather easily when you accidently pressed the surface with your fingernail. Also I need to get a air filter mask, the dust Depron and Blue foam generates from sanding can kill you!

      This is the first time I used Blue Foam to build wings. Previously I would have used large grain styrofoam which is very weak and had to be reinforced with a spruce or plywood core. I used my trusty homebuilt Bow Wire foam cutter and aluminium foil wrapped balsa templates to cut the wings out from the foam. Blue foam is incredibly easy to cut with hot wire, but I had to set my cutter to the maximum level to cut through the blue foam, but the heat is too strong, that's why I had to wrap my balsa templates in foil otherwise the hot wire will burn through the balsa. Luckily for me, the cutting went smoothly and this is the first pair of wings I have foamed cut in 6 years!! The wings are simply glued together with Araldite 5 minute epoxy and reinforced with a thin carbon strip. Wingspan 28". Dimensions are scale to the real Tucano! My favourite plane.

      I have attached pictures to show the rest of the folks here who might want to try designing and building their own creations. There is also a 3D Tucano which I modelled in 3D carrying the Peruvian Airforce colours.

      Power for the Tucano is a Himax 2808 outrunner and using a 11.1v Lipo 3s 1100mah battery. It flies really scale and the motor and hollow space produces a very nice humming sound almost like an Internal Combustion plane. My first few flights nearly ended in disaster with 2 bad crashes, but the problem was traced to a loose stabilizer that fluttered during extreme movements and also the unsecured battery that can seriously affect the CG during flight. I have since glued the stabilizer solidly and built depron brackets to secure the battery but have yet to fly it in her new colours yet. This plane is definitely not for novice flyers!

      Comment


        #4
        nice planes dude....

        Comment


          #5
          oh my god... we have another scratch builder!!!!nn

          i open my arms more bigger now

          can be my shifu and teach me to build your tucano ?

          haha i never seem to get my planes right

          Which character are you test by

          Comment


            #6
            Hi Alamin2!

            Heh heh, when I started building my planes many years ago, I didn't get it right the first time. Although my first self design flew in 1986 using a 1cc Enya glow engine, it only flew once before the wing snapped in two in mid-air in a spectacular crash. When I started to learn the RC hobby and building skills, I was lucky then to have a mentor to teach me, in fact he taught me how to use a hot wire to cut my foam wings. I made a lot of mistakes but I also learnt from them. With the Internet and all these great RC forums and websites, I think you can learn a lot too! I'll be glad to show you how I build my planes, this is only my 3rd plane using Depron and my 2nd plane fully made of Foam. All my previous planes are made very simply with Balsa, plywood, Styrofoam (I never built built-up wings for my RC planes) and the traditional Solarfilm and Solartex.

            Let me tell you one of my beginner mistakes. When I first started, I just literally any how whack. I just took dimensions from real aircraft and scale it down. Big planes and small planes just behave differently and I began to understand why model plane designs can be so different from real planes. For example, if I want to build a FockeWulf-190 D-9, I will have to make the stabilizer about 10% bigger than the real thing (according to expert friend) and probably scale the wing slightly bigger. Look at the GWS ME-109, and you will notice that it is not completely scale to the real thing. Aerodynamics is very important when designing your plane, you must understand how the airplane fly and the physics involved. I'm no physics expert, but if you follow the basic rules, even a radical design can fly. Build quality is also a very important factor. When I first started, I was very impatient and my planes are quite sloppily built and it translates to your performance. My good friend built his first Depron plane based on the Marchetti prop trainer and he sanded the wings and moving surfaces until they are knife edge sharp and super smooth and streamlined. Needless to say, his plane's performance is out of this world!

            Before I built the Tucano, I made a flat wing Depron flyer and honestly I did not pay much attention to building it and although it flies, the performance is less than desirable. Attached are pictures of my 1st all Depron plane, as mentioned, the flying charateristics is not so good.

            BTW, I made a flight just now with the new colours and it was fantastic, though I nearly crashed my Tucano again, I suspected the small stabilizer but I have now found my problem. My propellor was out of balance! I should have bought Original GWS props, but I got some black generic ones instead to save a few cents, now I understand why my plane was so underpowered and vibrates very badly. That could have affected my flight performance.

            Be warned guys! Before installing your props, get it balanced first, now I know why my Twin IPS was destroyed, by a bad prop!!! An unbalanced prop will cause excessive vibration and damage your motor and bearings and also deliver less power!

            Comment


              #7
              Hi there, could you teach me how to cut foam wings too.

              Comment


                #8
                i also want to learn.
                Radio(s):
                Sanwa Style
                Futaba 4SkyPort

                Plane(s):
                Flying:
                T-34 (Electric)

                Comment


                  #9
                  Hi Curare & Ducky! Merry Christmas!

                  I'd be glad to show you guys and those who are interested some pointers, but I have to say this first as a disclaimer, although I have been cutting foam wings with no problems all this while, I will not be responsible if things don't go as I explained here and someone gets injured or killed, so you those who want to try foam cutting wings will do it at your own risk.

                  Okay now that I got that out of the way, I just want to say, it is not as dangerous as it sounds, but you definitely need some qualified help (trained electrician) if you are tapping electricity from your mains to cut your foam. For those who can get a 12 volt lead acid car battery, that would be slightly safer but you won't get the constant power and control the mains provide.

                  Foam cutting your own wings is actually quite simple, but you need a lot of practice. Be prepared to make lots of mistakes when you are starting out. When I first started, a lot and I mean A LOT of styrofoam was wasted. What are my mistakes? Impatience and not paying attention to details! I'll explain further.

                  To cut foam effectively, you must first have a Foam cutter. Here's an excellent link showing how to make one for yourself. Mine is not as elaborate as the ones described on the site, but it has been foam wing cutting workhorse for many years. I believe I built it in 1989 with some help from my Dad who is a licensed electrician. He provided the giant step down transformer from 220V to 12V and the incandescent light bulb variometer so that I can adjust the heat levels by turning the knob, there's a built in switch so I can turn it on and off. For the cutting wire, I started with thin nichrome wire but they snapped when the temperature is too hot. If you look at my own bow (at the picture below) you will notice that it is only made with a old broom handle, 2x4mm diameter piano wire rods, speaker wires for the power, and 1mm piano wire made very taut by twisting it around the slanted 4mm metal "dowels". You might have to twist it tighter after turning the hot wire on as the wire will expand a little, be very careful when you do that, I use a insulated heavy duty pair of pliers to get the job done, please do this with the electricity OFF!

                  White styrofoam uses less heat to cut than Bluefoam, for the blue foam I turned my temperature settings to the maximum. For styrofoam, only a third of power is required on my variometer. For templates, I used 2mm aircraft grade plywood you can get from NTC, but they can be a challenge to shape. Other more professional set ups used thin aluminium blocks for the templates, since I don't have a milling machine, I can only make do with aluminium foil wrapped 5mm balsa templates. Besides Balsa wood is way easier to shape than plywood or aluminium blocks!

                  To prepare the foam blocks for cutting, get your templates ready and pin both templates to the sides of the foam blocks. Your blocks must be cut with great precision with 90 degree sides and also there mustn't be any deviation of the templates unless you want a few degrees of washout for your design. The type of airfoil templates you use also determine what kind of performance you want from your plane. Wikipedia explains. Or you can simply search on google for Airfoil or Aerofoil to find out which templates you want. This is an area that is too complex for me to explain and you must find out yourself.

                  When cutting your foam, it is better to get someone to assist you like hold the foam down on the edge of a flat table, if you can't find anyone, then you cane use extra large plastic clothes pegs, to hold your foam block down. Use mounting paper tape to hold it down further. Manual cutting requires a lot of practice and skill, before you actually cut, you must test the temperature by test cutting a piece of foam first. Remember, a small test piece will cut easily than a large piece, and also the first few inches are easier to cut then you will get resistance as the wire cools as it slices through the foam. Be very careful when you are pulling the bow as pulling too fast will cause the wire to dig into the foam and you will get a badly cut wing. Pulling too slow will cause the wire to burn the foam and you will get a uneven surface on the foam, and it might also shrink it from the original template. This is really a balancing act and it takes some time to learn. After each cut, take a old rag and fold it several times, wipe the wire while it's still hot before turning it off, this step is very critical as a dirty wire with old foam gunk on it will cut a badly uneven surface. DO NOT leave the wire on for too long at high power setting, you might blow a fuse if you use my set up. Also before starting to cut, turn the wire on and wait for about 10 seconds for the wire to heat up before cutting. If your wire turns RED HOT, it is TOO HOT. Because my wire is made of steel, it actually changes colour from silver to bluish from oxidation. Another cue is you see smoke coming out from previously cut foam. Please do your foam cutting in a ventilated area but not at a windy location. A little bit of air current is fine, but a strong wind can cool your wire down and make it less effective to cut and also your foam block may flutter and move!

                  Once you learnt it, you won't forget it. I'm surprised my first pair of Blue Foam wings for my Tucano came out so well with no mistakes, as mentioned previously, the last foam wings I did was like 6 years ago.

                  Of course after you cut your foam wings, it's not the end of the story, you will still need to trim it and sand it down. Blue foam can come in different qualities and the one I got does not have a even texture, meaning some parts are softer than the rest, so you must sand and shape slowly. Get at least 3 different grades of sand paper from Rough, Medium to super fine and gradually sand down from different grades. Use a a blue foam block as a sanding block, check your alignment constantly with a long steel ruler. Oh yeah, remember to sand in a ventilated area and wear some air filter mask to prevent yourself from breathing in the dust. Also remember to clean up afterwards less you drive your family members nuts. Once you finished shaping your wings, you will need to reinforce it with carbon strips or plywood. Use fresh cutting blades to cut a slot to push in your carbon strips, never use rusty or blunt blades, they are very dangerous and should be discarded. My first pair of styrofoam wings snapped in mid-air because I didn't reinforce it and back then, I didn't have the luxury of space age composite materials like carbon fibre. I ended up using furniture grade plywood, which is alright for small planes but I built a powered glider using the Art Friend's plywood, but that was a disaster too which ended with the wings also snapping in 2, the plywood from the art stores are just not strong enough, now I just stick to carbon fibre or fibre tape. Well you learn from these disasters.

                  Well, hope this helps, there are other resources on the internet that are much better than mine, but I hope you will try this out as nothing gives you more kicks than seeing your own design and self-built plane fly!

                  Comment


                    #10
                    Great guide Weeliano, thanks for taking the time to pass on your knowledge

                    Comment


                      #11
                      Hi Kenshinz! Merry Christmas!

                      Thank you are the rest for all your compliments! I'm only too glad to share my knowledge to those who want to know. BTW, I made a typo regarding the Himaxx motor on my homebuilt Tucano, it's not a 2808 as previously mentioned but a 2212-0840. Honestly speaking, I'm a very unscientific designer, I'm sort of a design by eye kind of person so naturally I have hits and misses. But I have been lucky so far, of all my designs, only 1 didn't fly and ended up as a lawn dart! The others have different measures of success, but I think my Tucano is so far the best flier!

                      Comment


                        #12
                        Welcome to DaddyHobby Weeliano

                        It's good to have another scratch-builder on board, do contribute to this forum and make new friends at the flying fields wherever you may be flying, and yes Merry Christmas to you too, Cheers!

                        By the way, nice planes you got there

                        Comment


                          #13
                          Thank you Astroboy for making me feel welcome!

                          Do check out my gallery, I've uploaded a few pictures and 2 videos of my Tucano in flight and my good friend Adrian's flat wing Marchetti in action.

                          http://www.daddyhobby.com/gallery/sh...00&ppuser=1374

                          Adrian and I are very excited with the possibilities of building with Depron and Blue Foam, we are going to start building 2 WW2 classics this week. Adrian is going to build the P-40 KittyHawk and I'm going to build the FW-190 D-9.

                          I will document the progress and maybe everyone can try building their foam airforce!

                          19 June 2006 update

                          I've removed the old Tucano video as it is taking too much space, checkout my new Tucano video instead in the same link!
                          Last edited by weeliano; 19-06-2006, 10:51 AM.

                          Comment


                            #14
                            The Marchetti looks superb in flight. I have the plan for this plane from RCmodellers many years back, but its for a foam rubberband-powered version haha

                            Comment


                              #15
                              I must salute to Mr Weeliano for the patient u hv both in R & D n writting out these full load of info ..... one word 'RESPECT'....

                              U really draw me into building somethg from Depron and Foam.
                              Roll call from hanger
                              -Kyosho, STRATUS 1600 Glider
                              -JH Spitfire-25 size (no 2.)
                              -Cap 232-15 size
                              -GWS P51 Mustang EP, from a nice DH flyer
                              -Dualsky Breeze PRO

                              Kissed the ground...

                              -Scanner
                              -JH Spitfire-25 size (no 1.)

                              Frequency

                              -Spektrum, DX7

                              Comment

                              Working...
                              X