Announcement

Collapse
No announcement yet.

Sig Cub 1/5 Scale Build

Collapse

Zenm Tech Pte Ltd

Collapse

Visit Zenmtech at rc.zenmtech.com

X
 
  • Filter
  • Time
  • Show
Clear All
new posts

    Sig Cub 1/5 Scale Build

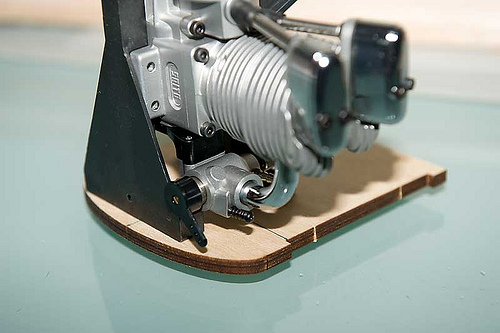
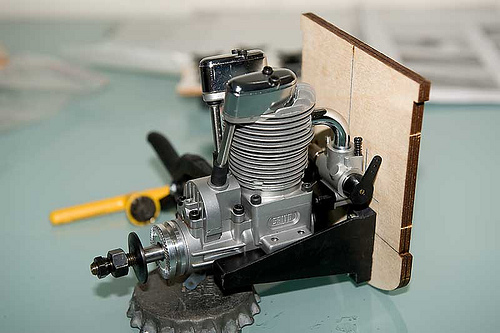
    Time to get started to build something for the forthcoming scale fun fly in November. I thought the Sig 1/5 Cub would be an easy enough build to be ready by then. Having a new and unused Saito 70 made the decision a no brainer.

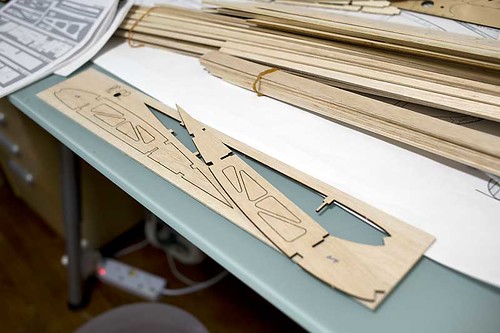
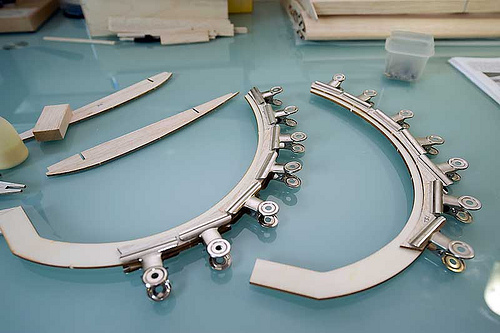
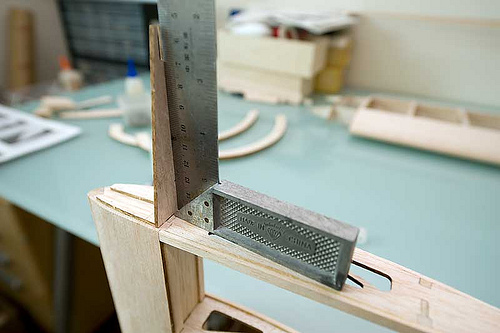
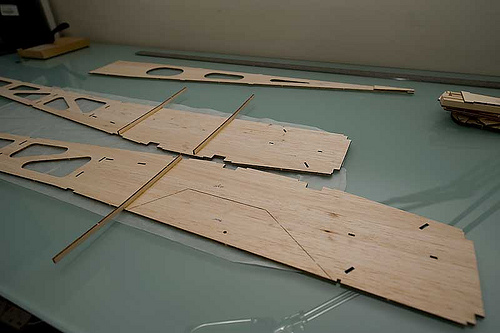
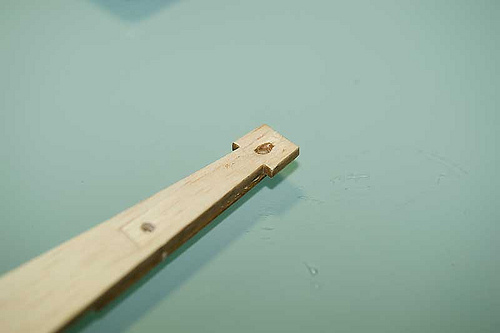
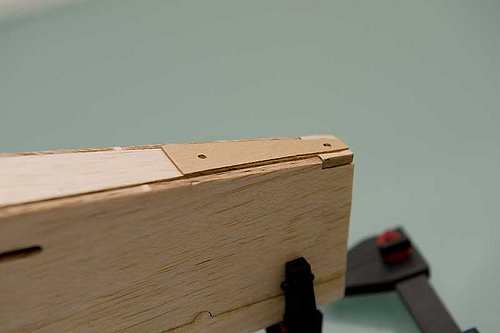
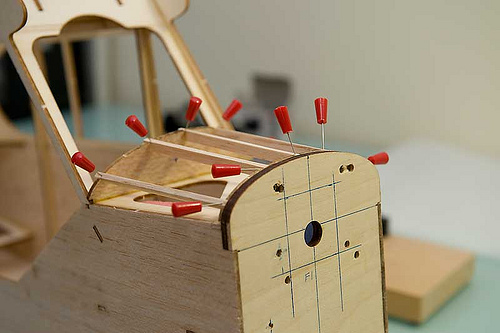
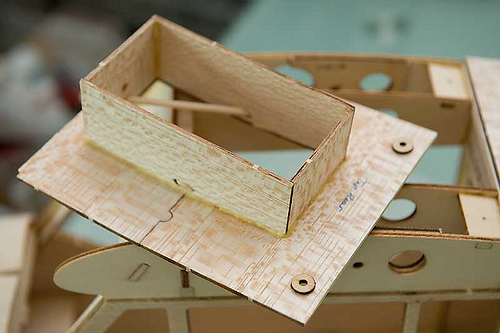
    Typical Sig quality balsa ie. balsa is nice and crisp. None of that soft and weak or super heavy stuff. Quality was very consistent throughout. The laser cutting on this kit is very good. Parts just about almost fall out and fit is very good.


    4 rolled plans are provided in the kit. I found out that I had an extra plan no. 3 and was short of plan no. 4. An email to the Sig had the missing plan arriving in a tube in just a little over a week. Good after sales service.

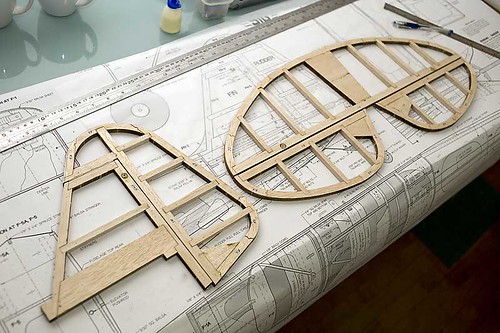
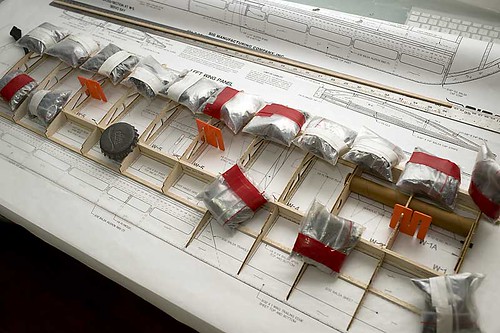
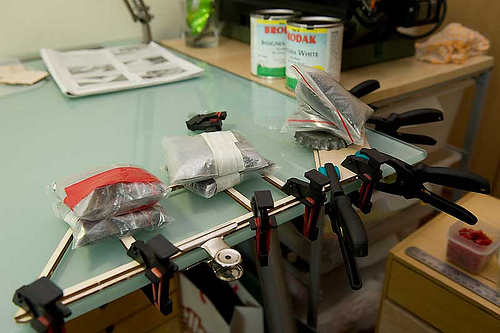
    I start by plucking all the parts out and keeping them in zip lock bags.


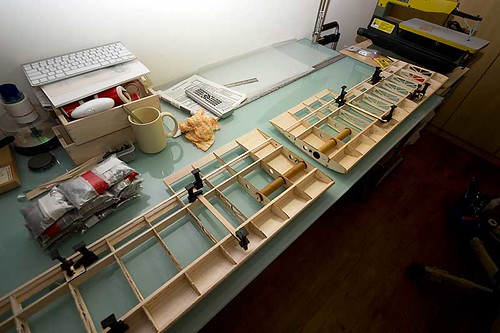
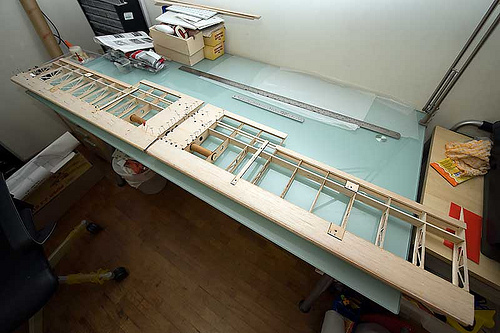
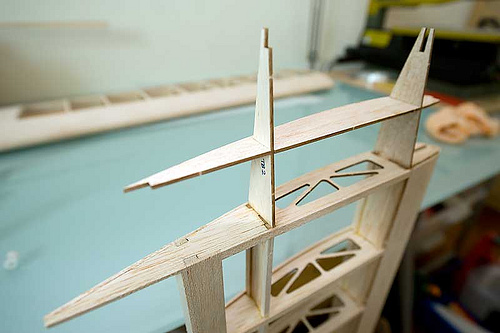
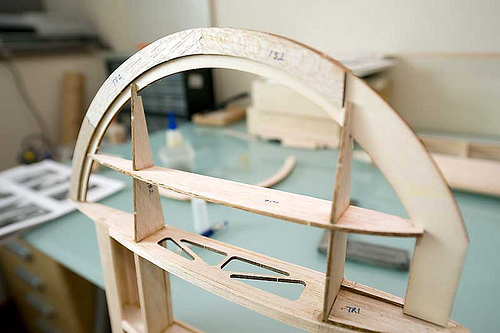
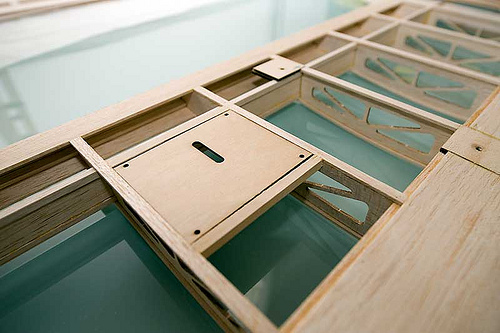
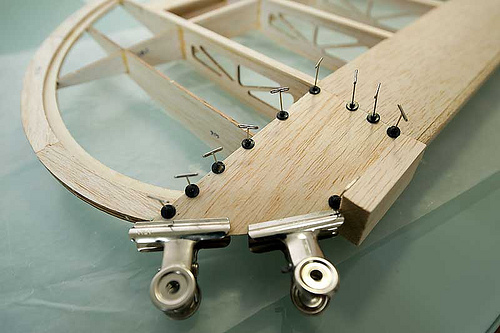
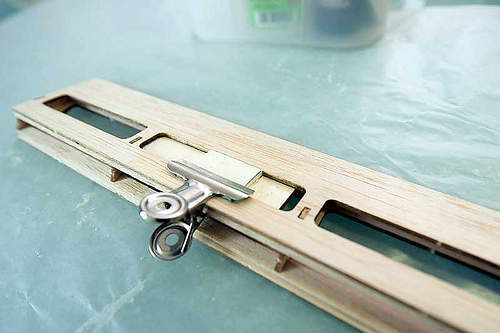
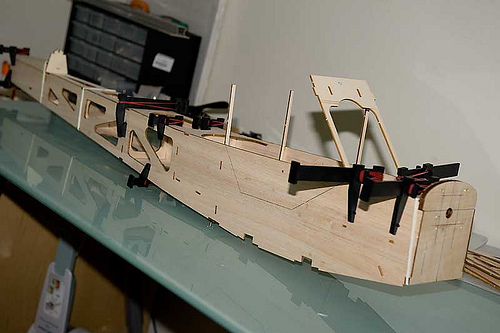
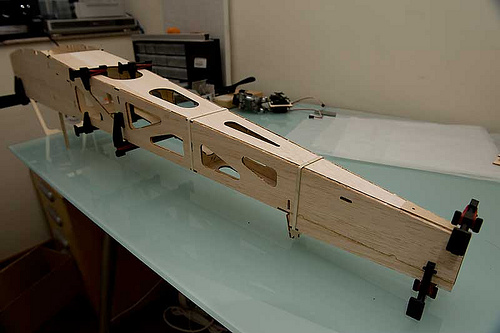
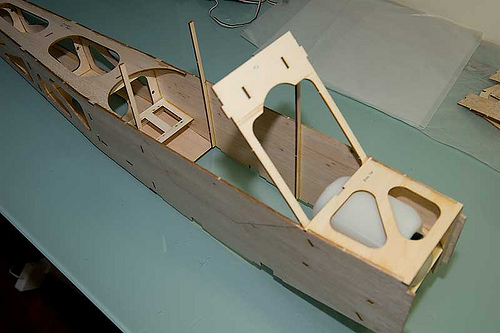
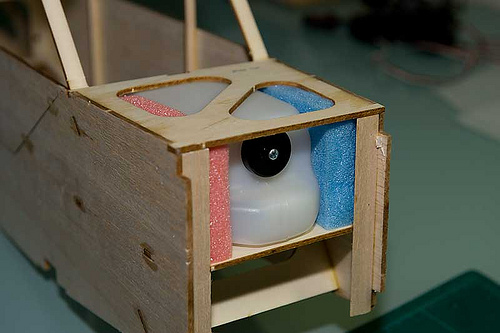
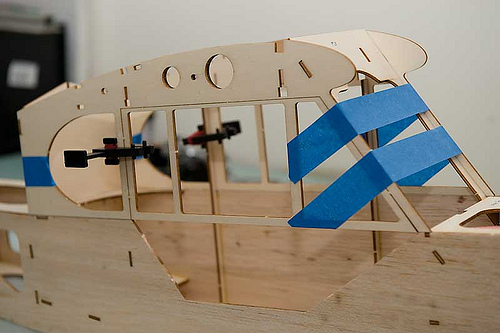
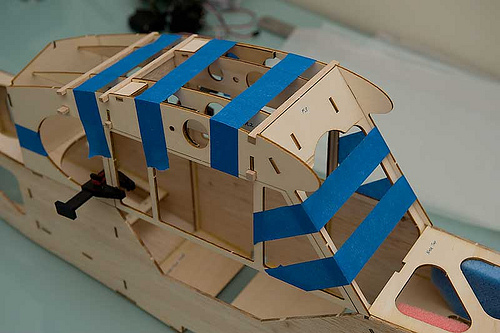
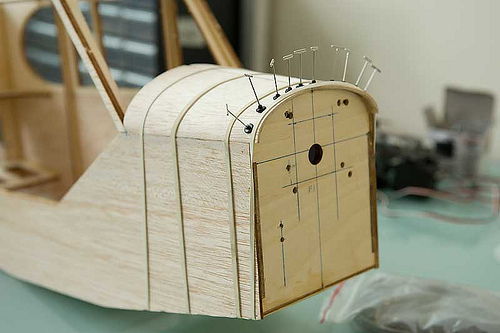
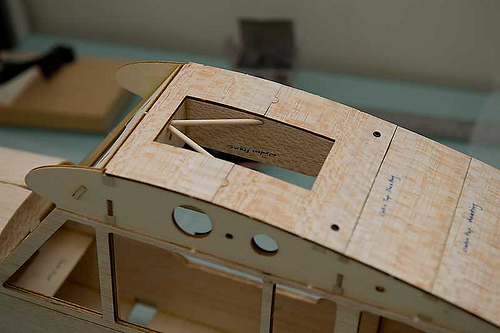
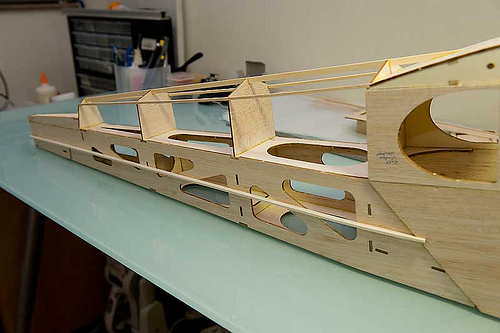
    So far, the kit is coming together very quickly. Faster than I thought it would. The excellent parts fit and clear instructions had a part to play in this. I've finished the tail group and should be completing the wing within a week.

    Last edited by Tony; 26-07-2009, 12:03 AM.
    To win........one must not lose.

    Confucius

    #2
    Moving along quite quickly. Its a two part wing. They are joined by an aluminum tube. I'm building the J-3 cub and not the clipped wing cub, the wings will end up at 84.5 inch wingspan so a two part wing will come in handy during transportation.

    Last edited by Tony; 27-07-2009, 02:21 PM.
    To win........one must not lose.

    Confucius

    Comment


      #3
      Hi T,

      Look like you got your works cut-out for you for at least a couple of weeks. Have fun and hope to see your completed plane at the field.

      Cheers
      TB

      Comment


        #4
        Originally posted by tboltsg View Post
        Hi T,

        Look like you got your works cut-out for you for at least a couple of weeks. Have fun and hope to see your completed plane at the field.

        Cheers
        TB
        Hi TB,

        So far so good. Its been a relatively easy build. Sort of like a big trainer. Instructions has been very clear so far but if I were to do the wing all over again, I'd sheet and cap strip the bottom of the wing first then the top instead of the other way around as given in the instructions. This plane has a flat bottom wing so doing the bottom first will allow one to hold the wing down flat and before completing the upper sheeting. As this will lock in the wing permanently, being able to do it when flat on the table will pretty much ensure that there will be no warps to have to contend with. Doing it the other way around per the instructions requires the use of scrap balsa to jig the wing to make sure it is warp free since the upper surface of the wing has the curved airfoil shape and won't lay flat on the table without the jigs. This is quite a bit of work and time but not difficult.

        Here I have just finished the centre sheeting of both wings. It doesn't show the jigs because I have already taken them off. Forgot to take some photos with the jigs on. They are just left over scraps of balsa Zapped to the leading and trailing edge and then Zapped to the glass top to hold the wing straight and true before commencing with the upper wing sheeting.


        This is the first time I am building a plane using a glass table top instead of a wooden building board - a method I have used since I was a kid. Using plate glass is a method taught by Dave Platt in his instructional videos on scale building. The benefit is that the glass top is absolutely flat and never warps and one just Zaps the balsa jigs directly to the glass. When finished, one just snaps jigs off the glass top. Neat stuff. Wonder why I never thought of this????
        Last edited by Tony; 30-07-2009, 08:57 AM.
        To win........one must not lose.

        Confucius

        Comment


          #5
          Finishing construction of the wing. Here the wing tips and ailerons are being finished.


          The instructions says to epoxy nylon horns to ply supports for the ailerons. I decided to modify this as I have my doubts as to the longevity of such an arrangement. Epoxy doesn't stick too well to nylon. Should it come lose, I'd lose the plane or at the very least, will have to rebuild the ailerons with a more sturdy arrangement to mount the ailerons. I decided, I might as well do it now than later. Using scrap ply, I secured ply mounting plates on each aileron. The horn will be attached to these externally after the ailerons are covered.


          So, save for final sanding and covering, the wings are finished. Next week will see the start of the fuselage build.
          Last edited by Tony; 02-08-2009, 09:33 PM.
          To win........one must not lose.

          Confucius

          Comment


            #6
            Good work......keep it up!

            Comment


              #7
              Originally posted by Lee View Post
              Good work......keep it up!
              Thanks.
              To win........one must not lose.

              Confucius

              Comment


                #8
                Fuselage starts with putting together the fuselage sides.


                A problem with the engine mount came to light. With the Saito 72, side mounting the engine causes the throttle lever to be in the way of the cowl. And there is no way I can snake a throttle cable that far up without having binding issues. Further more, the engine ended up sticking 10 mm too far forward. This means that the engine has to be mounted inverted to solve the throttle lever positioning problem. Shucks, will now have to buy a 90 degree header and a flexible exhause hose.


                To solve the problem with the engine length, I considered shortening the nose of the plane and shifting back the firewall by 10mm. Just a little work but I decided to swap engine mounts and modify one of the legs to allow the engine to be shifted backwards by 10 mm. Its a snug fit with little room to spare but it'll fit. Perhaps, a bit of the valve covers may have to show out of the cowl. I may consider getting a Laser 80 but it is going to cost $$$. It'll definite fit in the cowl for sure and it's reliability is legendary especially since this is an inverted engine set up. Hmmm, think think think.........

                Last edited by Tony; 07-08-2009, 09:35 AM.
                To win........one must not lose.

                Confucius

                Comment


                  #9
                  The tailwheel is mounted onto balsa. Its not going to take too long before the tailwheel crushes the balsa. I decided to strengthen it by gluing a 1 mm ply reinforcement.


                  The fuselage parts being assembled dry for glueing later.


                  To win........one must not lose.

                  Confucius

                  Comment


                    #10
                    Looks good, Tony. Will start work this weekend on my 1/8 scale Piper L4 Grasshopper. Have a great long weekend.

                    Comment


                      #11
                      Originally posted by preferscale View Post
                      Looks good, Tony. Will start work this weekend on my 1/8 scale Piper L4 Grasshopper. Have a great long weekend.
                      Greaty! Hope to see it up at this forum.
                      To win........one must not lose.

                      Confucius

                      Comment


                        #12
                        Continuing with the fuselage. Here the basic fuselage is glued up. With accurate laser cutting, it can be assembled without the use of glue and then glued only when everything is perfect.


                        The upper cabin is then added on.


                        To win........one must not lose.

                        Confucius

                        Comment


                          #13
                          Engine bulkhead gets epoxied on.


                          Fuselage doublers being fixed on. Fuselage is surprisingly light at this stage - weighs almost nothing.

                          To win........one must not lose.

                          Confucius

                          Comment


                            #14
                            Left cabin doubler pinned down and waiting for glue to dry out.


                            Access to the electronics is via a scale opening side door and window panels. Here they are formed on the table top while drying to ensure that they turn out absolutely flat.


                            Nose sheeting in place.


                            The J3 Cub has a "sunroof". The kit is designed so that this part is removable to allow access to the wing mounting bolts.


                            Here the "sunroof" is bolted on the wing. The gaps are necessary to allow for the thickness of the covering material that will go on later.

                            Last edited by Tony; 11-08-2009, 02:27 PM.
                            To win........one must not lose.

                            Confucius

                            Comment


                              #15
                              Something I wasn't going to repeat was to use the 1/8 x 1/4 balsa upper longerons supplied in the kit. Nothing wrong with the wood. Just that I had built a Sig 1/4 scale Cub more than a decade back and it had similar construction to simulate the stringer effect on the full scale. The only thing was that with balsa and a relative long span between supports (fuselage bulkheads), you can see that it doesn't take much to break the upper longerons. Once that longeron cracks, its a massive repair job.

                              So, I replaced the balsa sticks with spruce. It may still break if one were to apply sufficient pressure in the wrong places but its heaps stronger now for a minor weight penalty.


                              As usual, although the kit was very complete ie. no missing parts, its quite normal to end up short of sticks and sheets. Unless you utilise the wood in exactly the same way that the kit maker intended, you'll end up with a bunch of short cut offs and a few sticks/sheets short. In a country where we don't get the full range of balsa wood sizes available at the local hobby shops, one has to be prepared to make your own sticks and strips. With my trusty balsa stripper, I made a pair of 3/32 x 1/4 inch balsa sticks from firm 3/32 inch balsa scrap sheet stock in no time. Works out cheaper than buying ready made sticks and I get to choose the density I want too.

                              Last edited by Tony; 12-08-2009, 01:32 PM.
                              To win........one must not lose.

                              Confucius

                              Comment

                              Working...
                              X