Announcement

Collapse
No announcement yet.

Foamy Tucano Version 2 build thread

Collapse

Zenm Tech Pte Ltd

Collapse

Visit Zenmtech at rc.zenmtech.com

X
 
  • Filter
  • Time
  • Show
Clear All
new posts

    Foamy Tucano Version 2 build thread

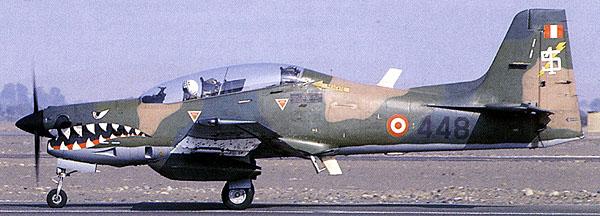
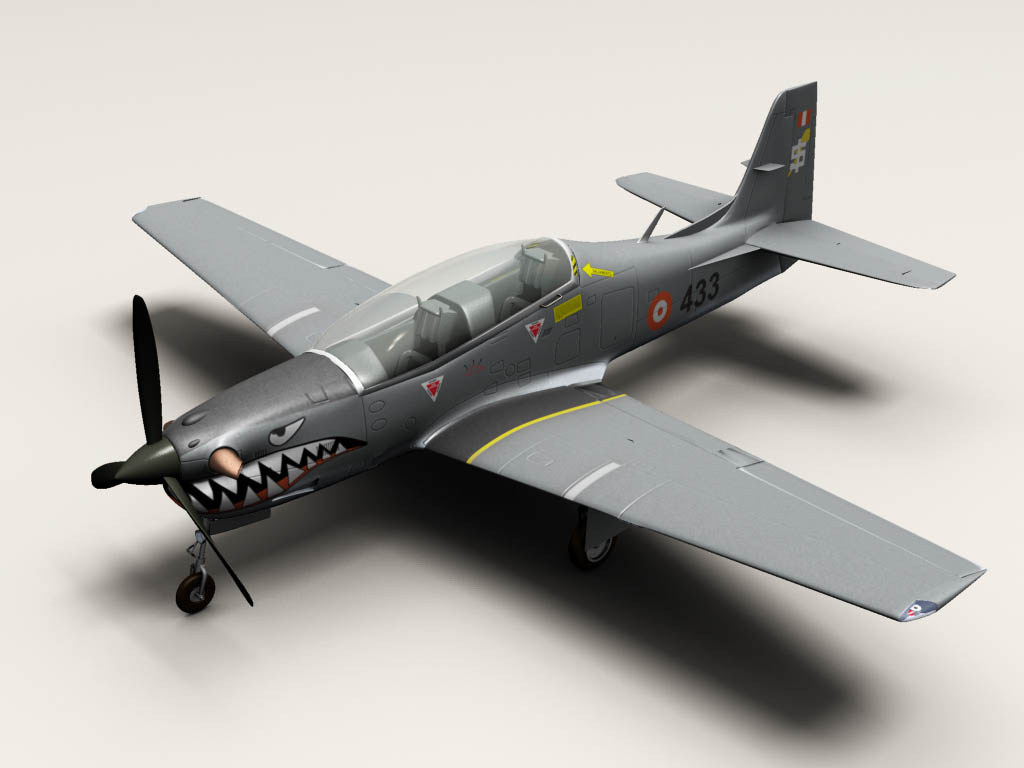
    My hands are itching to scratch build another plane again and what better plane to build than to build another Tucano. For the 2nd version I'm going make this one as streamlined and rounded as possible. If I got more time I'm going to use this paint scheme of the Peruvian Airforce.


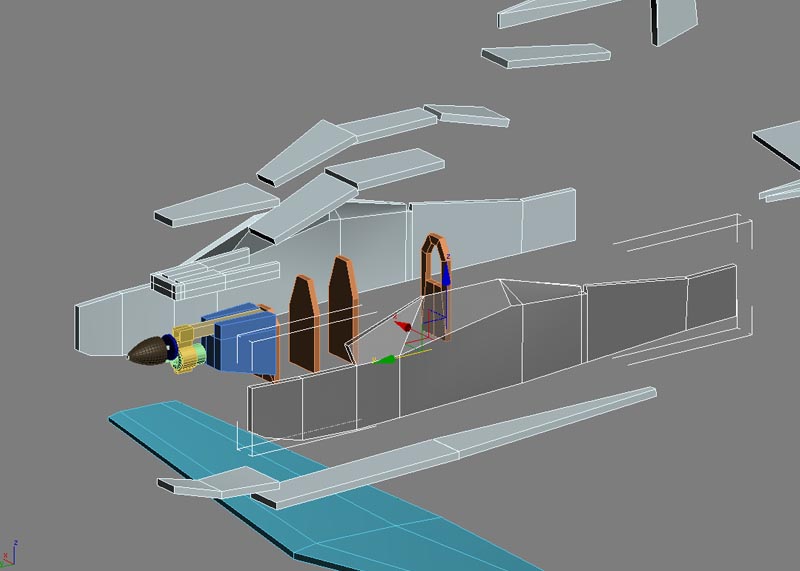
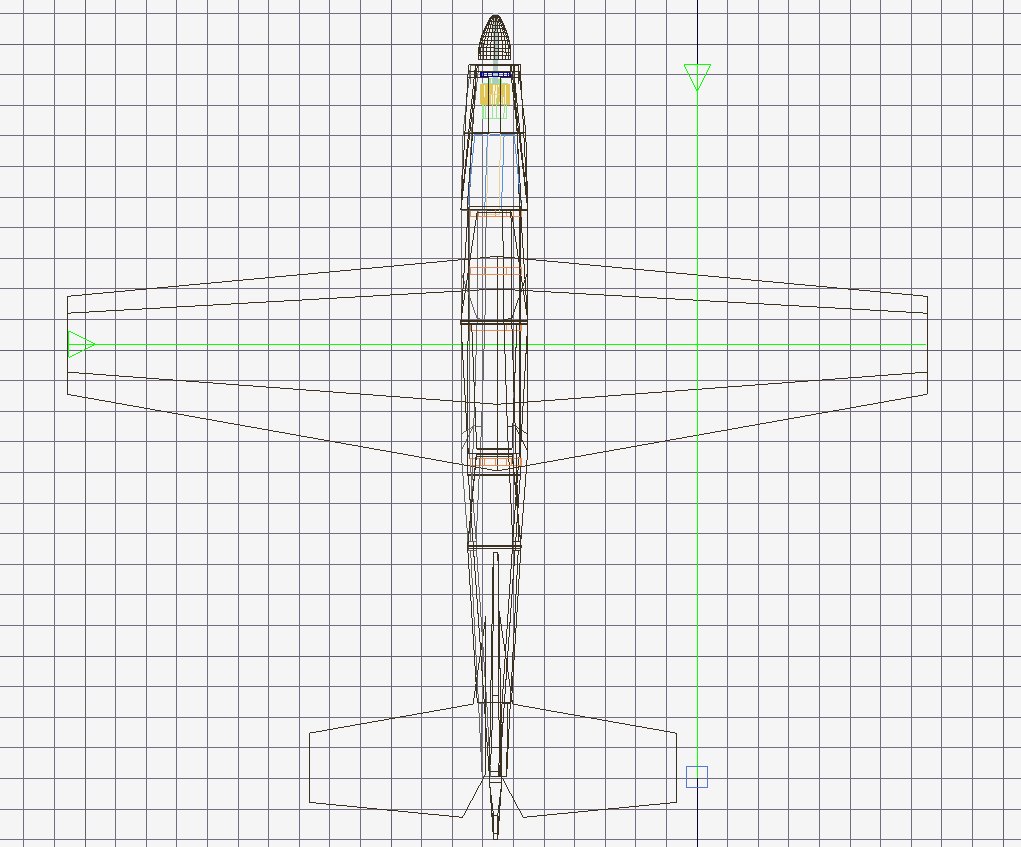
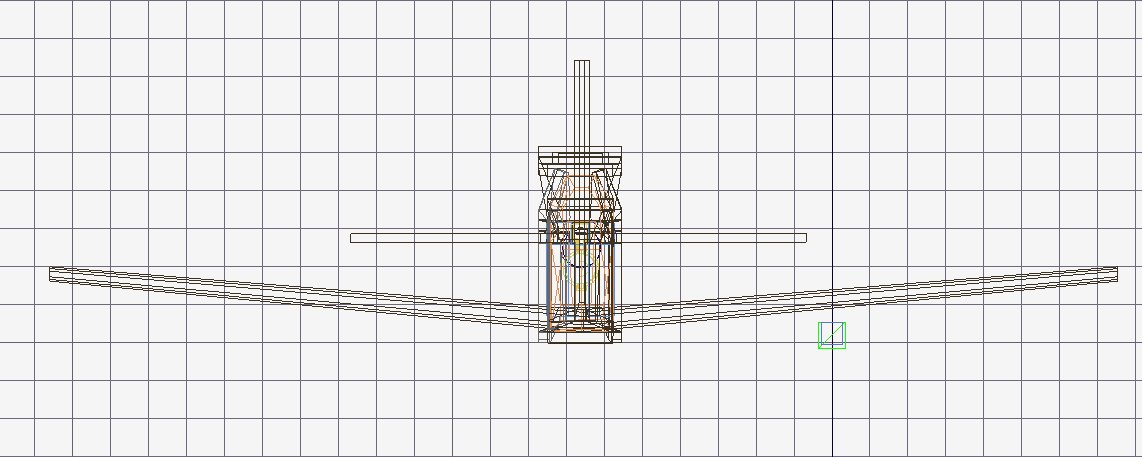
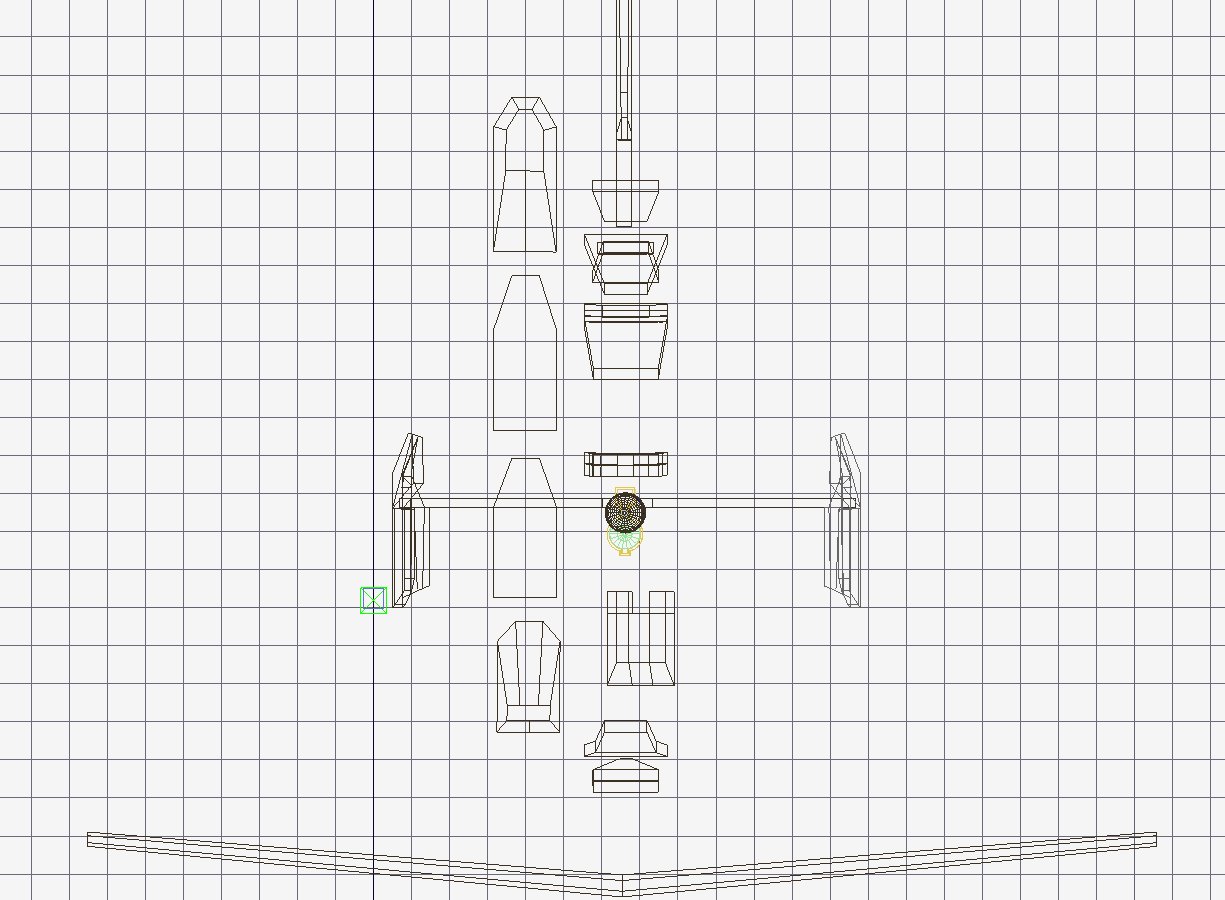
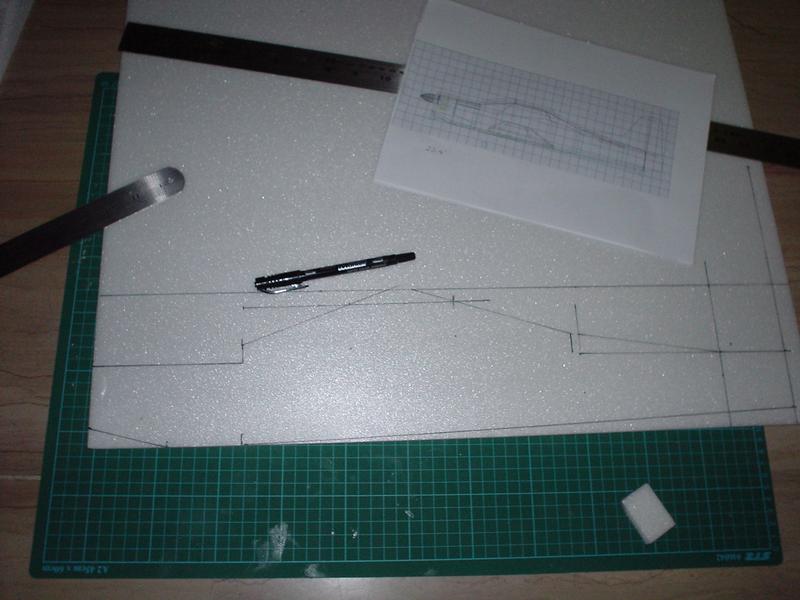
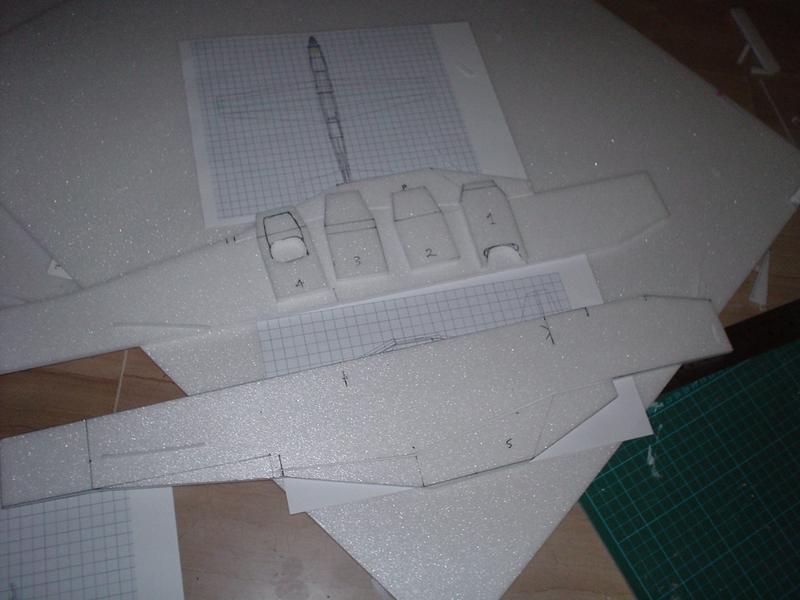
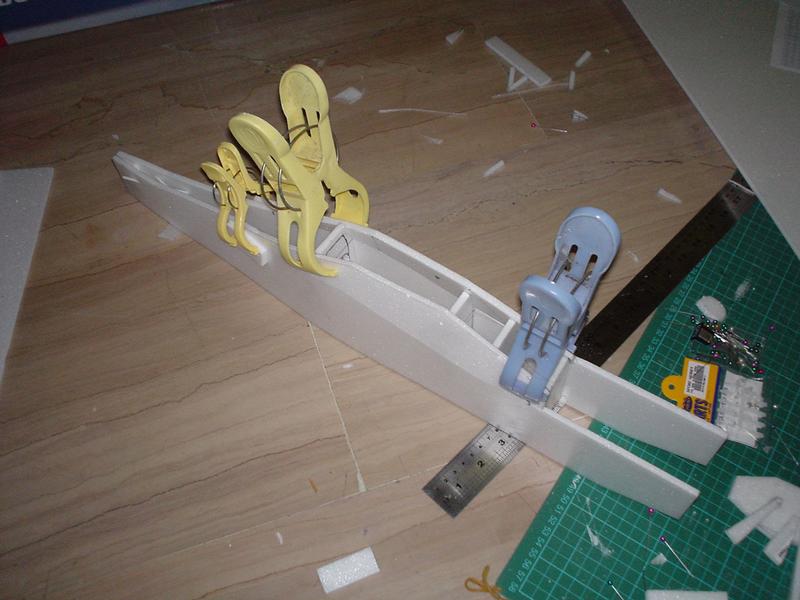
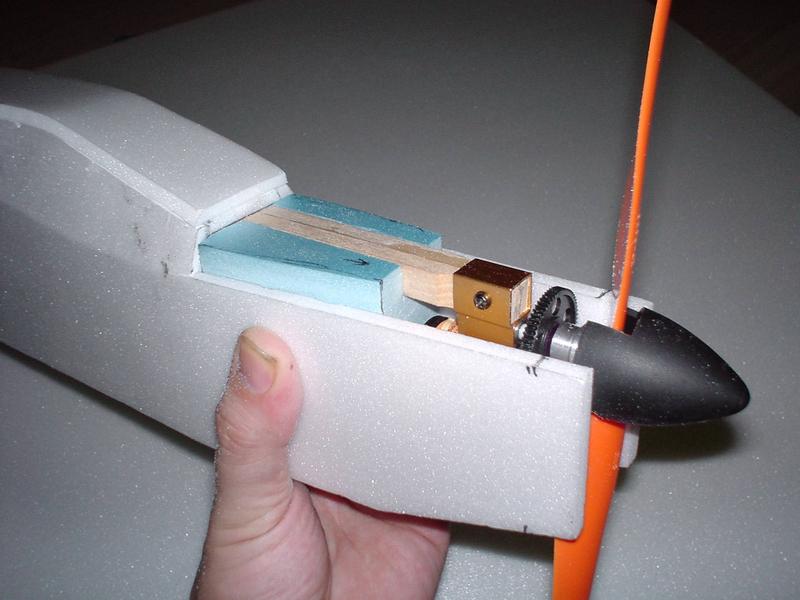
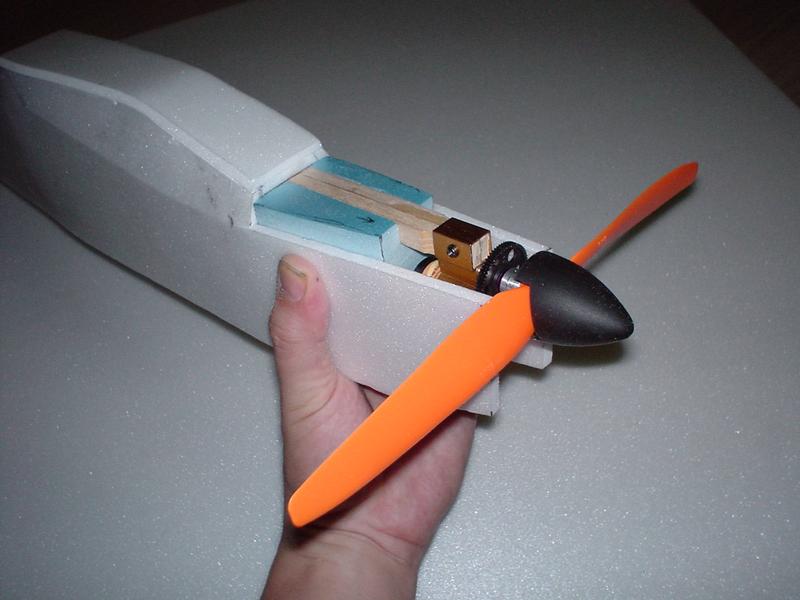
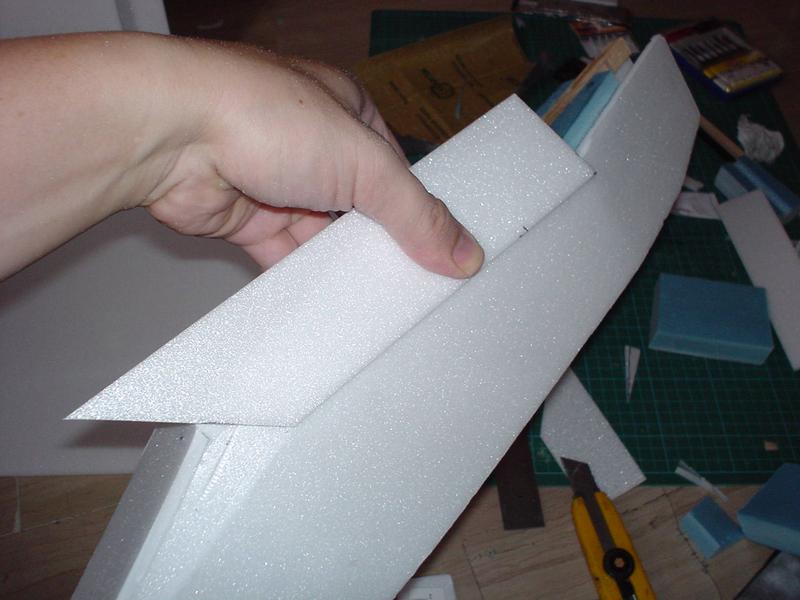
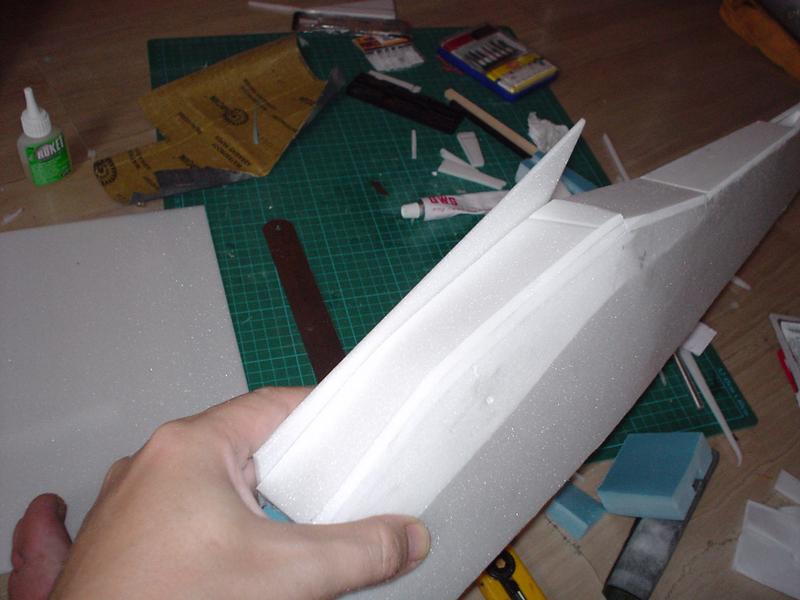
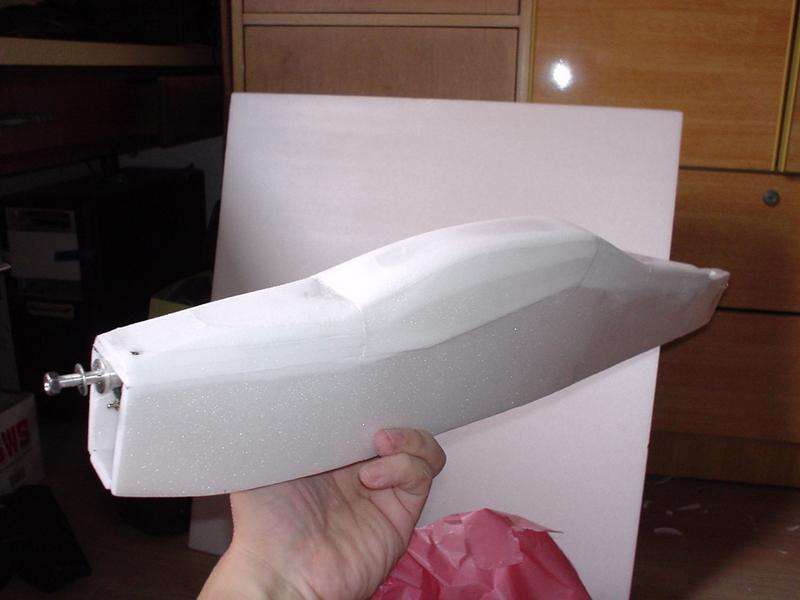
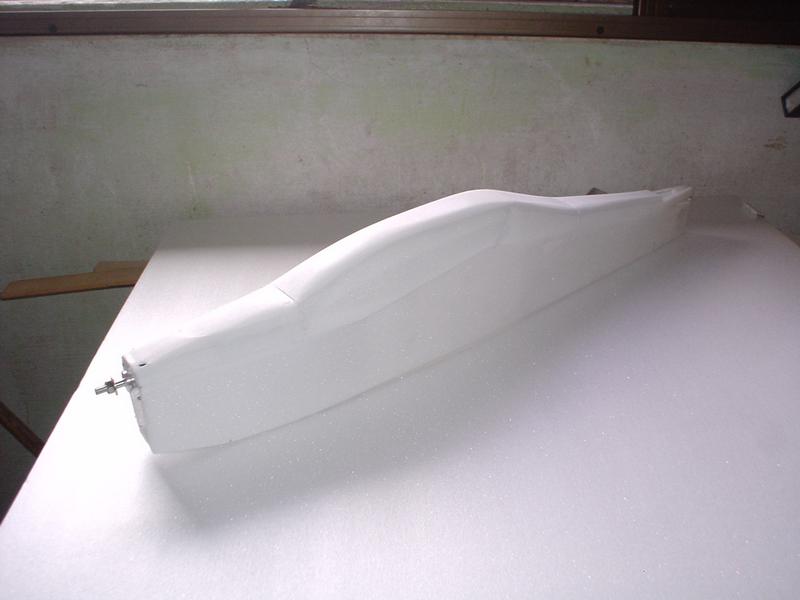
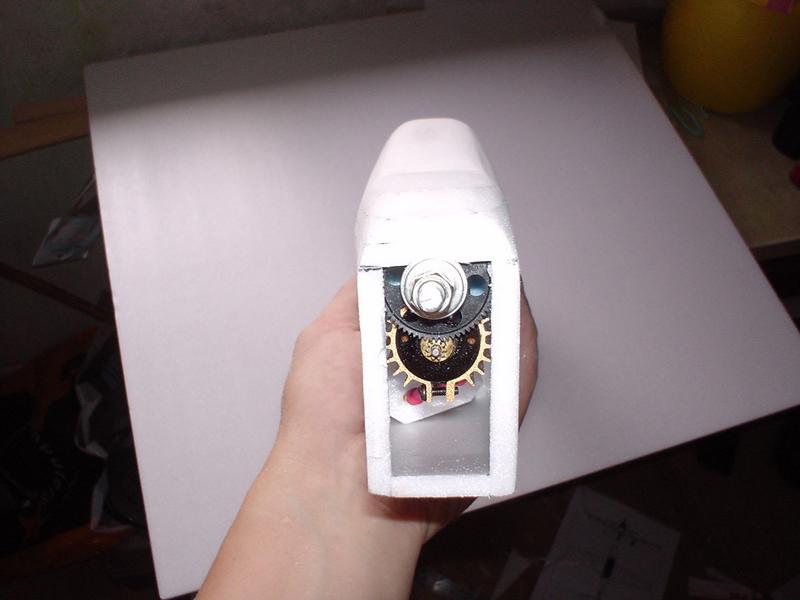
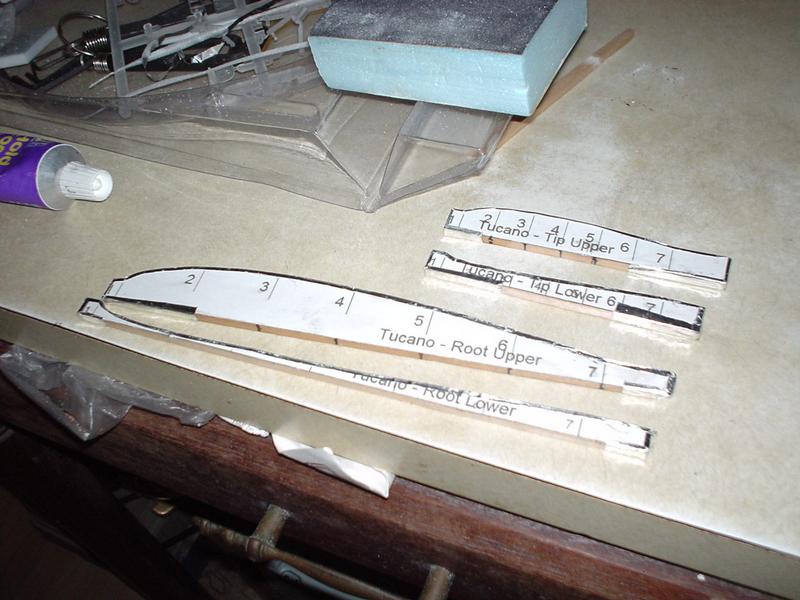
    At this stage, the plane is in 3D design stage to see how the foam fits together.


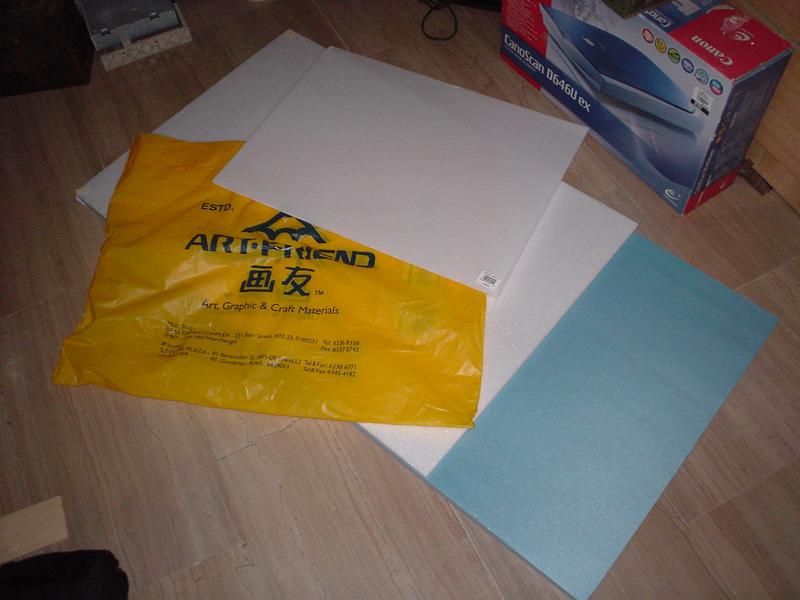
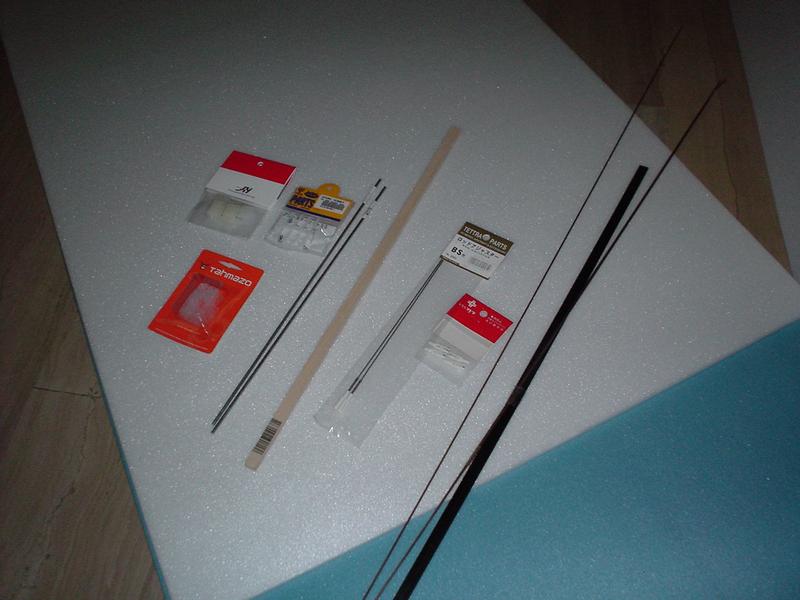
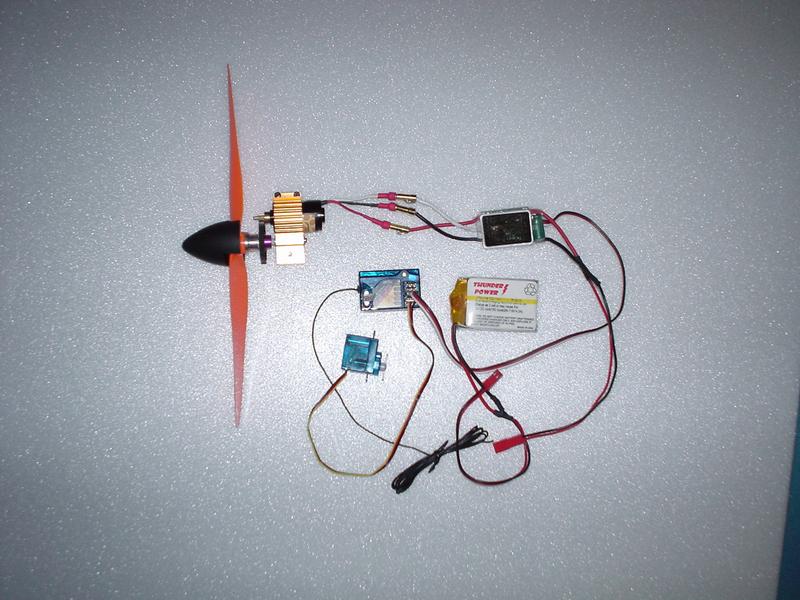
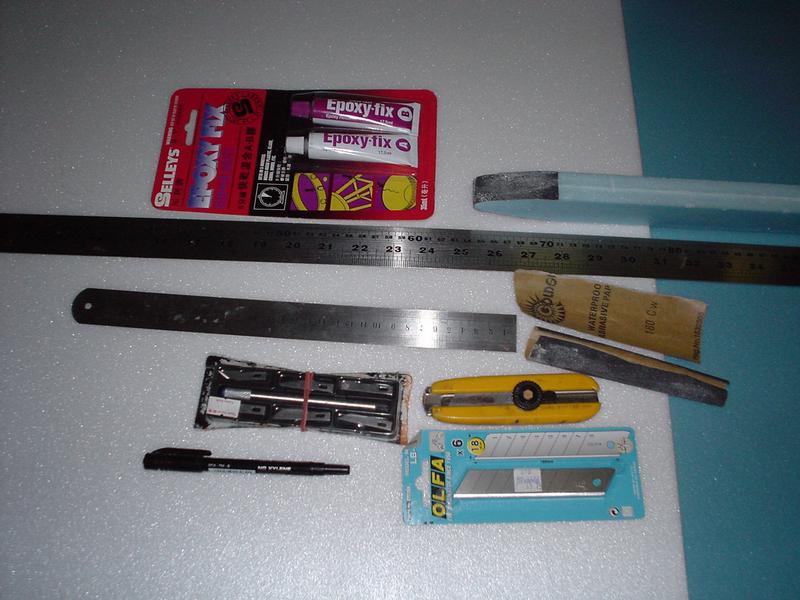
    I've already got all the building materials and I'm going to document each stage of my build progress. Stay tuned!

    #2
    Hi Weeliano,
    This is certainly a coincident, I am also planning to build the Tucano!
    I intend to use PE foam for the fuselage and Depron foam for the wing and tail. Target wingspan 30".

    MS

    Comment


      #3
      nice work Weeliano, great to have you sharing.

      Cheers! Happy building!
      Punggol Field Walk - Precision Landing Required!

      Comment


        #4
        Hi MS! and Pacman 
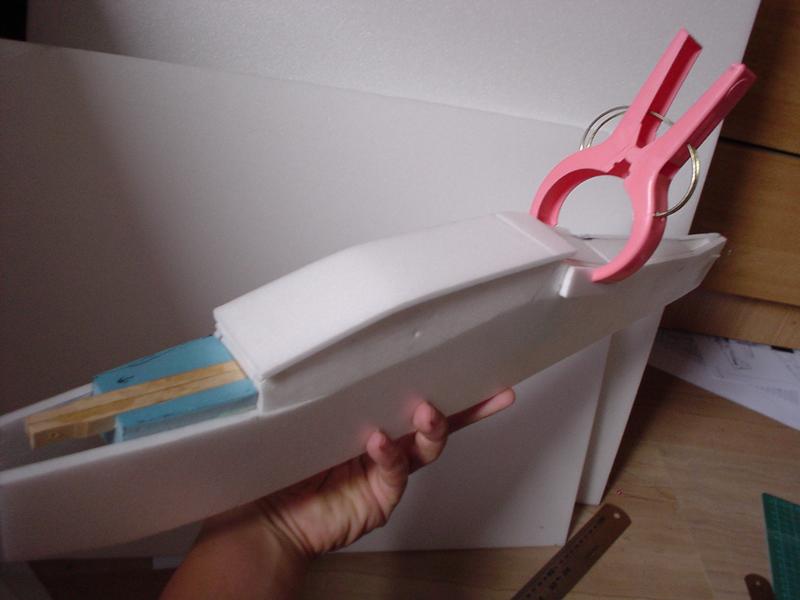
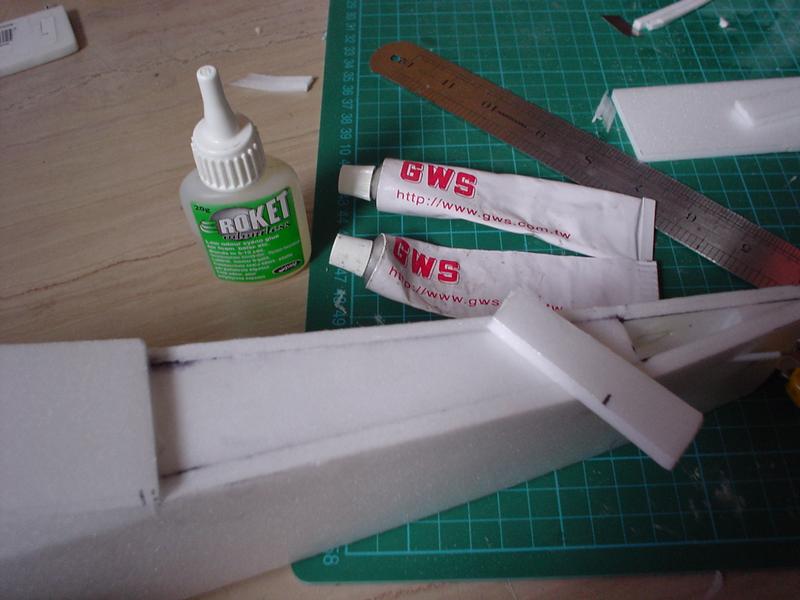
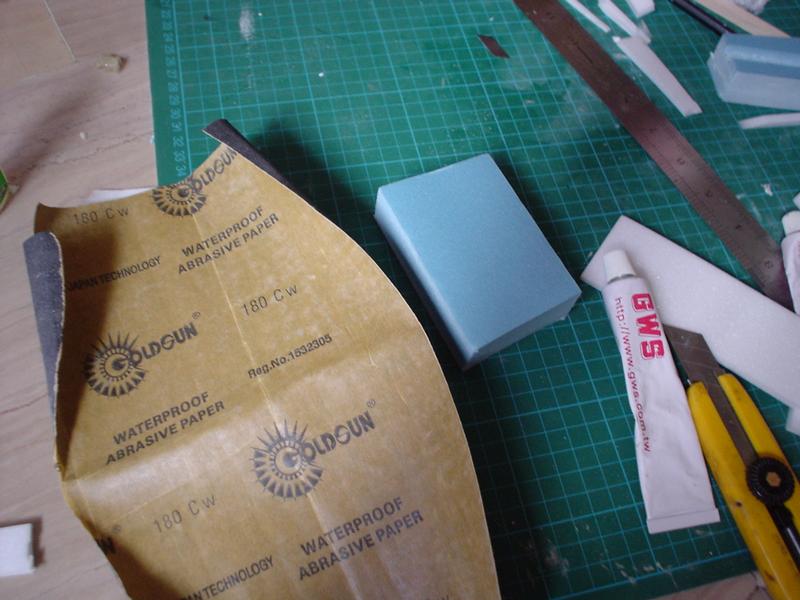
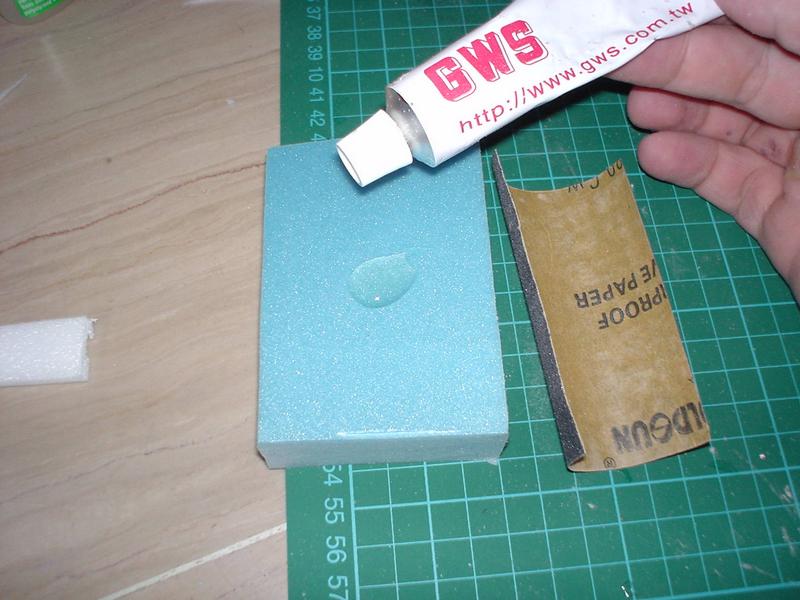
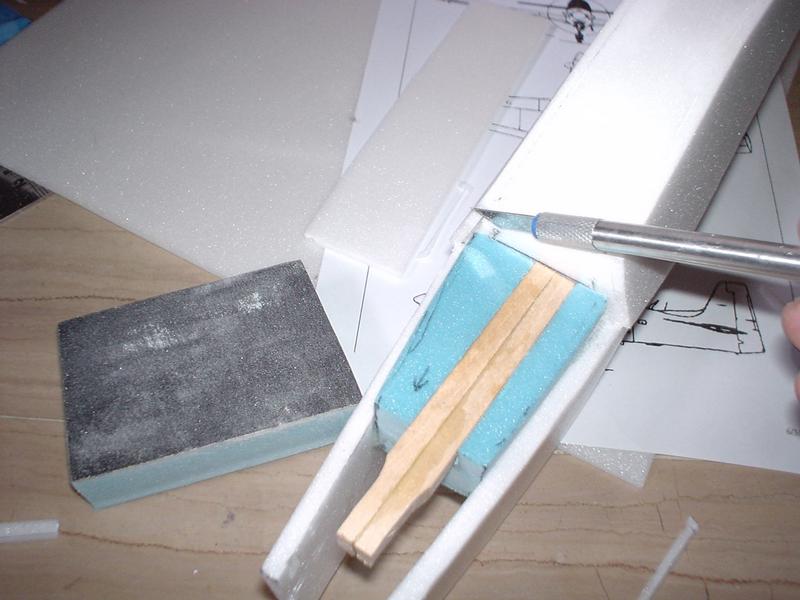
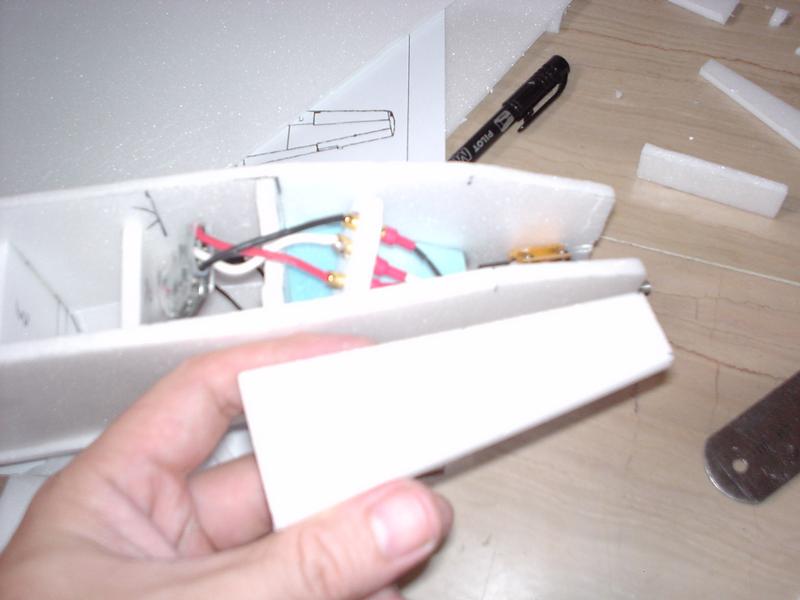
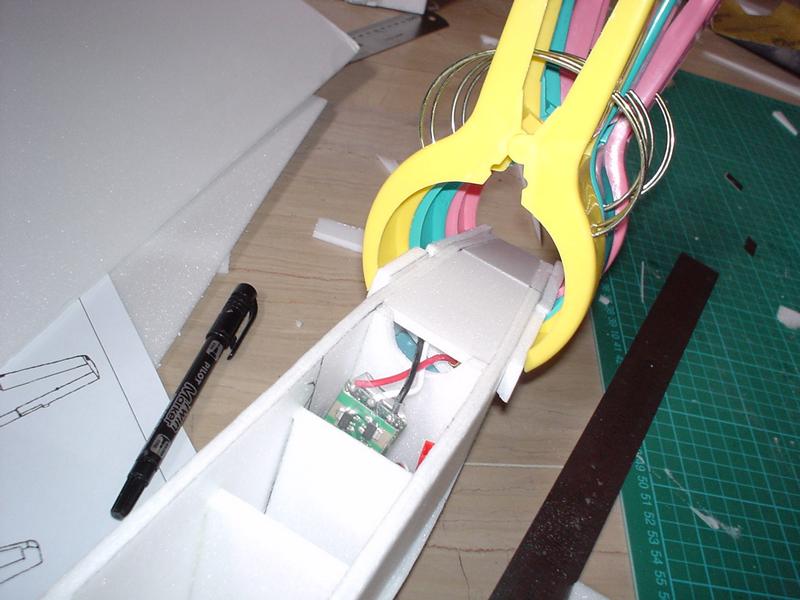
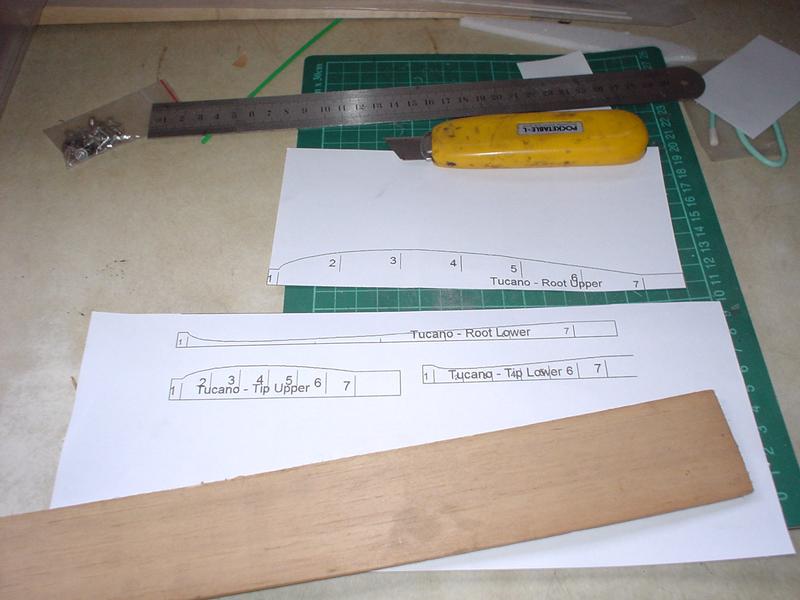
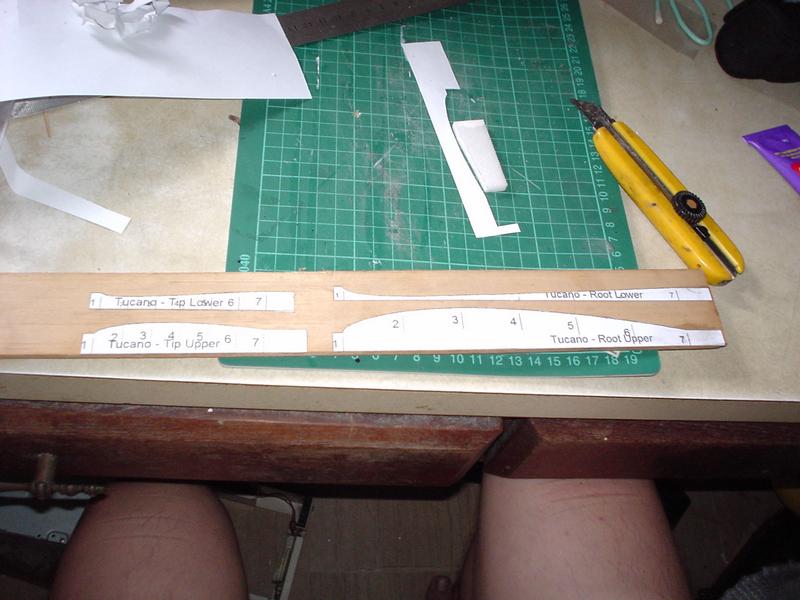
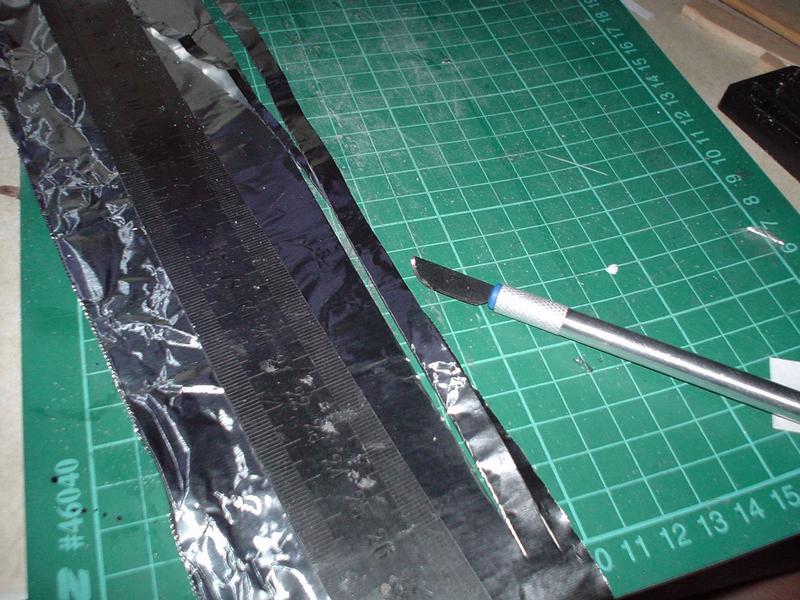
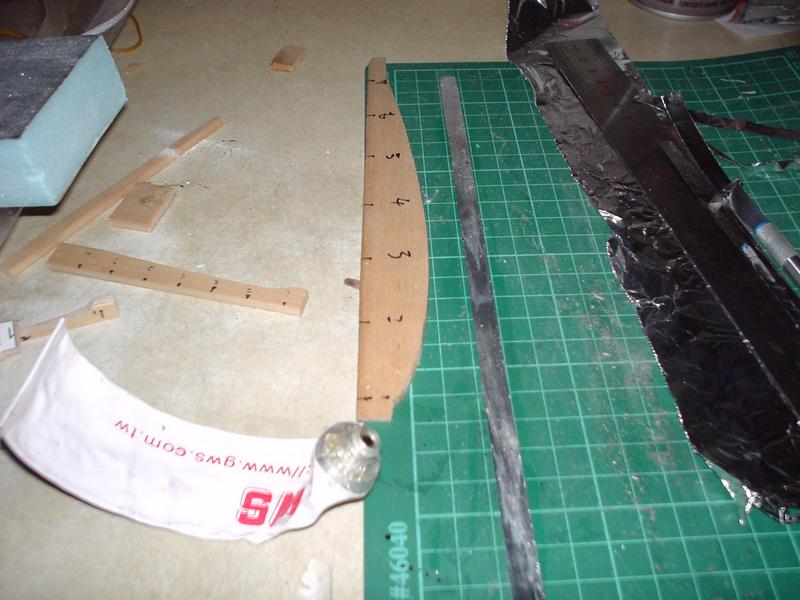
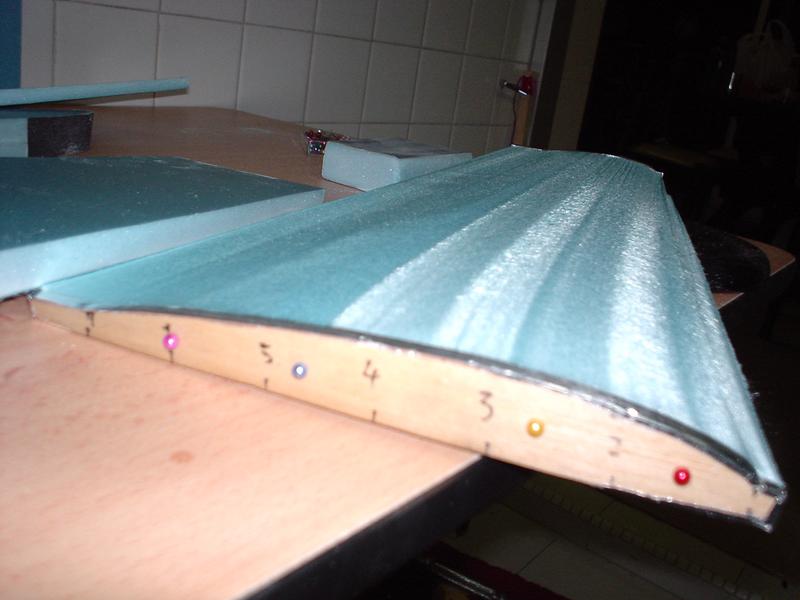
! My airplane's wingspan shall be 28". I have just printed out the line drawings and these will help me to mark out the depron and start cutting. Each square box in 1" in length. Having the box grid will help me to measure the parts correctly quickly. The plane on the drawings look boxy now, but after the depron layers are glued and set, I will be using the Olfa cutter to shave it down and sand it smooth.

        I will be listing all the tools and materials I've used, hopefully this will act as a guide to enable anyone who is interested in designing and scratch building their own plane. Today I went to the hobby stores to pick up nylon hinges and clevis for my Tucano.


        Comment


          #5
          Build report update 1

          Okay here’s the latest update on the build progress,

          The materials I got for my new Tucano are 6mm Depron and 1 inch Blue foam acquired from Art Friend at Bras basah. I also bought a couple sheets of 3mm Depron for the directional and lateral fins. The material I bought is enough to build 3 or more Tucanos with left over! And all for less than $14!


          Besides the building materials I had to get other accessories like wire for making pushrods, plastic clevis, horns, spruce, carbon fibre, aluminum tubing and most important of all plastic hinges.


          Here’s my power plant and electronics


          Some of the tools (not all)I use. The most important are the Olfa cutting knife with fresh blades, large and medium sized vinyl cutting mat, super long steel ruler (100cm) and 30cm steel rulers. The large vinyl mat will prevent you from ruining your marble floor, parquet, or carpet while cutting your depron and blue foam and the super long steel ruler is great for cutting long straight lines.


          The first thing to do is to mark out the depron based on your design.


          Once the depron is marked properly, the first side is cut and used to stencil the other side. Make sure you hold the blade perpendicular before cutting the depron to ensure a flat edge. For my design, I cut an angled groove into the bend lines so that I can fold the depron inward to form the cockpit and later to be layered with more depron to enable me to sand it into a rounded shape.


          Short change in design, I realized that the bulkheads are too long and had to be trimmed to accommodate the wing, so they are shortened accordingly.


          Once the bulk heads are shaped, the last bulk head has a hole trimmed to enable pushrods to go through. The first bulk head has a round slot cut below to enable the motor power cables to be strung through. The bulk heads are then carefully positioned and epoxied to one side of the fuselage.Yup! That’s my big toe, this plane is built sitting down!


          The other side is glued.


          Once the epoxy has set, the folded areas can be glued. It is important to wait until the glue has set and hardened before moving to the next step. Rushing the build will only result in a poorly finished fuselage and could affect the shape and thus performance.


          Holding the depron with our hands and fingers while waiting for the glue to set is no fun, I borrowed these extra large clothes pegs from my mum to do the job for me. I liked them so much that I went to the store to purchase more giant plastic clothes pegs, they are dirt cheap, 4 for $1.


          The plastic tubes from the cotton ear buds are extremely useful, I use them as push rod guides which in this picture you see them glued to the slanted holes I made using a sharp and thin mini screw driver.


          It will save you a lot of hassle if you plan ahead and placing the push rods into the fuselage first will save you a lot of trouble later when you install the servos.


          The paneling can start and I start to panel the tail section first using the Roket brand foam safe cyanocrylate super glue. Using the glue can be tricky, you don’t use too much of it otherwise it won’t work and make sure the surface of your depron is free from depron dust and dry. I find that using a hairdryer while clamping the joint can speed things up a little. The picture shows the 1st layer of paneling for the canopy applied and trimmed with a sharp blade.


          While waiting for the glue to set on the fuselage, I kept busy by making the motor mount from spruce. Because I don’t have the appropriate thickness of spruce I glued two pieces together using epoxy and shaved the end till it fits the aluminum gear box.


          Using a el-cheapo exacto knife set and my trusty Olfa knife I fashioned a motor support from blue foam.


          I bought this el-cheapo exacto knife set from those budget stores at $1!!!


          The blue foam support is held against the fuselage and marked to be shaped.


          A Sakura dual head marker is a great tool for marking foam.


          My new giant clothes pegs at work, holding 2 pieces of blue foam while the epoxy sets, you can see from the picture that waste pieces of depron can be used to prevent the pegs from nicking the surface. I added another layer of blue foam to give it more surface area to be glued to the front of the fuselage.


          After the glue has set, I sanded and shaved the blue foam to shape and test fitted the mount.


          Bringing the partly finished motor mount to the fuselage, I marked out the excess depron that’s obstructing the propeller and spinner.


          The sides are trimmed and now the blue foam support and mount can be permanently glued to the fuselage.


          Okay this ends my first update.

          Comment


            #6
            Wow.wonderful build thread with pictures~Looking fwd to round2.gd luck

            Comment


              #7
              wah skill man!
              "To invent an airplane is nothing. To build one is something. But to fly is everything."- Otto Lilienthal

              "To fly a plane, a pilot must have cool brains and hot hands!"- Dennis John De Witt

              Fubata 7C 2.4 + T6XAs
              E-starter (GWS) - On "Fire", Trainer, -Sold
              SPITFIRE (GWS) - On "Fire", -Sold
              T-45 Goshhawk 64 mm EDF - Lift-off!
              UAV Scratch Build Ver1.1 - It flies! -Sold
              Mini Cessna scratch build - fun!
              F330 Quadcopter W/KK2 V1.5 - Finally Tuned!
              Charger- Turnigy AC6
              sigpic

              Comment


                #8
                2nd Update

                Tucano Build Thread 2

                Okay more peektures!!!

                Still working on the paneling and there’s lots of area that needs to be paneled. Here you see the tail section panels being applied both internally and on top. As usual, I’m taking a slow approach here, waiting for the glue to set before moving on to the next panel


                I used 3 different types of glues in my construction. For large surfaces to glue, I use the leftover GWS glue I have from previous kits, they are excellent for gluing Depron. I spread a thin layer between two surfaces, wait a few minutes for the ether or alcohol to evaporate and then press them firmly together. For small areas like the internal paneling, I use the superglue. For areas I need maximum strength I use the 5 minute epoxy.


                Making a sanding block from Blue foam is very simple. Cut an appropriate sized blue foam block for your need and stencil it over your abrasive paper.


                Spread a thin layer of GWS glue over the block.


                Wait a few minutes before pressing it down to the sand paper and there you have it!


                More paneling work done, this is to add side thickness to the cockpit canopy. Initially I wanted to use 6mm Depron but changed my mind and use the 3mm ones instead.


                The Depron is marked and duplicated for the other side. Before gluing the panels, the surface must be sanded flat and smooth.


                Cockpit panels glued


                Some trimming done.


                The Engine section is marked for paneling.


                Two layers of 6mm Depron are required. Notice the outline I have cut to accommodate the blue foam and also the slot for the round black gear. The side Depron surrounding the gear are also trimmed with slots to accommodate the gear.

                The previous picture shows a recess in the blue foam area, a thin sheet of Depron from the 3mm sheet is cut to fill in that gap and trimmed to give a flat surface for more Depron panels.


                More Depron panel madness! Looks chunky now, but that’s gonna change later!


                Work now goes on inside the engine compartment. A small piece of foam is pierced with 3 holes using a screw driver to act as separators for the motor contacts. The motor will malfunction when the metal pieces touch one another. Too lazy to tape them up and besides taping will leave a sticky mess.


                Bottom panel marked and prepared for gluing. For this type of panels, I use the superglue as the edges sits inside between the fuselage walls. And because there’s a bend, I cut a half slot to make bending easier.


                My trusty Giant Pegs at work.


                Once all the glue has set and dried, the panels and shaved using a Fresh Olfa blade. A new and sharp blade will make your shaving easier and less likely to cause fraying or accidental deep shaves. Using a rougher grade sandpaper, the fuselage is gradually sanded down.


                I’m taking my time here to shape the fuselage. It’s a good idea to get a dust mask during sanding and work in a ventilated area. Breathing in Depron dust is not a good idea.


                View from the front.


                Okay that’s it for this update. Here’s a photo of my scratch built FW-190D9 after a bad crash yesterday 
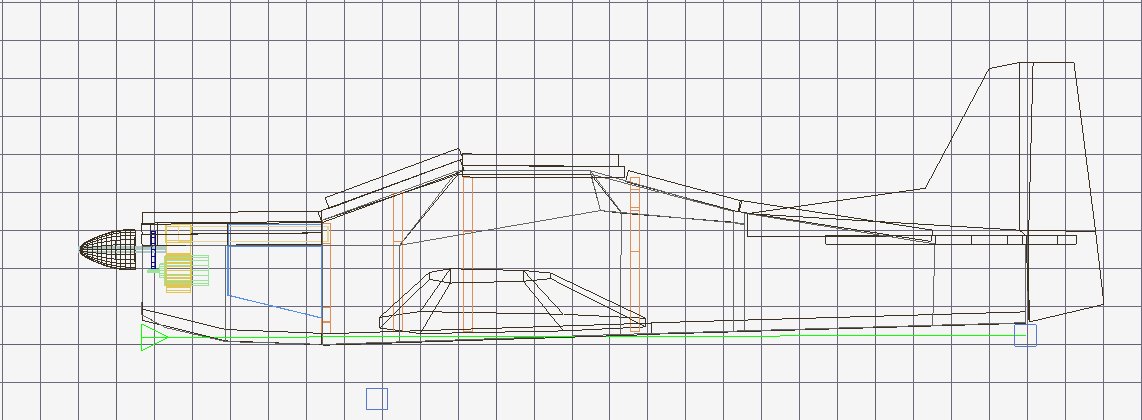
(Sunday) due to a combination of pilot error and poor design and also I haven't flown the FW for 3 months so I forgot it's flight characteristics . Oh well, maybe I’ll build a F8F-BearCat later which incidently was inspired by a captured FW-190 analyzed by Grumman engineers. You can see my first Tucano in the picture as well.

                Comment


                  #9
                  wow the foam separators are a brilliant idea! was almost abt to tape my gold connectors. whew. luck i saw that. thanks for sharing! sorry abt your lost of your fw.
                  "To invent an airplane is nothing. To build one is something. But to fly is everything."- Otto Lilienthal

                  "To fly a plane, a pilot must have cool brains and hot hands!"- Dennis John De Witt

                  Fubata 7C 2.4 + T6XAs
                  E-starter (GWS) - On "Fire", Trainer, -Sold
                  SPITFIRE (GWS) - On "Fire", -Sold
                  T-45 Goshhawk 64 mm EDF - Lift-off!
                  UAV Scratch Build Ver1.1 - It flies! -Sold
                  Mini Cessna scratch build - fun!
                  F330 Quadcopter W/KK2 V1.5 - Finally Tuned!
                  Charger- Turnigy AC6
                  sigpic

                  Comment


                    #10
                    Hi Weeliano,

                    Great work bro! Good to see other home-made planes construction in this forum. Hope more will join us to make home-made planes.

                    just to check how do you post at one thread 10pics?
                    most of us can only post 5pics at a time and I find it very tedious...

                    thanks.
                    Punggol Field Walk - Precision Landing Required!

                    Comment


                      #11
                      Hi Aeronautical!,

                      Yes Aeronautical, the loss of my foamy warbird is sad, I still have the wreckage in the big plastic bag 
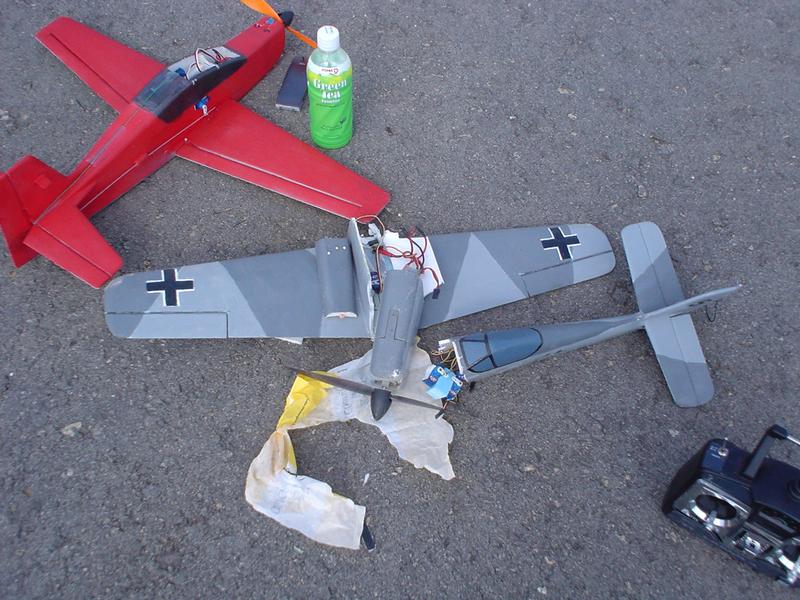
. But it was it's time to go, it did gave me several spectacular flights. I wasn't completely satisfied with my build quality though, I'm trying my best to match my friend Adrian's build quality on his P-40
                      with this new Tucano so that I can transfer the experience to future projects. Glad you find my depron seperator useful!


                      Hi Pacman! Thanks for your compliments!

                      Actually my method of posting isn't that straight forward either. Here's what I did. I composed my thread on Word and inserted the images there. I named my images accordingly and uploaded them individually to image shack and copy the image url and pasted them back to the corresponding image in the word document. Once I finished composing the thread on Word, I just cut and paste it onto the reply box. After that I just highlighted the image link and add the image HTML tag by clicking on the Insert Image button. Maybe this image below will demonstrate better.


                      Once you clicked on the insert image tag with the url highlighted the tags [IMG] xxxxxxx [/IMG] will be placed between the link.

                      Here's another picture of my old Tucano with Adrian's P-40 and his brother's GWS Zero.

                      Comment


                        #12
                        wah cheems man......but I'll try to spent some time digesting it bro..keke...wish HZM can help increase the pic post limits to more than 5pics per time...keke...

                        anyway,, very kind of you for sharing this posting info Weeliano..

                        Pop by Punggol Field Walk field Sat/Sun morning 7.30am onwards funfly....C ya!
                        Punggol Field Walk - Precision Landing Required!

                        Comment


                          #13
                          Wonderful sharing

                          HI Weeliano,

                          Thanks for your sharing. It is my first time seeing how planes are build. You are really skillful builder. I am a newcomer to this hobby. Pacman 2000 very kindly gave me lessons on flying at the Punggol field. I am flying the E starter which I got second hand from Andy. I am staying at CCK and am also looking for a nearby field to play. Do you know of any field nearby Bukit Panjang, Jurong West. I only heard about this places but am not sure the actual location.


                          Cheers
                          Jana

                          Comment


                            #14
                            Update 3

                            Tucano Build Thread update 3

                            Okay folks, more pictures!

                            The Fuselage is more or less getting there, still needs some final sanding to make it perfect. Meanwhile work started on the foam wing templates. I used the software Profili2 to generate the airfoil data, I use the NACA2411 airfoil for the wing chord and the NACA2410 which is quite close to the real Tucano and I applied about negative 1.3 degrees of tip incidence. The templates are generated and printed out.


                            They are then glued onto a 5mm thick medium hard balsa wood.


                            Then there are carefully cut out and trimmed. This has to be done extremely precisely using the thin Exacto knife blades.


                            Cut out templates without the aluminum foil protection.


                            Preparing the aluminum strips from those cooking aluminum foil. The rounded blade is excellent for cutting aluminum foil strips. You can use a pair of scissors too if you have a steady hand. Using straight blades can fray during cutting.


                            Glue is applied on the non reflective side of the foil. The edge of the template is also applied with glue.


                            The foil is carefully applied on the edge and pressed on the round handle of the exacto knife.


                            The finished templates with the aluminum foil protection. The reason for applying aluminum foil on the balsa templates is to prevent the hotwire from burning into the balsa wood. I could have used aircraft grade thin plywood, but they are much harder to shape than balsa. The best materials to use are solid aluminum blocks CNC milled templates, but I don’t have the machine to do that.


                            After making the templates, I began to mark the Depron to cut out the Tail Fin and stabilizer.


                            I just couldn’t resist puttingthe stabilizer and Fin on the fuselage to see what it looks like! I will not be cutting out the elevator and rudder first as I need to sand them smooth and rounded first before cutting.


                            Another example of improvisation; a long block of blue foam with rounded ends stuck with abrasive paper is a great sanding tool for those rounded spots. Depron foam can get nicks very easily if you are not careful and this tool help me to get rounded surfaces without worrying about the edge of the sanding block digging into the foam when I lose my grip and sand too hard.


                            The tapered blue foam blocks are measured and cut in preparation for foam cutting.


                            I wanted to foam cut the wings today, but my foam cutter is in a terrible condition, so I spent some time re-furbishing it with a new cutting wire. This foam cutting tool was made almost 20 years ago and it still works well! For more information about building your own foam cutter, check out this link or this one
                            .


                            Alright that’s it! It’s too late to cut foam now, so I'll leave that for tomorrow, hopefully those templates will work as advertised!

                            Comment


                              #15
                              Things don't always work the first time.

                              Tucano Build Thread update 4

                              After preparing the foam it’s time to cut. I placed weights from my dumbbell to hold the foam down. Pins are used to attach the templates to the Blue foam.


                              The first cut seemed to go quite smoothly.


                              This looks promising!


                              Going for the bottom cut with the bottom templates. Result – Disaster!!!! A ruined piece of foam!


                              I figured that it could be that there’s not enough foam for both ends so I cut bigger blocks for the next cut.


                              Another Disaster!!! Oh dear! What went wrong here? Hmmm, apparently, this is the first time I am cutting wings in a tapered fashion, something which I’m not used to anyway and also this is the first time I’ve used 4 templates to cut my wings. In theory it should work, but I got a wire cutter that is very crude and manually operated and the thickness of my foam could be a factor. I should be using thicker foam for this operation. Anyway, I decided to revert back to my tried and tested method of foam cutting using only 2 templates, but the only thing I’m retaining is to use the weights to hold the foam down. This seems to work extremely well.


                              Okay that’s it, meanwhile I’m building new templates from Birch plywood. This time I’m going to spend more time making the higher quality templates. Watch out for the next update!

                              Comment

                              Working...
                              X