Announcement

Collapse
No announcement yet.

Finwing penguin v2 - summary build log-ish

Collapse

Zenm Tech Pte Ltd

Collapse

Visit Zenmtech at rc.zenmtech.com

X
 
  • Filter
  • Time
  • Show
Clear All
new posts

    Finwing penguin v2 - summary build log-ish

    Hello everyone!

    Click image for larger version

Name:	Screenshot_6-05.jpg
Views:	1
Size:	29.5 KB
ID:	997025
    photo from: http://******etpuss.******et.netdna-...nshot_6-05.jpg
    A/C Manufacturer's Website: http://www.finwinghobby.com/product_view.aspx?id=4

    Foreword:
    - I am obviously not sponsored by finwing.
    - This is just a build log not meant to get anyone insanely hooked onto FPV and diving into something which you'll regret later.
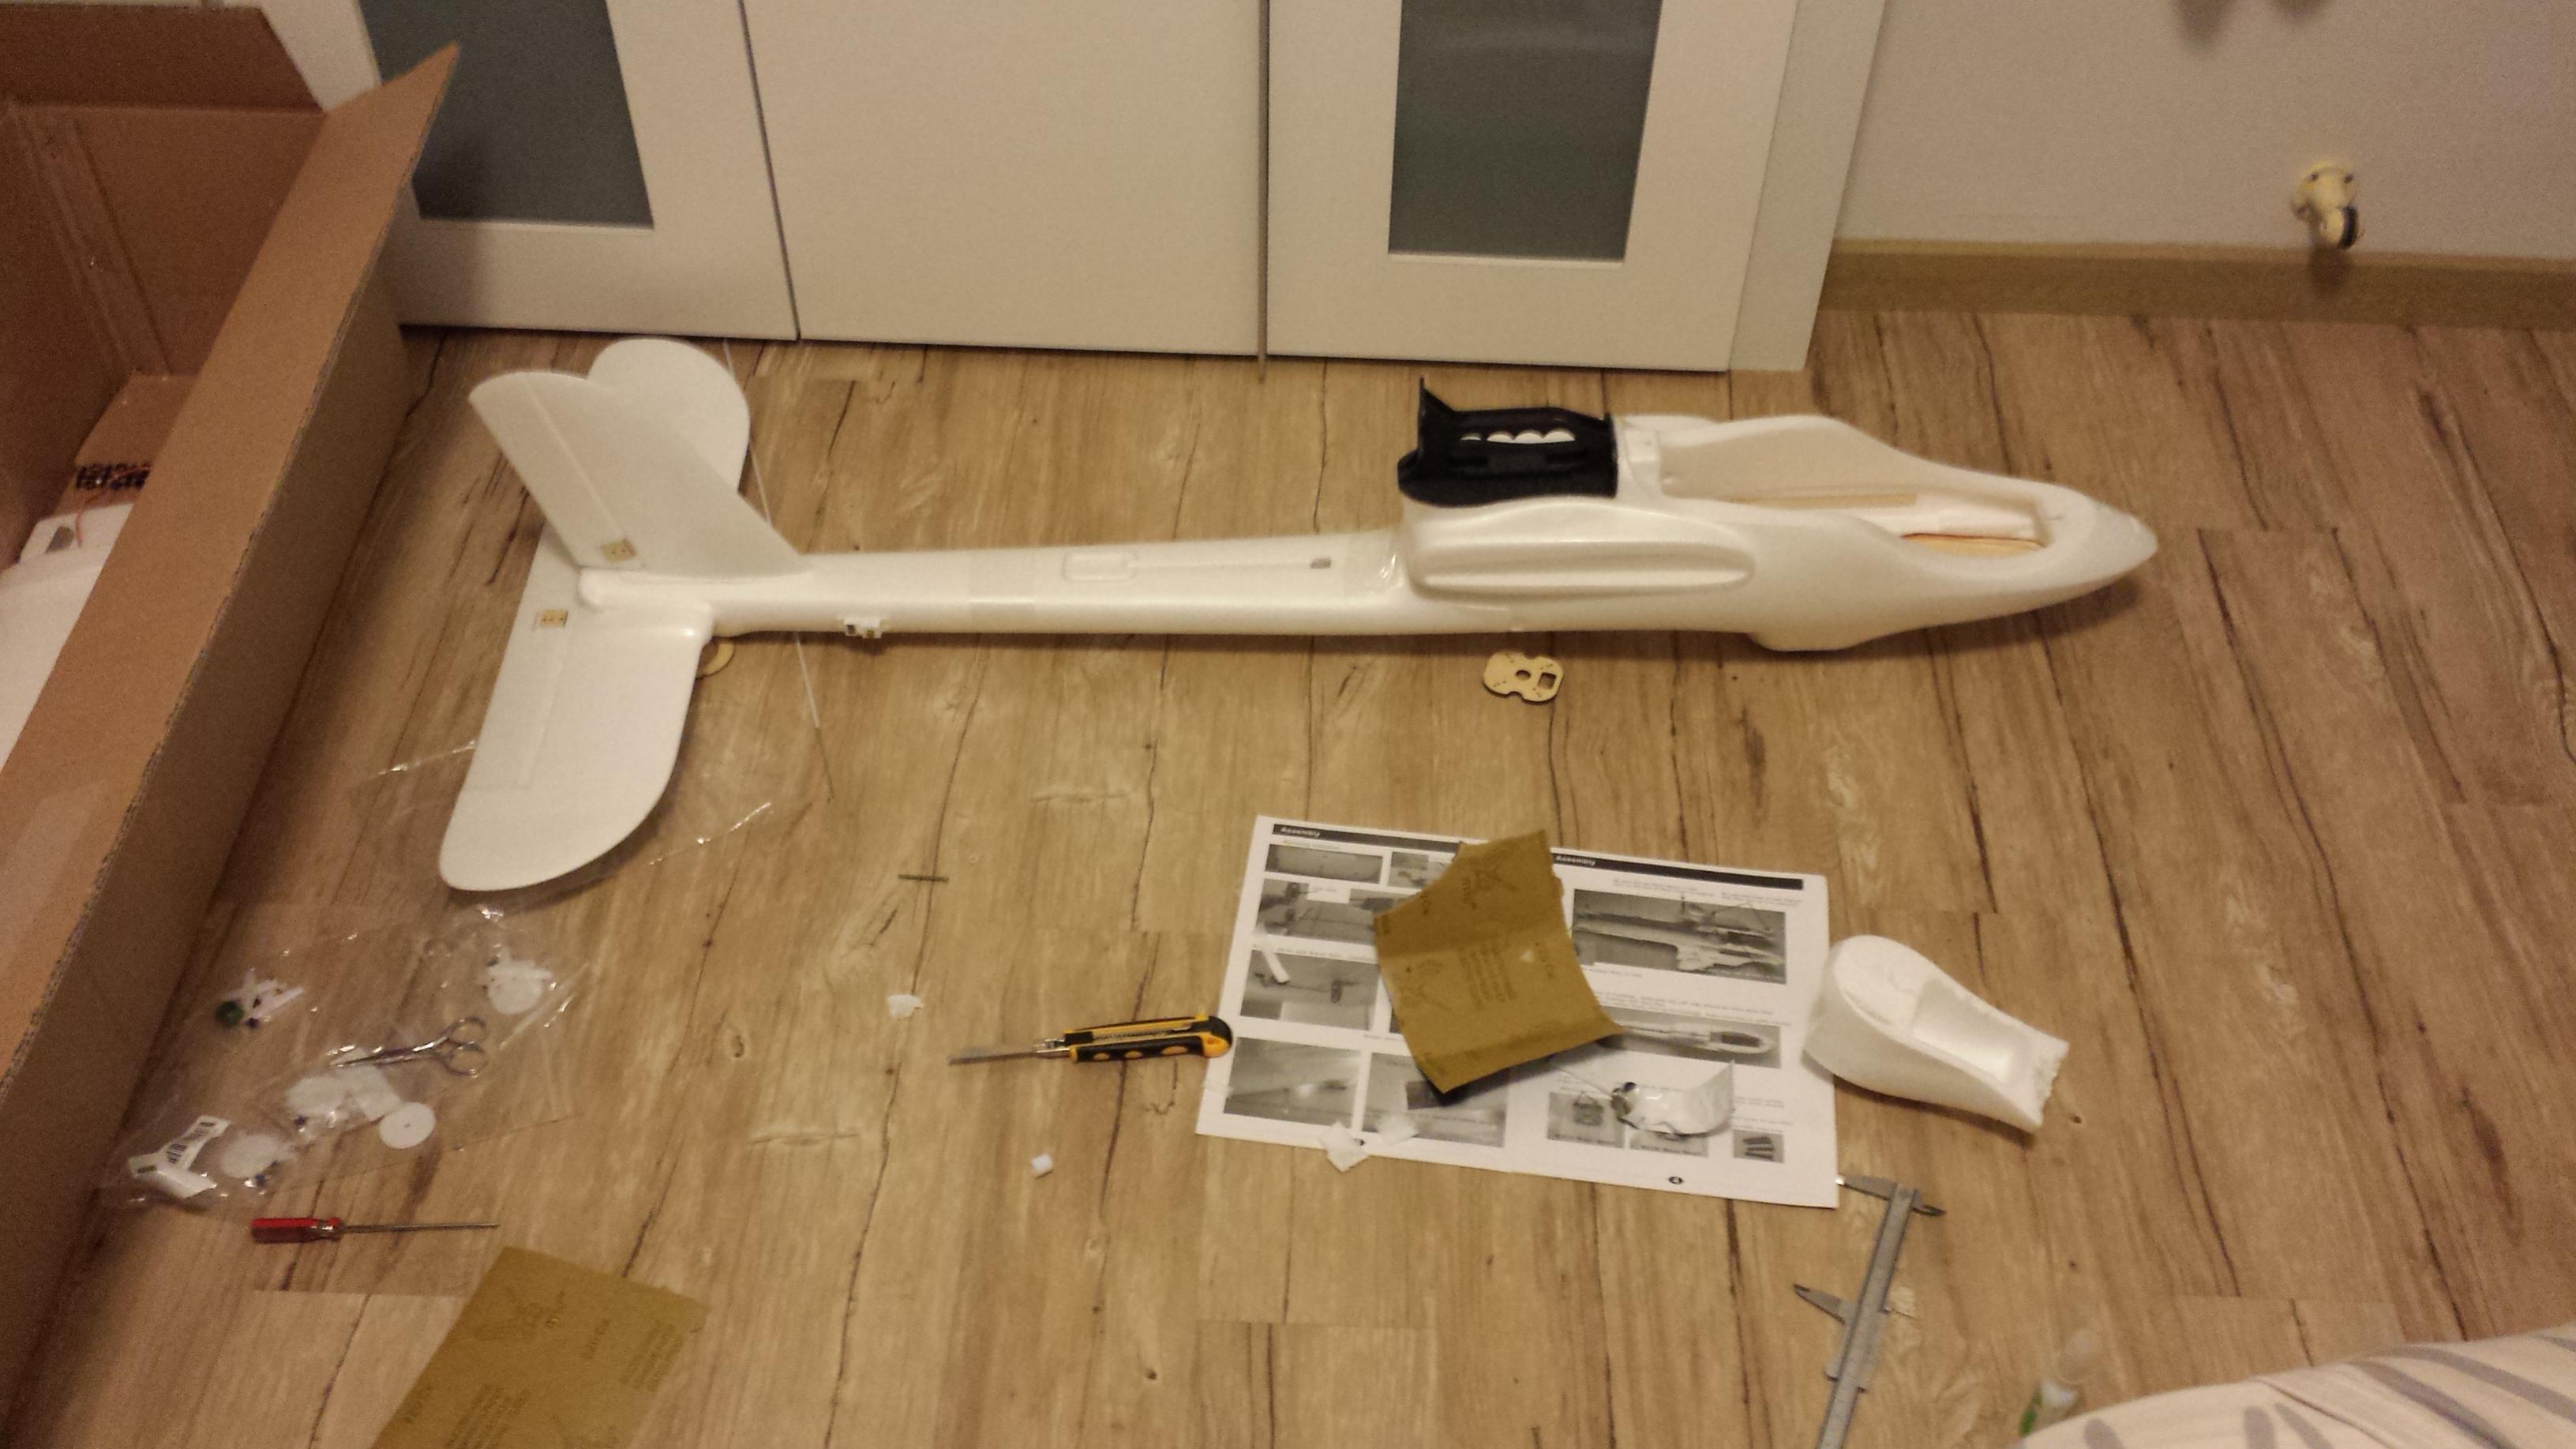
    - The A/C is huge. tip to tip wingspan is almost my height (im 177cm) at 1.7meters, so i hope you know what you're getting yourself into if you choose to get this.
    - Shipping is hellish expensive, but the seller is awesome (which is why I am writing this to complement him for his professionalism).

    Points to note:
    - This would be a summarized build log with rather long paragraphs of text.
    - I DO NOT follow manual throws and expo settings, i normally set max throws on all my control surfaces and expo them to 30%, and change from there =).
    - I have not and will no do long distance fpv, although this platform is perfectly capable of doing so.
    - There will be updates and upgrades in the future.

    So. Why the penguin V2?
    Because i liked it, and i really think that its a legit platform which can expand due to it's huge storage capabilites.

    Why not the bixler like everyone else?
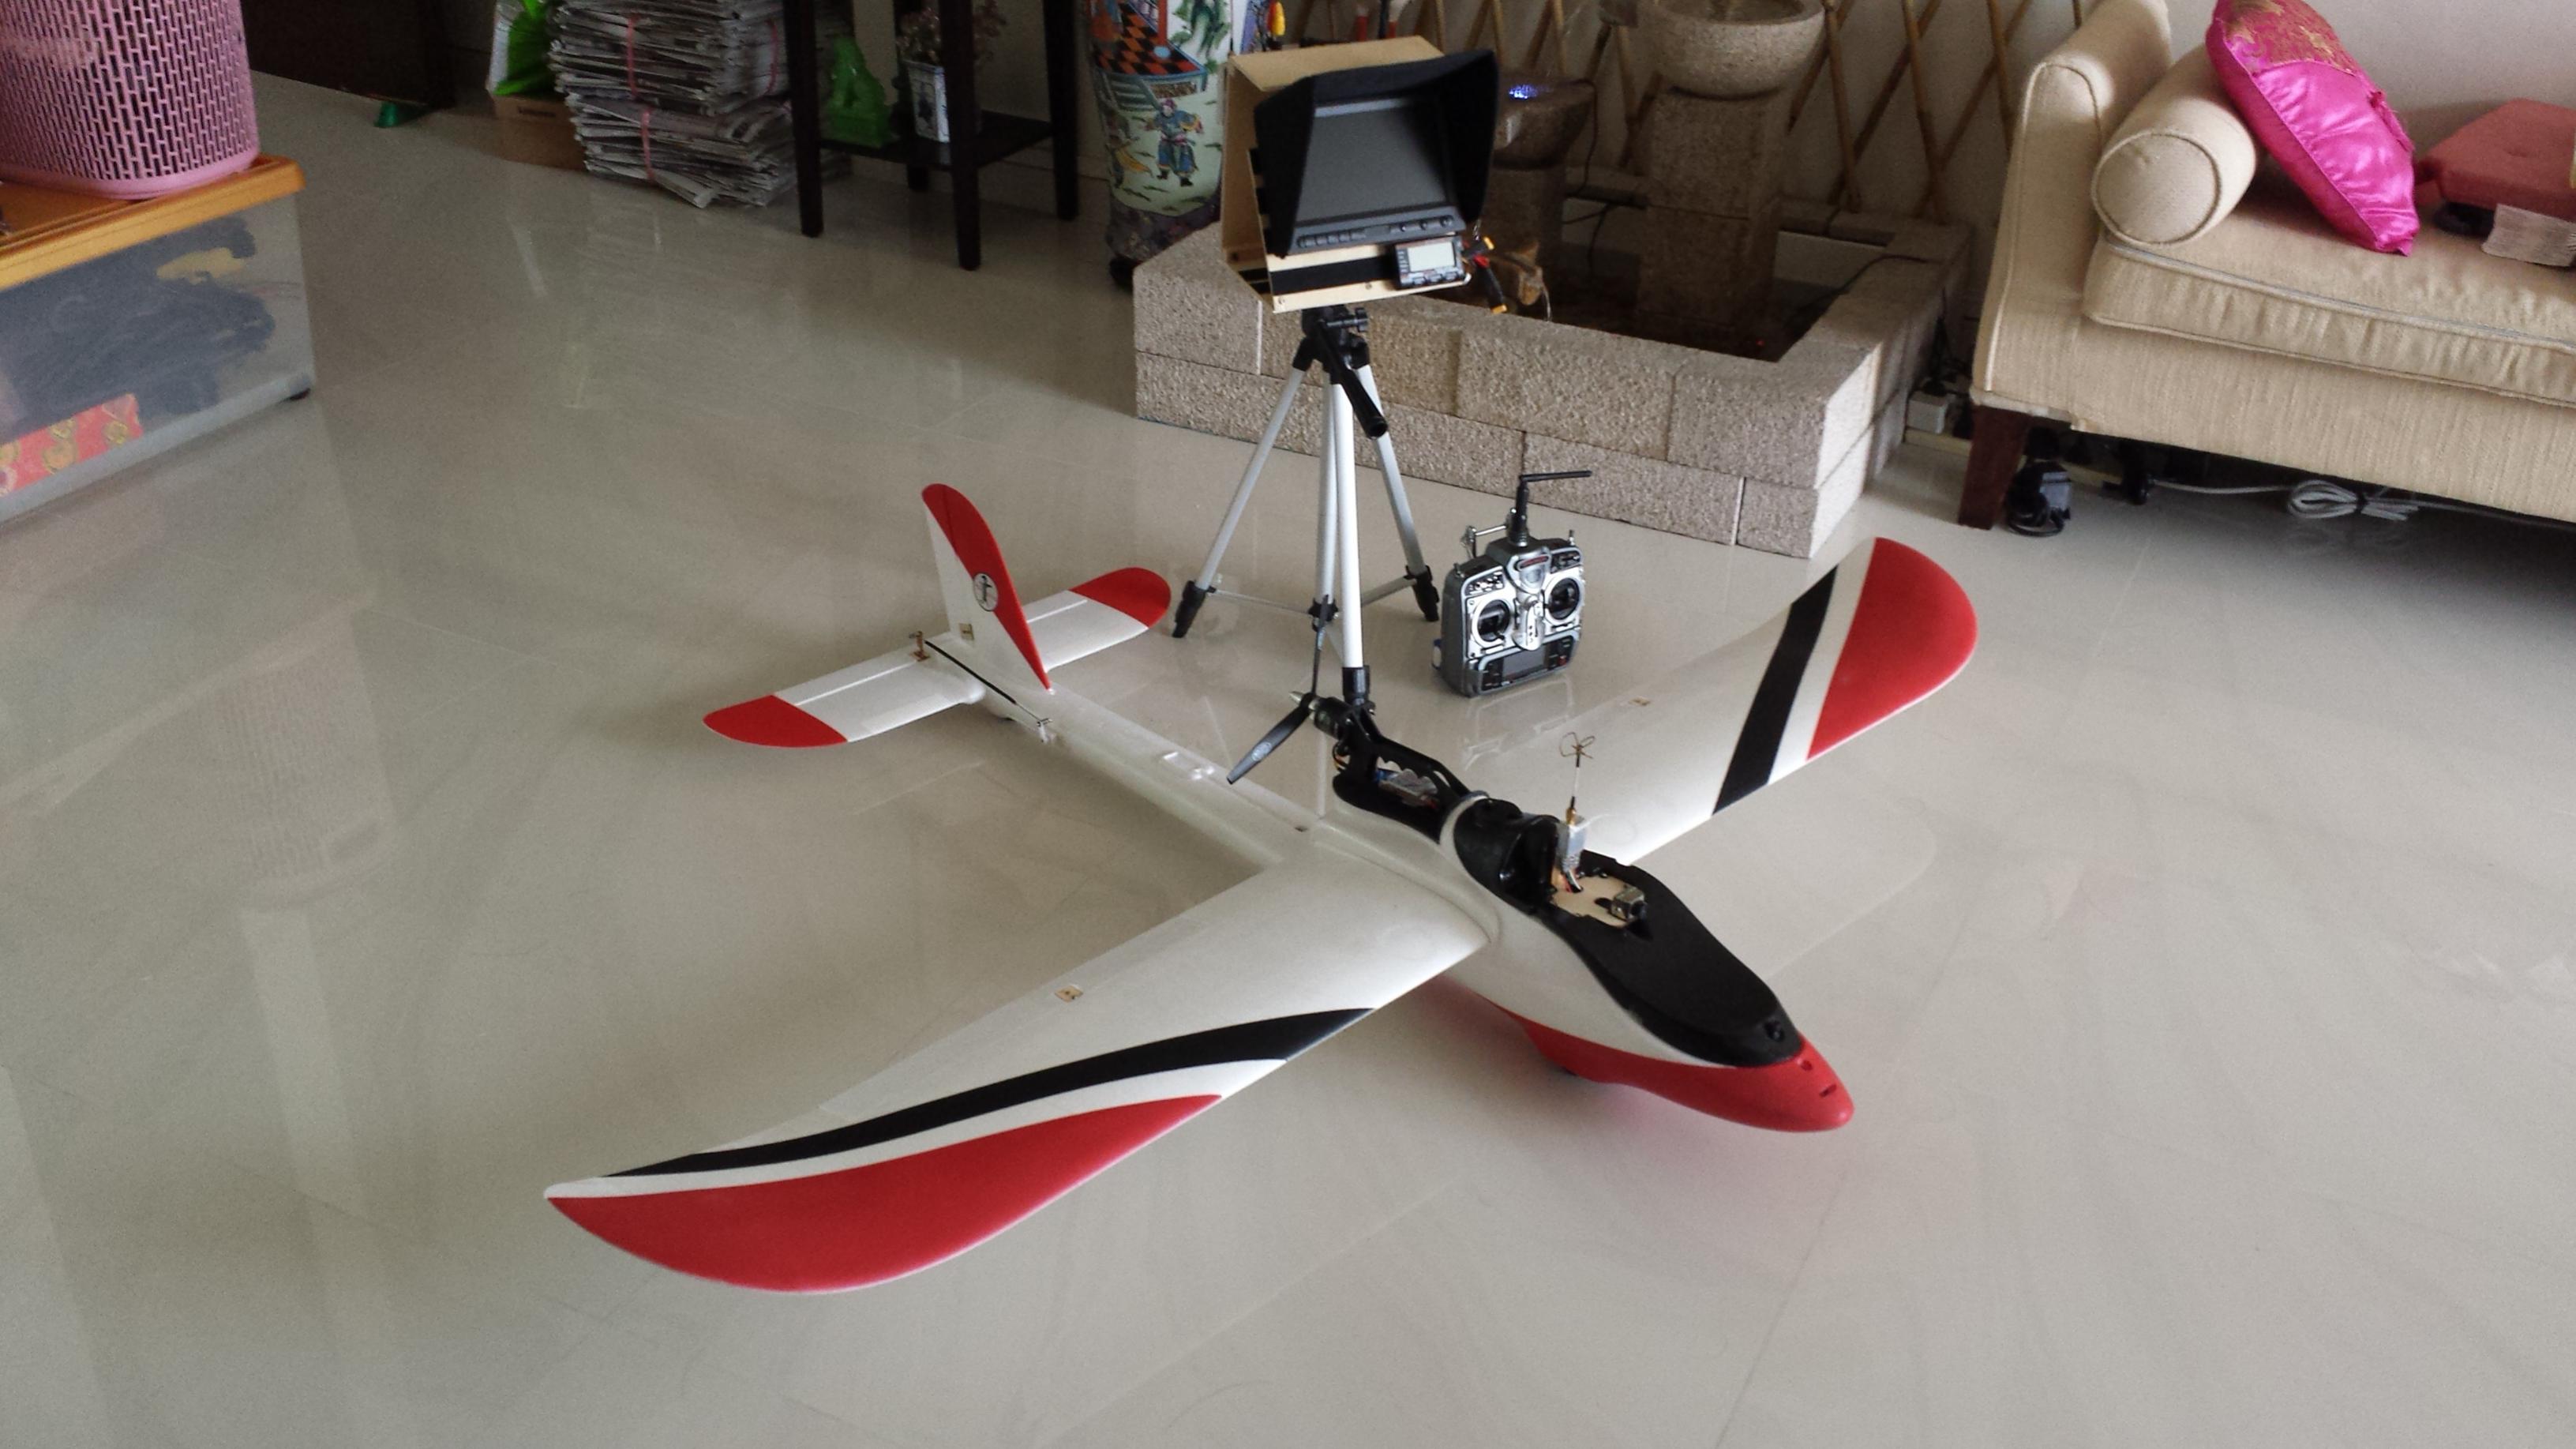
    *like everyone else* and i just simply didnt like the look of the bixler. the penguin with the weird bubble canopy removed looks pretty badass. and it can carry a gopro with ease!!!

    Will i ever recommend this to anyone in singapore?
    No, HAHA actually yes =) although it comes in a pretty big box, and it kinda hangs its tail when it turns, its a really forgiving aircraft. And i would say an awesome fpv platform because of its large wing area and its super stable gliding characteristics, maiden'ed at OHR and i actually preferred gliding compared power flights (maybe because my thrust angle is screwed)

    Please note that you need to have space for an aircraft this size!!! I was lucky that the fuse can even fit in my room!

    Click image for larger version

Name:	penguin-03.jpg
Views:	1
Size:	215.9 KB
ID:	997026

    A/c manufacturer's notes:

    Wingspan: 1720MM/67.7inch
    Length: 1230MM/48.5inch
    Wing Area: 36dm/3.9ft2 (Mainwing Area)
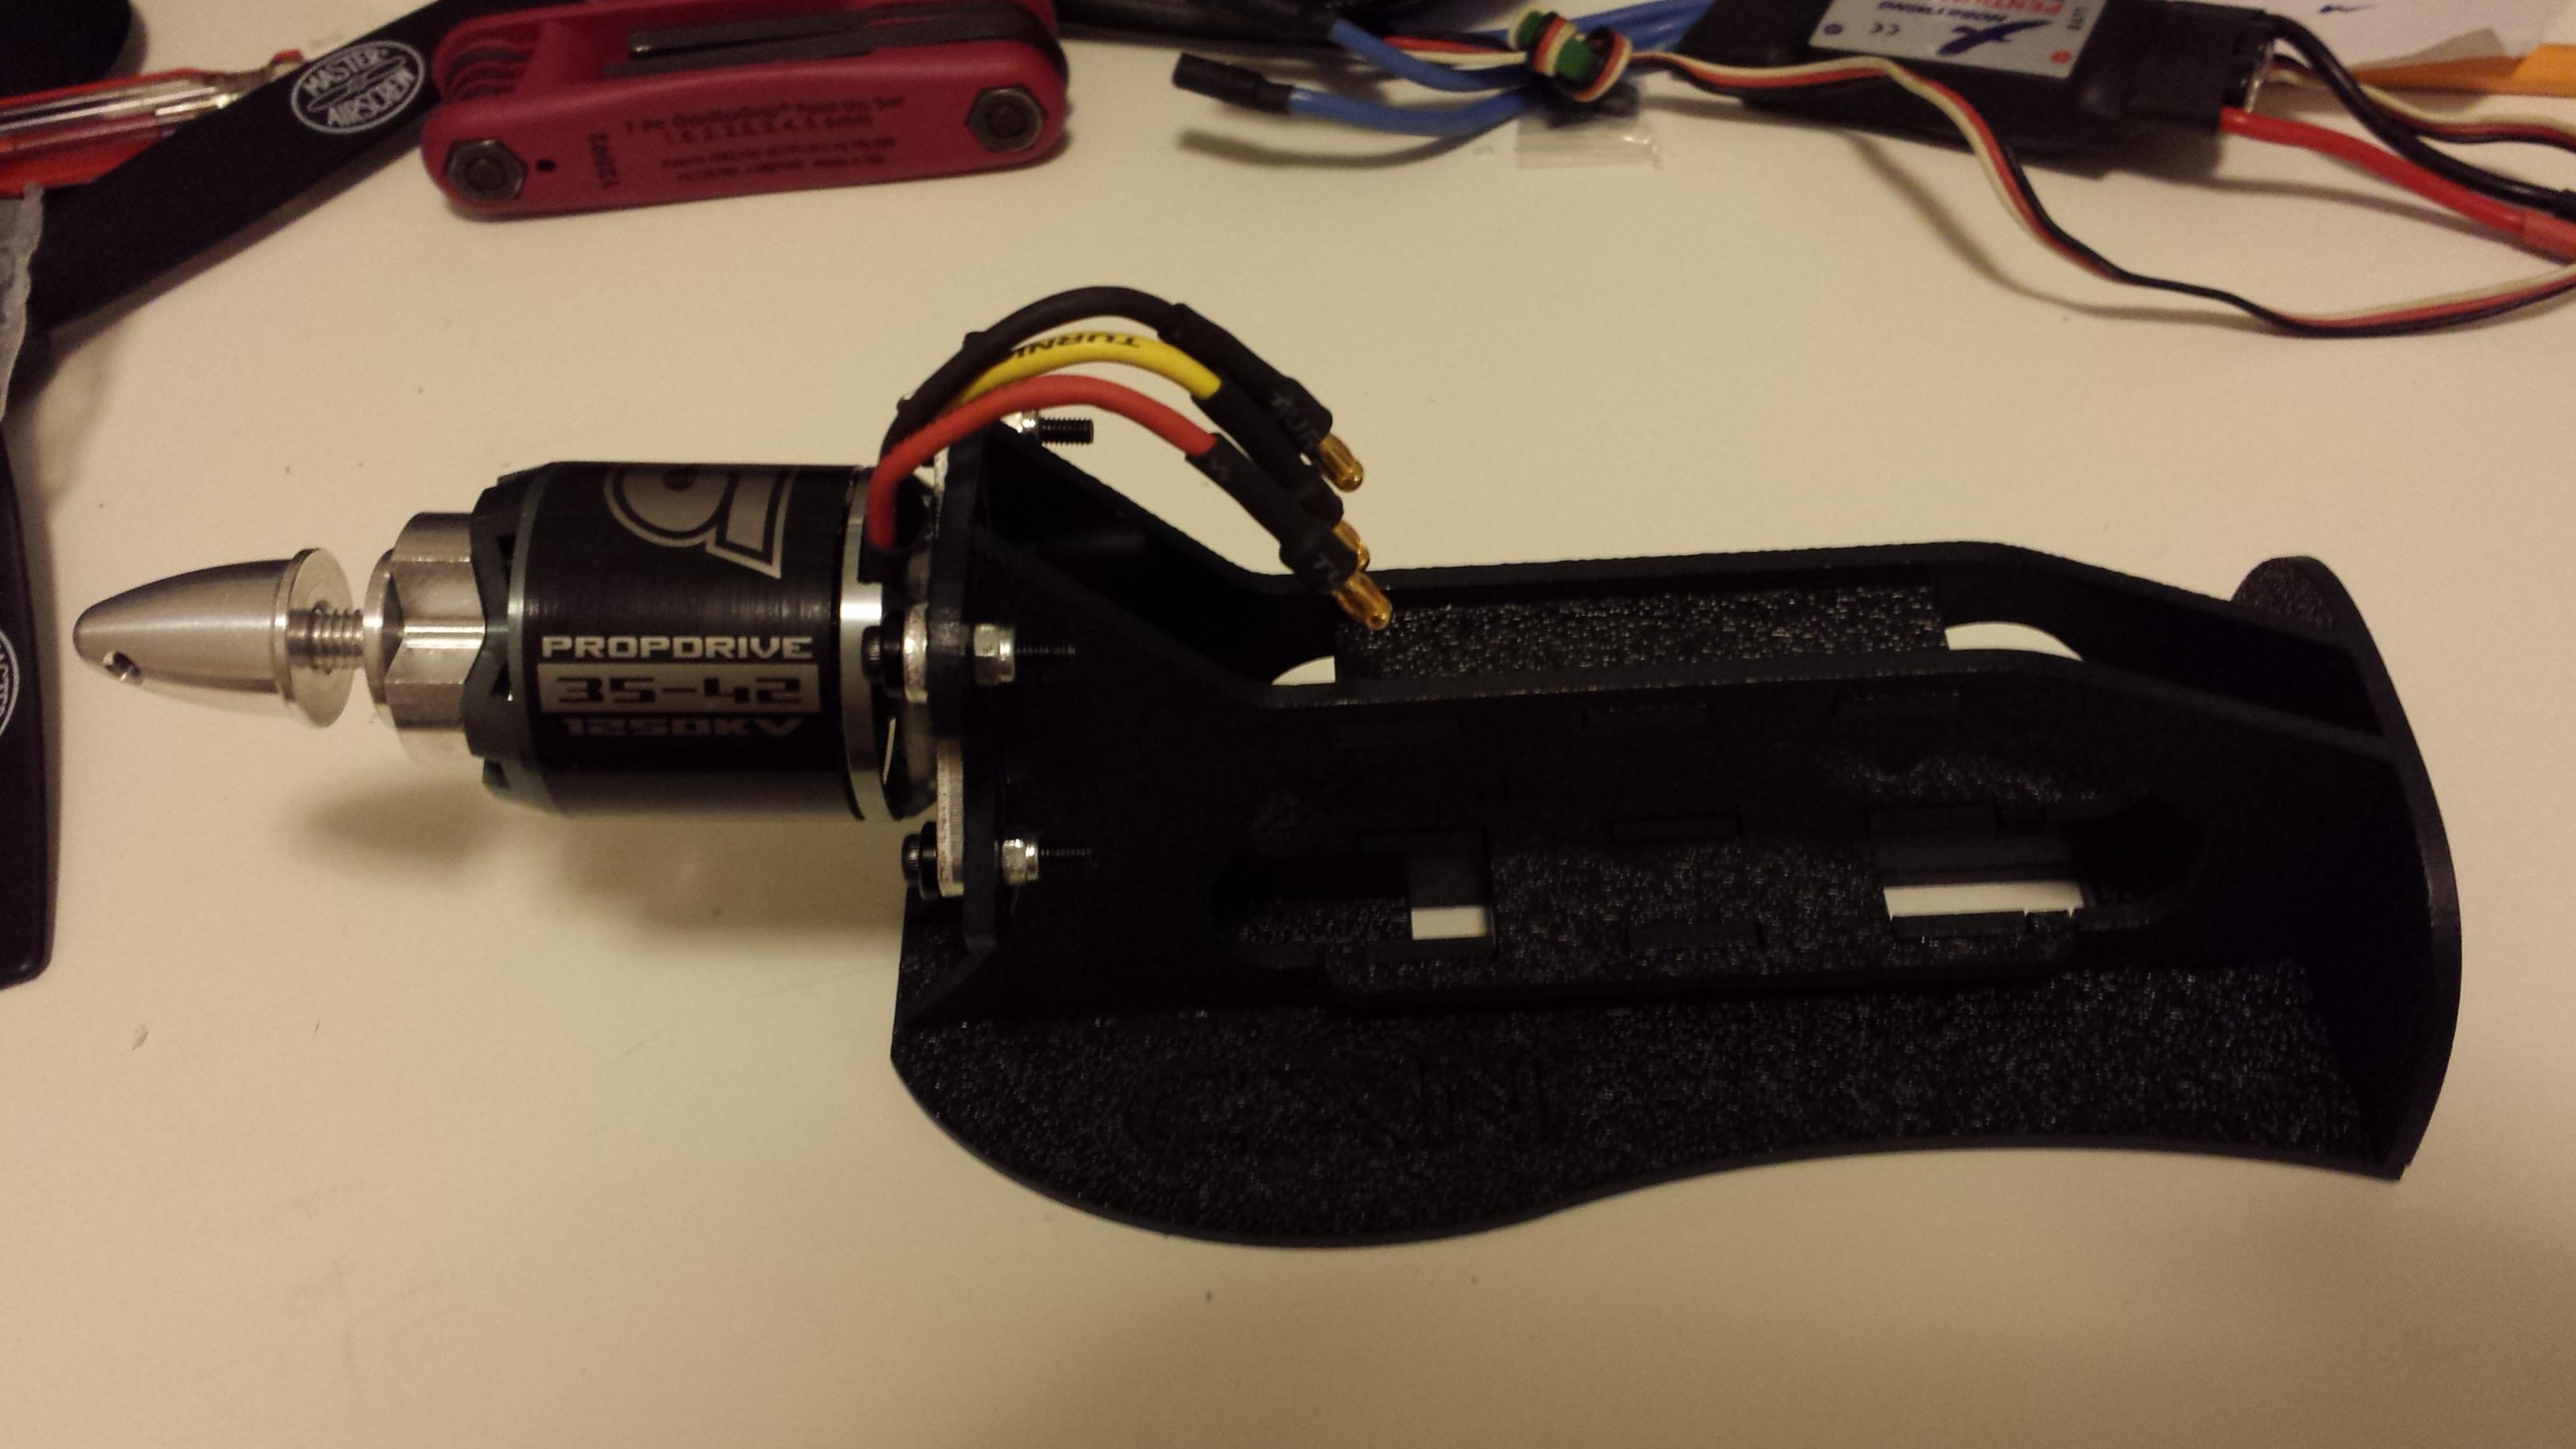
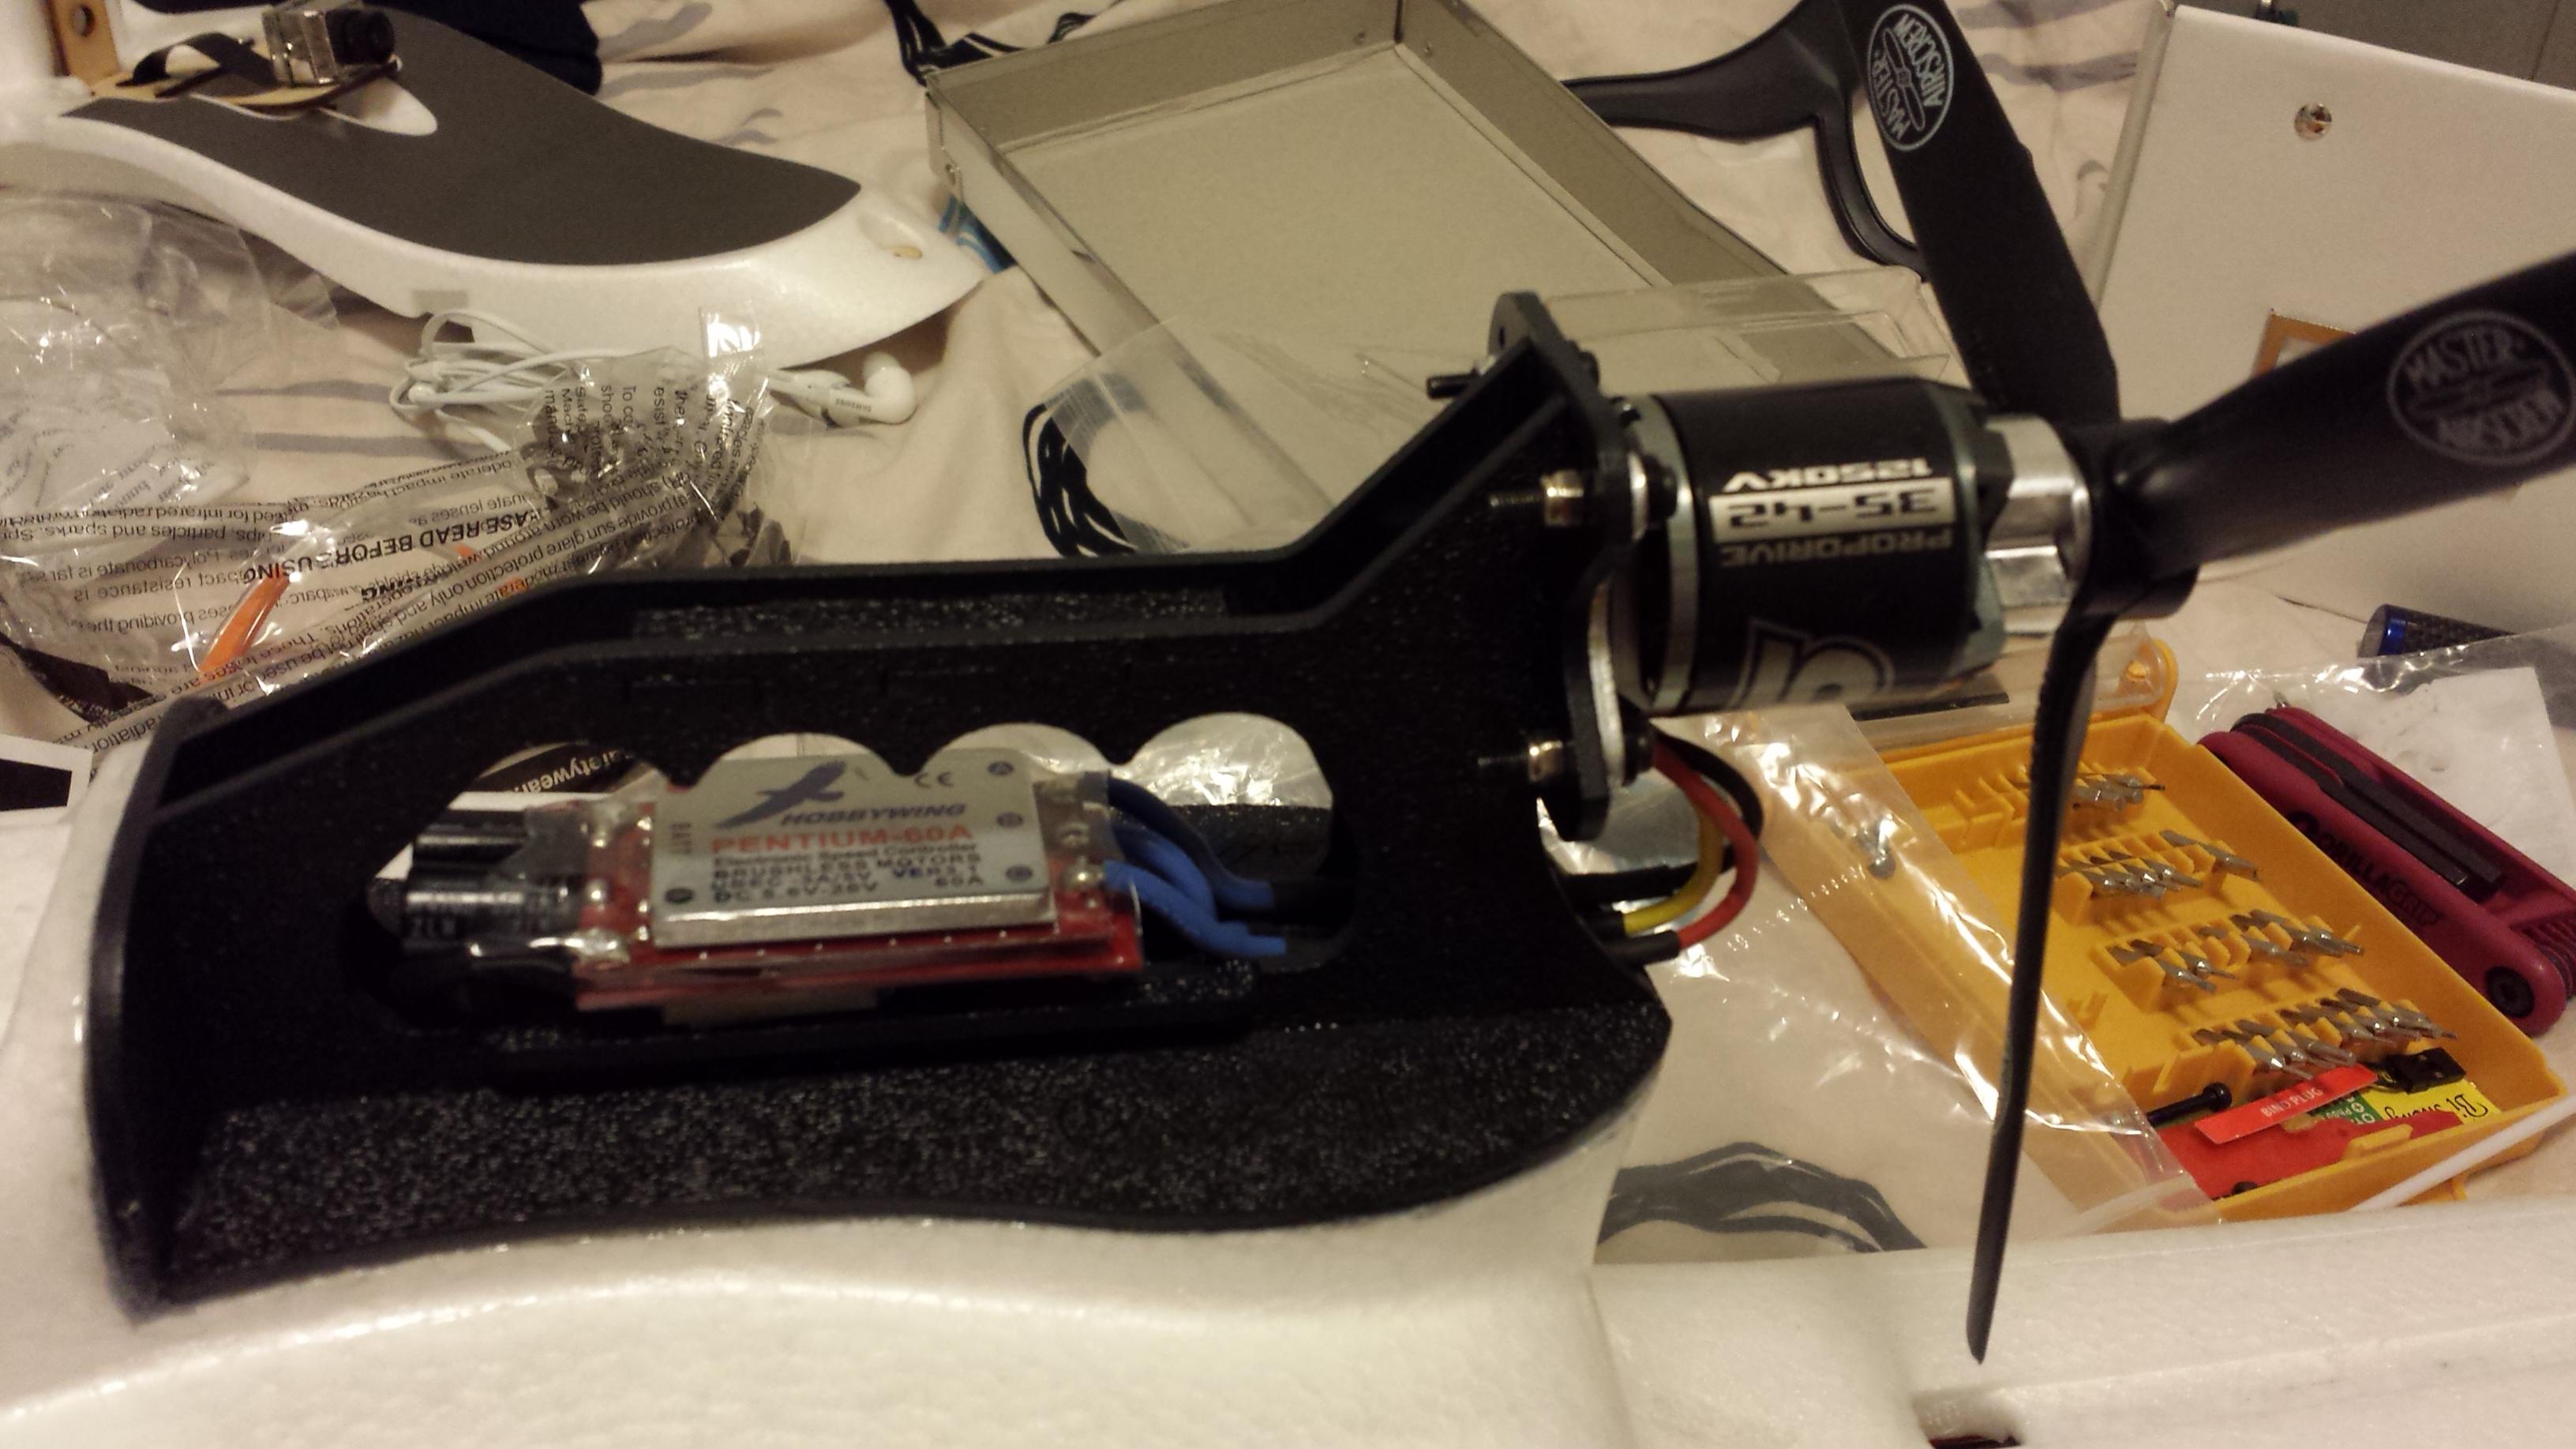
    Motor: Brushless motor M2220 or M2815
    ESC: 40A for M2220 or 60A for M2815
    Servo: 3pcs 17g servo+ 1pcs 9g servo.
    Battery: Li-Po 11.1V 2400 mAh for M2220 and 5000mAh for M2815
    ARF Weight: 0.98kg/34.6oz.ARF is the weight including almost ready to fly, not including battery and your extra FPV devices

    Max.flight weight more than 2.4kg (mine measured out at around 1.8 to 2kg)
    Payload: 600-1000G/21.5-35.5oz (Payload is the extra weight it can carry besides the standard ARF weight)
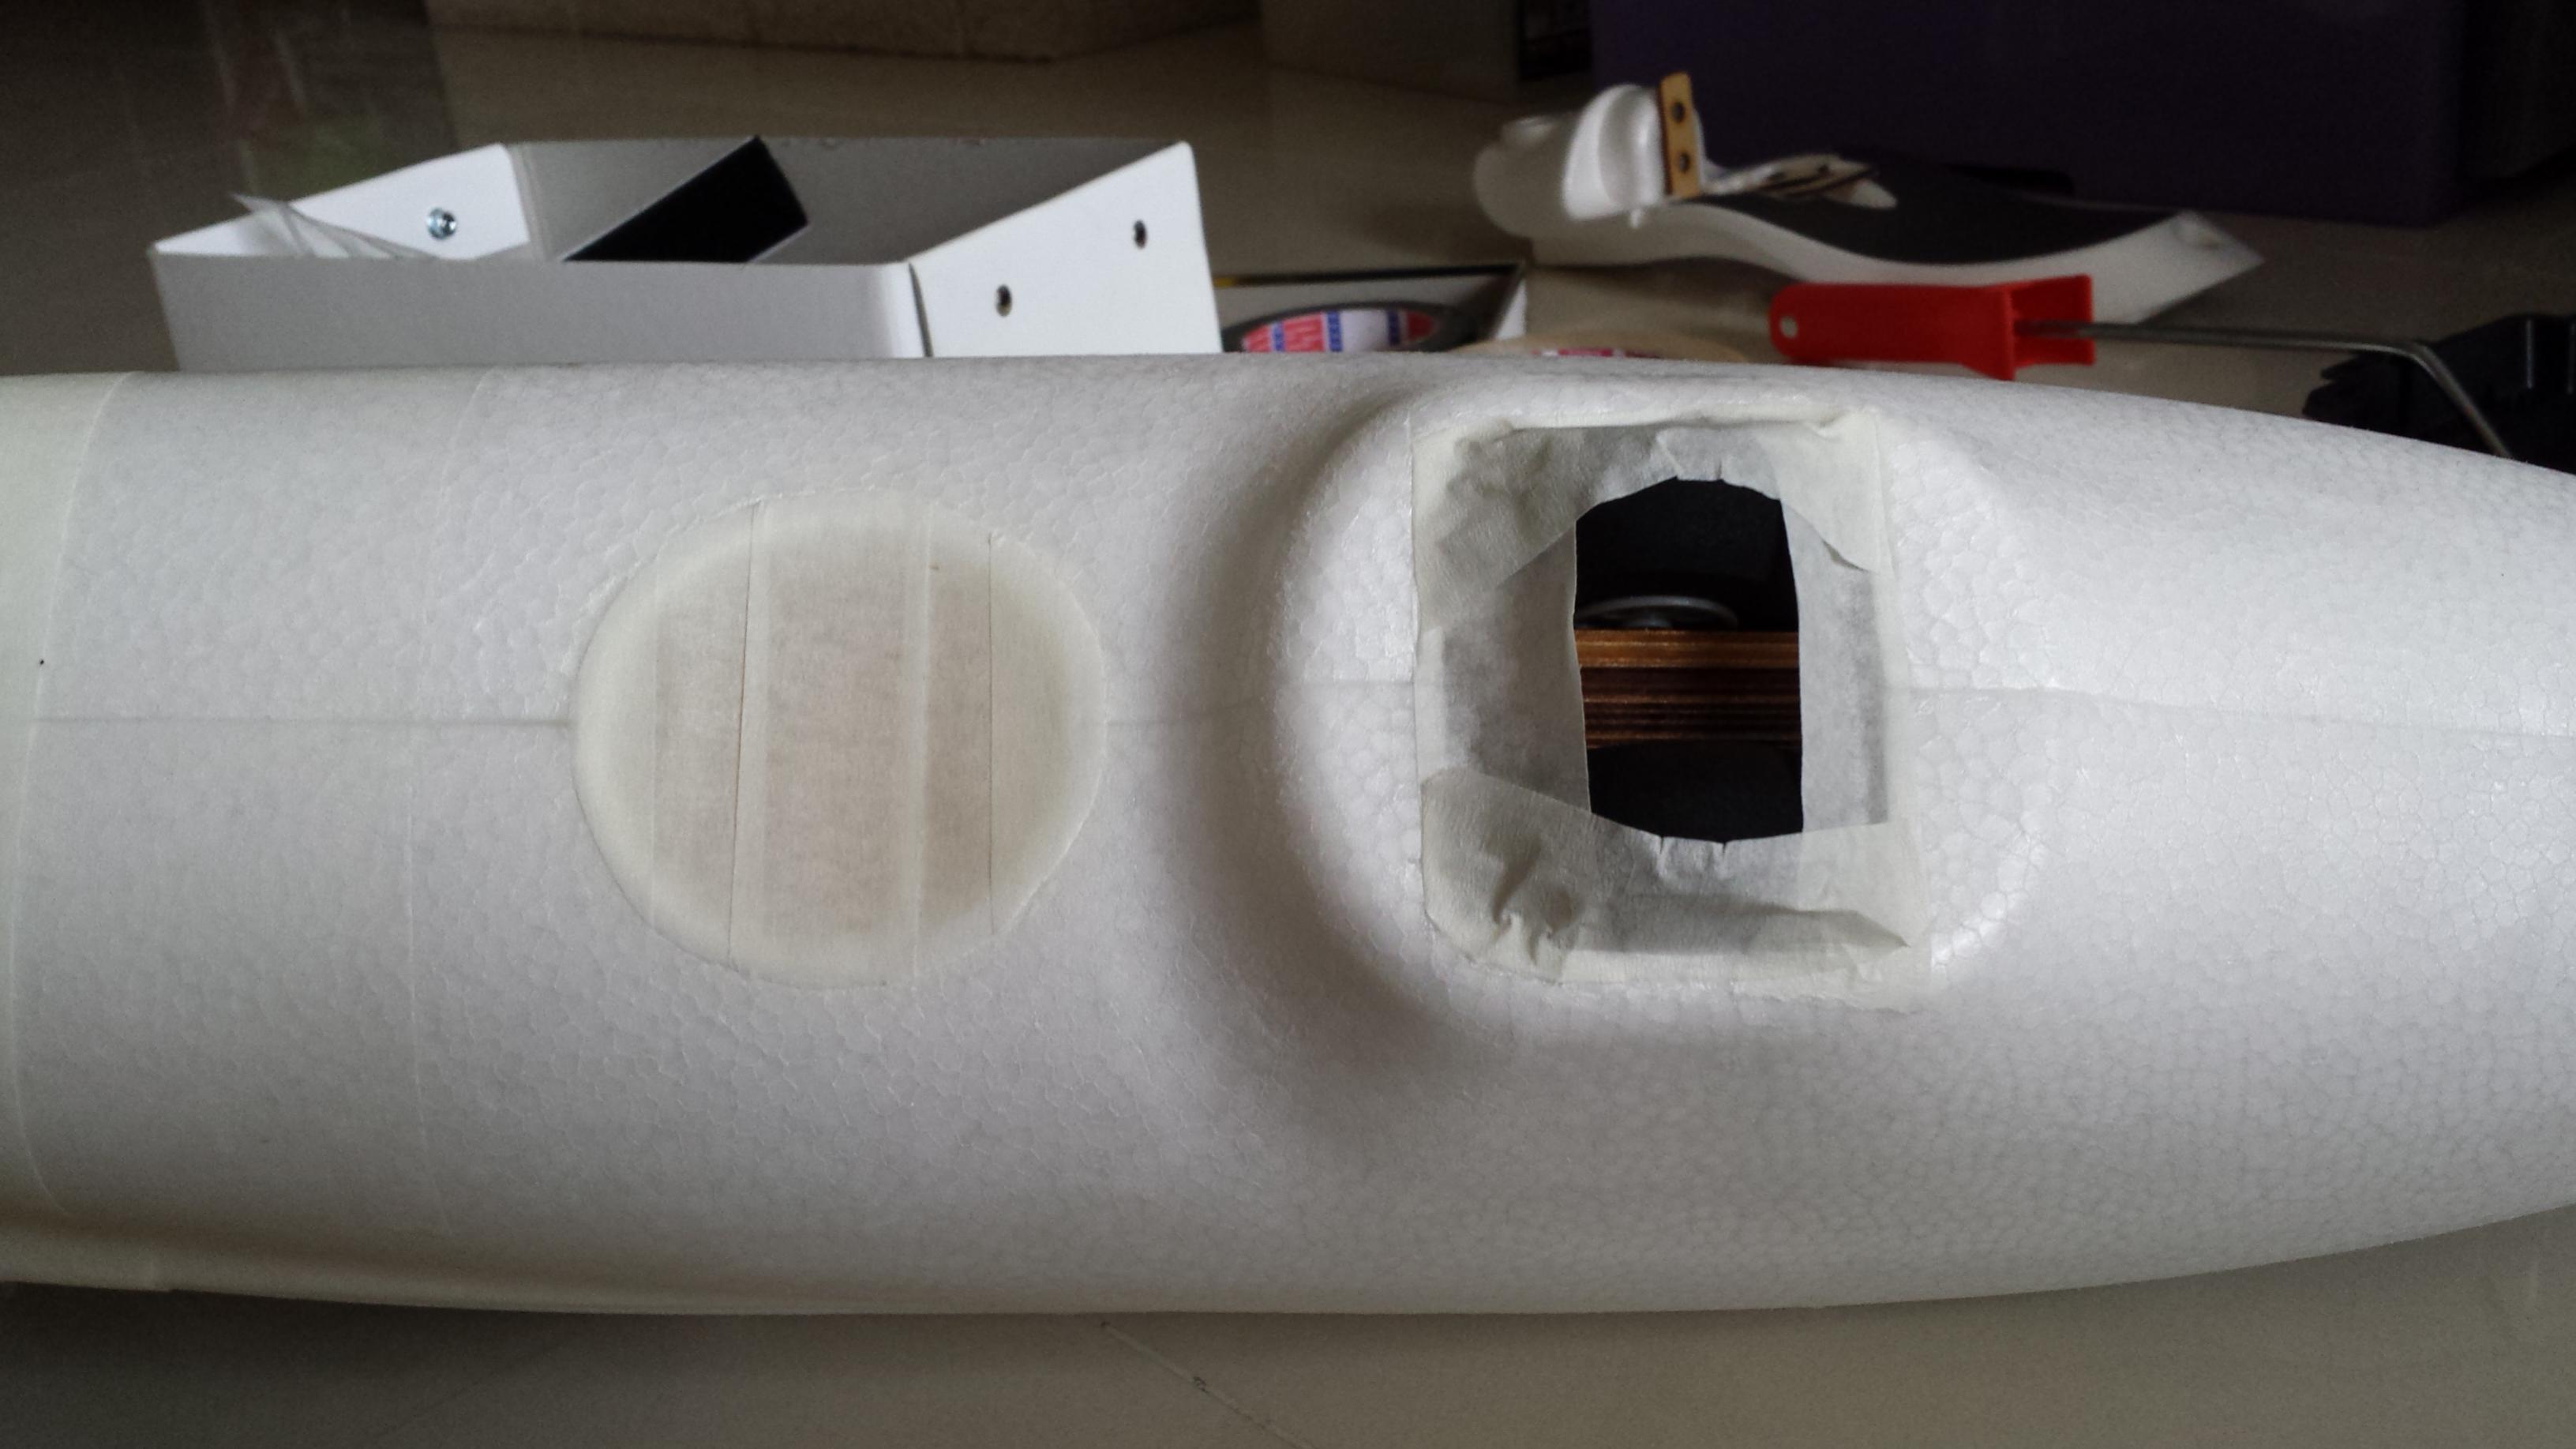
    Material: EPO Wing and fuselage/ Wood reinforcement/ aluminum alloy Pipe/Carbon Fiber Tube

    More Pics and build notes coming soon.
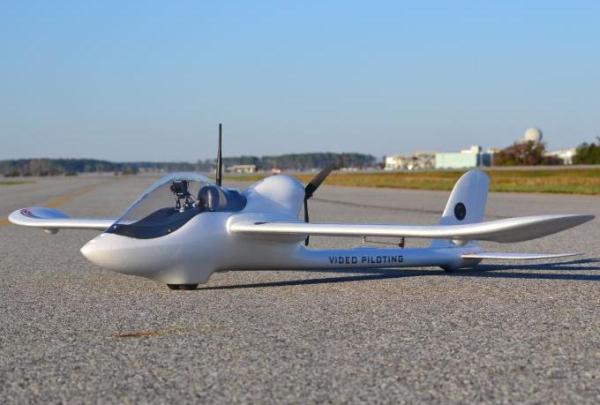
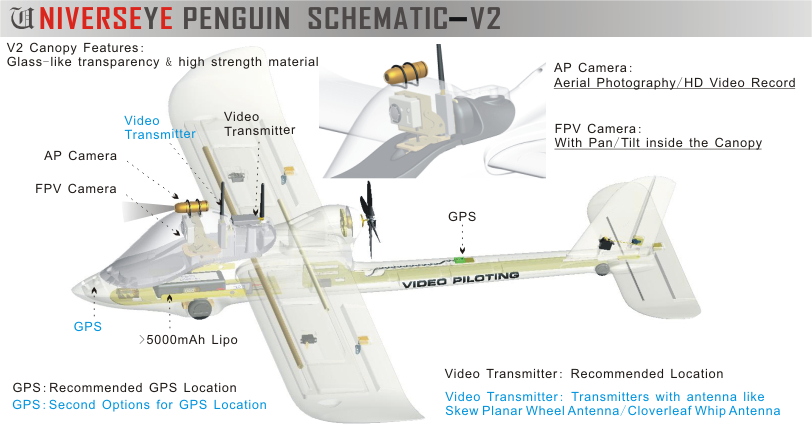

    #2
    Electronics and what nots...

    Flight Electronics:
    ESC: 60A hobbywing ESC
    Motor: NTM 1250kv 35size motor
    Prop: 10*5 CF prop, or 3Bladed Master Airscrew prop (went with CF prop)
    Servos: Hitec 450heli digital servos all around, Elevator servo 450 heli tail servo.
    RX: Orange Range 7ch DSM2 /w Satellite RX.
    Batt: 3s 5000mAh or 2x2200mAh in parallel (XT60 connectors)

    Click image for larger version

Name:	1.jpg
Views:	1
Size:	394.2 KB
ID:	977782


    FPV Electronics:
    Screen: 8inch non-bluescreen from skyhobbies
    VRX: 2x boscam 305 5.8Ghz, clover leaf and patch.
    VTX: 1x 200mw boscam 5.8Ghz
    Diversity: EagleEyes FPV ground station
    OSD: Eagletree OSD.
    Battery: 2200mAh hooked in parallel, or 5000mah 3s batts.

    *note, I do not intend to go far with this setup although i am fully aware that i can do it =)*

    Click image for larger version

Name:	20131228_132133.jpg
Views:	1
Size:	350.7 KB
ID:	977783

    with a little peak of the finished product...

    Comment


      #3
      Upgrade(s)

      Okay upgrades!

      Why would i upgrade a plane which i havent even flown? because i wanted something that flies, and continues to do so without modifications in the near future. I know that i will 100% buy this upgrade, its just a when...
      ANYWAY, this upgrade would be the CXN Motormount for FPV Penguins.

      Heres a link to their page: http://www.cxndesigns.com/penguinmotormount.html

      Basically what it does is that it raises the motor mount up a little, just enough to squeeze a 10inch prop in a pusher config to the a/c:

      Here's what it looks like assembled with the motor attached:

      Click image for larger version

Name:	3.jpg
Views:	1
Size:	337.5 KB
ID:	977784

      The original item comes in loose parts which you have to fix together... cant be that hard, its pretty idiot proof =)

      Always remember to sand ABS or any plastic surfaces for a proper hold! I like to sand them in a cross pattern... XXXXXXXXXXXXXXXXXXXXXXXXXXXXX
      Pictures speak a thousand words:

      Click image for larger version

Name:	6.jpg
Views:	1
Size:	338.7 KB
ID:	977785

      And then the mods (removed and replaced heat shrink on ESC with longer power wires, not shown )

      Click image for larger version

Name:	15.jpg
Views:	1
Size:	445.3 KB
ID:	977786

      On the top left, you can see my canopy, this is later sprayed, and the camera thrown away, stories come later in the build.

      Comment


        #4
        Everything comes nicely packed and the build begins!

        I did not take pictures of the unboxing because i was simply too excited!

        Andd... if you really wanna know whats in the box, you can find out via google and RCGroups =)

        So.

        I fixed it up, cut out the motor mounts as per instructed:
        Click image for larger version

Name:	motormount3.jpg
Views:	1
Size:	104.5 KB
ID:	977787
        Photo from CXN Designs.

        Although my cut was rough, i took the glue provided and used it as a filler/bonder between the abs plastic of the mount and the eps foam of the aircraft, this proved an awesome match because the entire thing is now rock hard! (thats what she said)

        The build is simple, if you can look at pictures, everything falls into place exactly like how the manual depicts it to be, manufacturing quality is next to perfect (nothing is perfect... sorry Ben!)

        Click image for larger version

Name:	7.jpg
Views:	1
Size:	477.3 KB
ID:	977788

        Did i say this A/C was Huge? (Thats a 600ml water bottle for scale)
        Click image for larger version

Name:	8.jpg
Views:	1
Size:	392.3 KB
ID:	977789
        Click image for larger version

Name:	9.jpg
Views:	1
Size:	409.2 KB
ID:	977790

        Comment


          #5
          Can you say fiberglass?!

          I Actually want this plane to last... How long? Hopefully forever, but thats just a challenge waiting to be destroyed by a friendly thing called gravity

          So, i used the WBPU and 18g Fiberglass method of coating!
          Lets face reality, WBPU is easy to use, and can be washed off, when it gets on the aircraft, it just dries out and doesnt increase the weight much!

          Basically in order of how i did it...:
          Fiberglass
          Roll Coat Over
          Roll Coat Over
          ~Dry~
          Roll Coat Over

          And a single coat of Epoxy on the bottom front of the fuse to protect it against mother nature's evil rocky thorns.

          Im not a master in this, and its actually my first attempt. Id say i did a good job

          Click image for larger version

Name:	11.jpg
Views:	1
Size:	236.7 KB
ID:	977791
          Click image for larger version

Name:	12.jpg
Views:	1
Size:	268.2 KB
ID:	977792
          Click image for larger version

Name:	13 (3).jpg
Views:	1
Size:	361.4 KB
ID:	977793

          The wings were not spared because they could be damaged by long grass! LOL

          Click image for larger version

Name:	13.jpg
Views:	1
Size:	274.3 KB
ID:	977794

          Note, i did not fiberglass the elevator and the tail fin because I already placed the elevator servo at the rear, adding the FG there could make the plane overly tail heavy...

          Comment


            #6
            Apologies, to add on to the previous section, please sand the a/c before adding the fiberglass coat as it would hold better with the surfaces.

            Comment


              #7
              Paintings!

              i'll skip the linkage alignment etc, because its another part which i believe that more senior builders in Singapore can do wayyy better than me.

              On to the paintings! always remember... SAND IF YOU'RE PAINTING DIRECTLY ON FOAM IN A XXXXX PATTERN FOR BASICS.
              If you're painting on FG like me.... please don't

              Click image for larger version

Name:	16.jpg
Views:	1
Size:	347.4 KB
ID:	977795
              This design was changed later on, and all the masking tapes were tucked in.

              Everyone has their own design... whats yours?

              Heres what i came up with after looking online on different designs. I just used the 'DO-IT' foam safe sprays from artfriend. Matt finishes are better as i have this psychological stigma that matt finishes have less weight compared to glossy ones. But then again its all up to you!

              steps are. In order:

              1.) Think of design
              2.) Measure and mask the areas with masking tape and newspaper (remember to sand in a XX pattern if you're painting on foam prior to masking!!!!
              3.) spray first coat, let dry 10-15mins. (just a light coat, don't gunk it all over and form lakes of paint -.-, i'll do a HOW TO PAINT if anyone is interested later on)
              4.) spray second coat, let dry 10-15mins. (repeat if the colours are not what you want)
              5.) Remove mask, and let dry another 10-15mins. (WHY? because you dont want the overlapping masks to remove your hard painted parts right?)
              6.) Mask other parts.
              7.) Repeat 1-6 untill you're satisfied.

              whoever said that painting nicely was a quick job is horribly mistaken!!!

              and voila! the finished product.

              Click image for larger version

Name:	20131228_132102.jpg
Views:	1
Size:	438.8 KB
ID:	977796

              And this is how everything goes in the car i could fit the fuse infront, but then no one would be able to sit behind, which sucks.

              Click image for larger version

Name:	20131229_073910.jpg
Views:	1
Size:	537.0 KB
ID:	977797

              Comment


                #8
                DISASTER!

                Went to the field immediately after these photos were taken.

                Plugged in the battery and POOF! smoke... hmm. i double voltage'd the VTX and the servos. Surprisingly the ETOSD could handle it because its rated up to 6-8cells. impressisveeee.
                So, with my VTX blown and my servos all fried, i made the journey back.

                Burnt items:
                200mw 5.8Ghz VTX
                4 Hobbyking servos
                Boscam Cobra HD (ouch)

                Replaced with:
                200mw 5.8Ghz VTX (not replaced, power source to camera was affected, signal works fine! Therefore power from camera is taken directly from 3s lipo source or FPV Lipo)"
                4 hitec servos, all Digital
                Security cam FPV camera, 600TVL
                GOPRO Hero 3Black (if i dare to risk it)

                Whats left?
                -Eagle tree Guardian
                -Eagle tree GPS
                -Eagle tree Air Speed Indicator

                Comment


                  #9
                  Conclusion

                  The penguin has been an awesome bird to fly in the sky, but please have an open mind while building the penguin. A simple mistake can cost the 200SGD plane to become scrap
                  All the mods were made based on my little years of experience in RC Flying and ALOT of research on the internet. Please do the same prior to any build which you attempt!

                  WBPU and fiberglass is indeed NOT the best way to do this, but it is the easier way =)

                  If you can't figure anything out, ASK SOMEONE! ASK ASK ASK AND ASK AGAIN! with a few short conversations, it could save you thousands of dollers in the long run!
                  I would recommend this Aircraft for anyone who has been in this hobby for awhile due to the shear size and costs involved in flying one of these things.

                  I went the eagle tree route because i wanted to have the antenna tracking function. Again, this is not the cheapest, and definitely not the easiest way to get an OSD etc.

                  Cheers!

                  Feel free to leave any comments for me =)
                  PS. Please DO NOT ATTEMPT LONG DISTANCE FLIGHTS IN SINGAPORE, IRL flying into birds isn't funny, and IRL flying into a RC plane when you're landing isn't going to be interesting either.

                  Comment


                    #10
                    thanks for sharing. I may not do fpv but I really enjoyed reading this thread. lovely.
                    Heli-ADDICTION:
                    Mikado Logos, RaptorG4s, X7F, 600ESP...
                    JUST one more Logo...for the month.

                    Comment

                    Working...
                    X