Announcement

Collapse
No announcement yet.

Just another parkflyer scratchbuilt

Collapse

Zenm Tech Pte Ltd

Collapse

Visit Zenmtech at rc.zenmtech.com

X
 
  • Filter
  • Time
  • Show
Clear All
new posts

    Just another parkflyer scratchbuilt

    Got bitten by the building bug again. With many spare equipment for small planes lying around, I rounded them up and thought of a new subject, which is not too time-consuming and daunting to be designed and build.

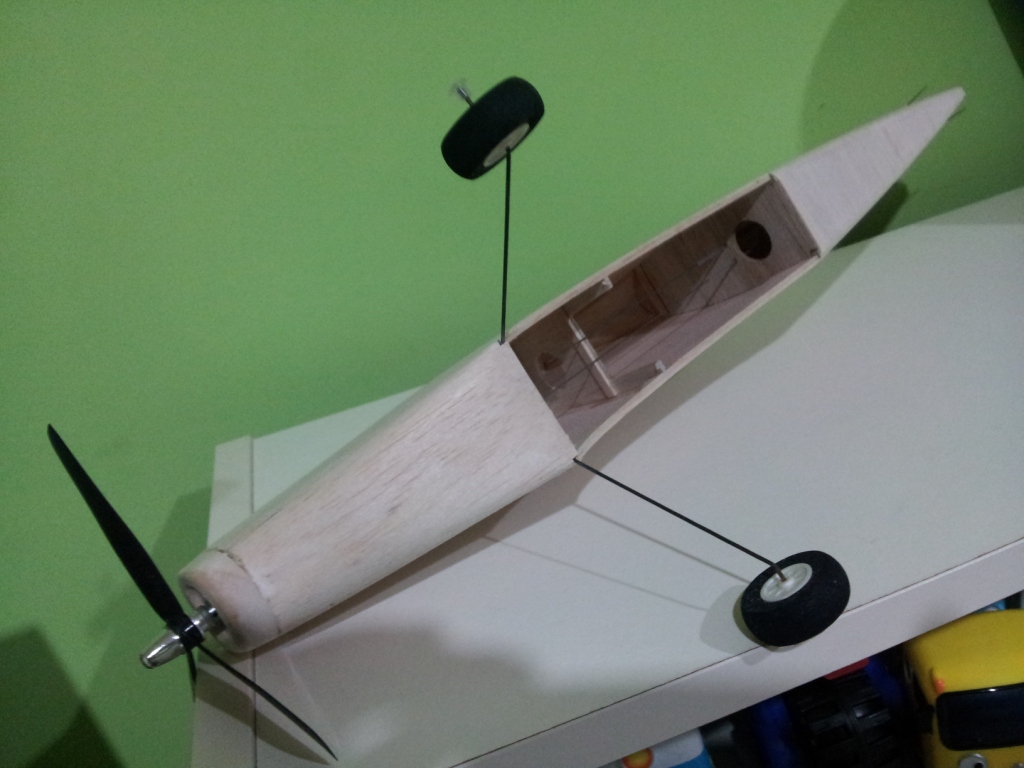
    After searching the internet for some pictures of the subject, I scanned and import them into CAD program and started drawing out the details for parts fabrications and assembly. I settled the wingspan at 24", which is pretty tiny for its fuselage. I wanted it simple and settle the controls at RET (rudder, elevator and throttle), which means that the wing needs quite a fair bit of dihedral for coordinated turns.

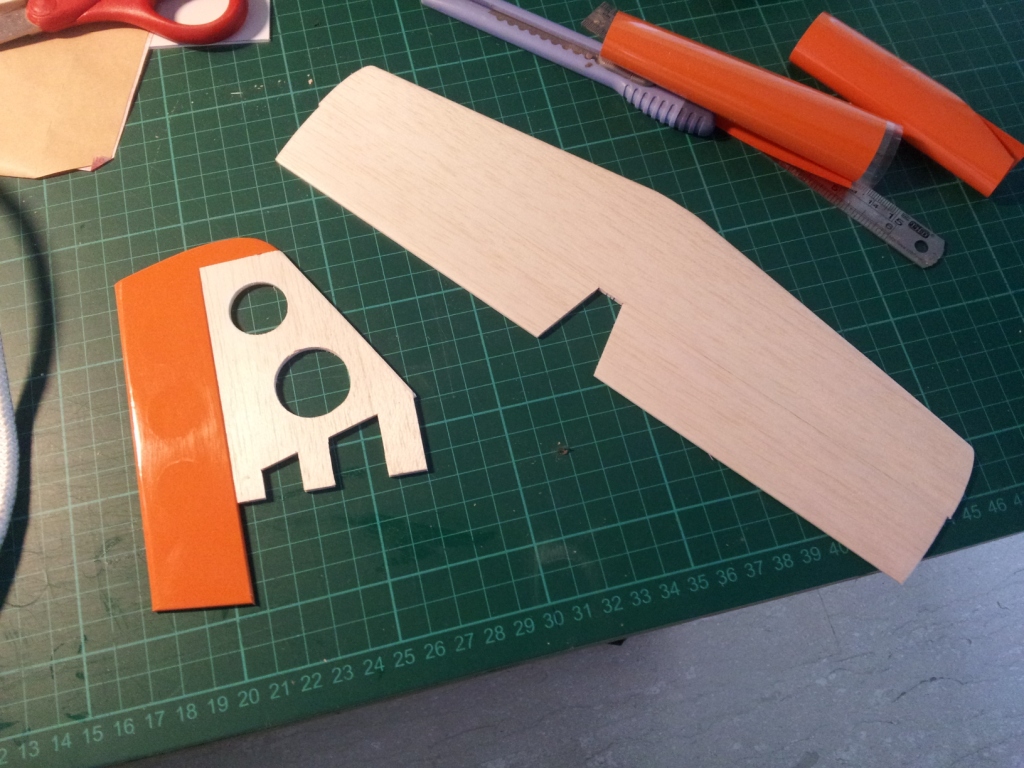
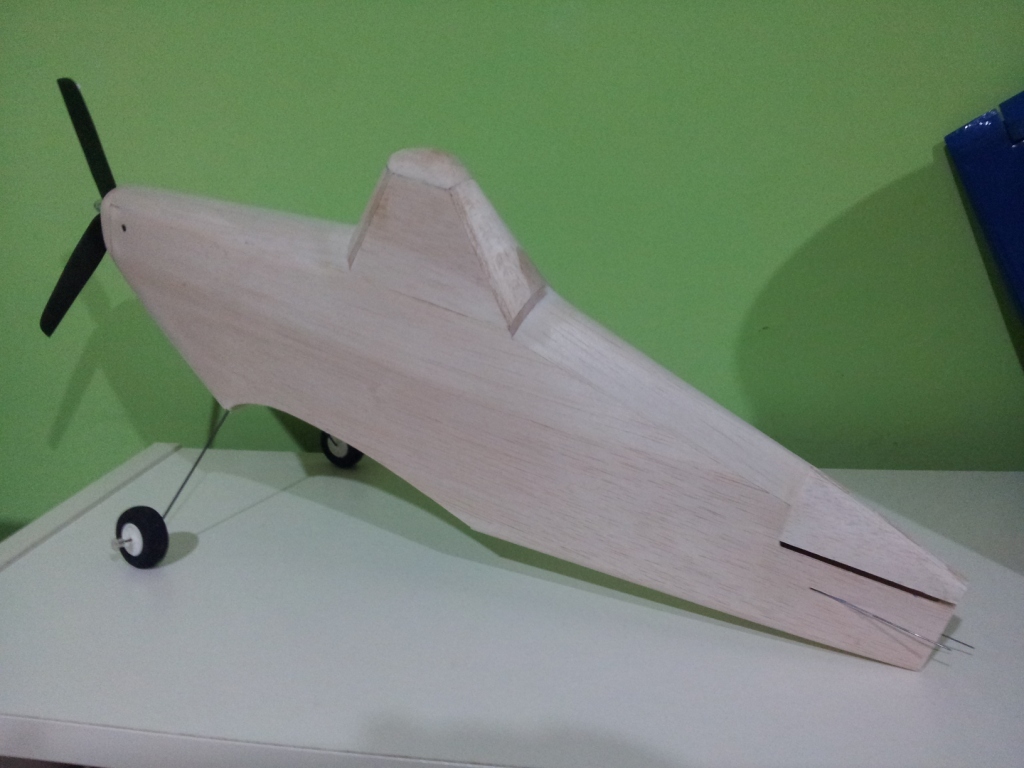
    I initially started out using foam, but eventually settled on balsa, which means I have to design the traditional structural framework, but these has already become my second nature, and so it didn't take very long for the so-called "plans" to be conceived.

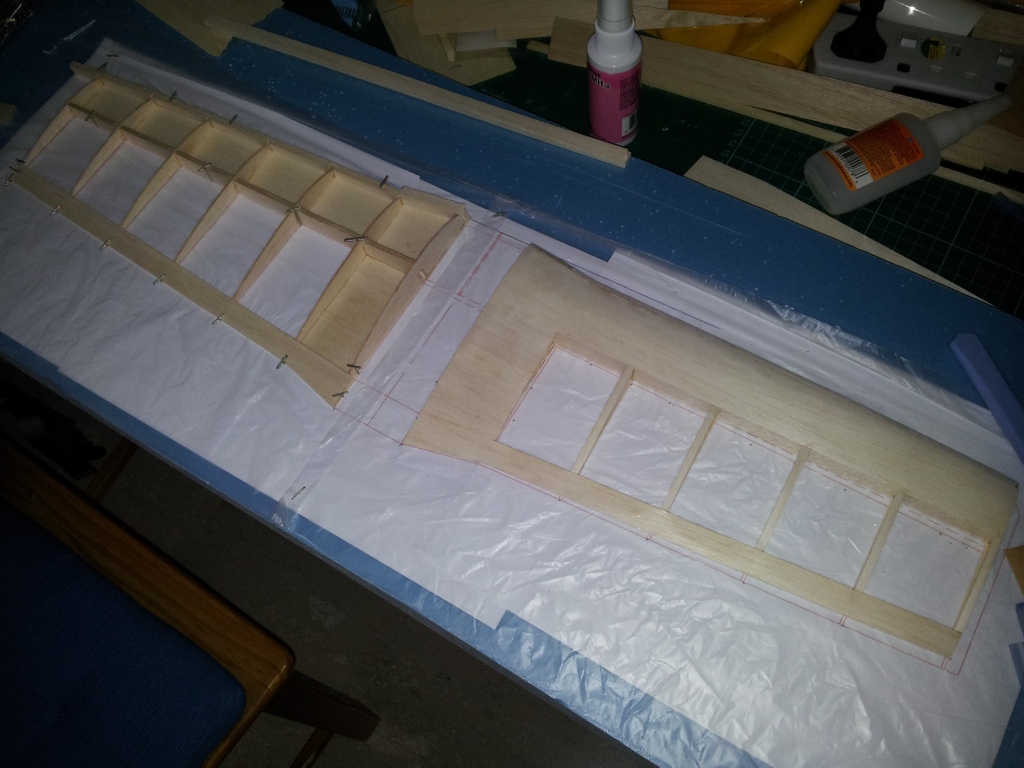
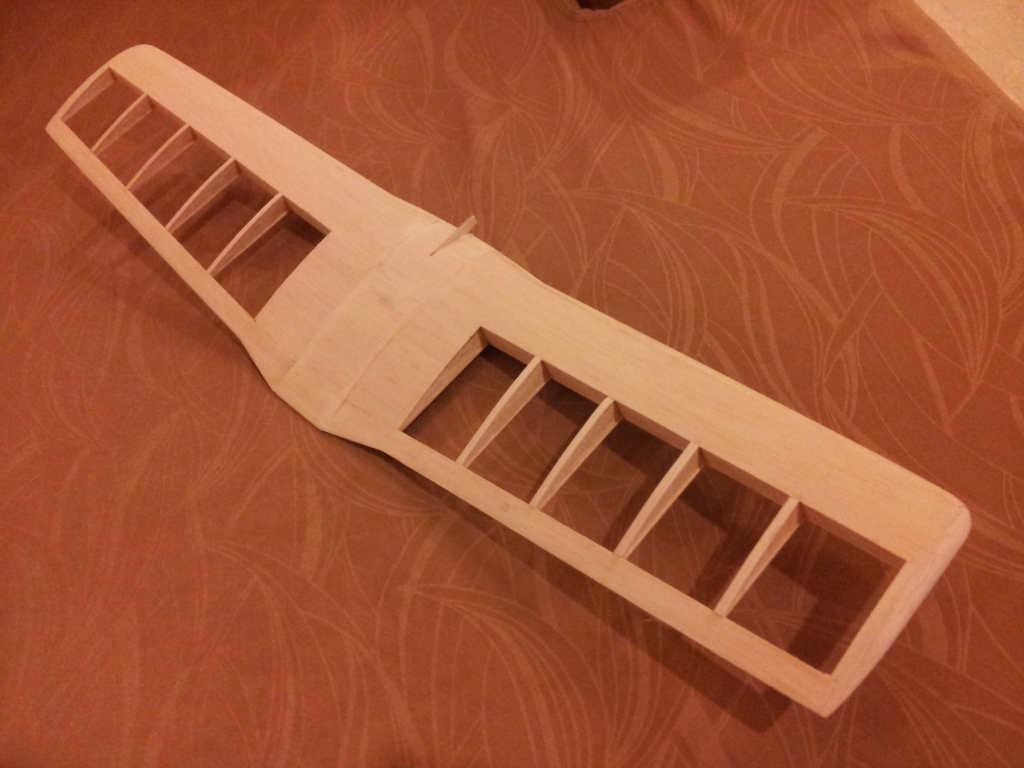
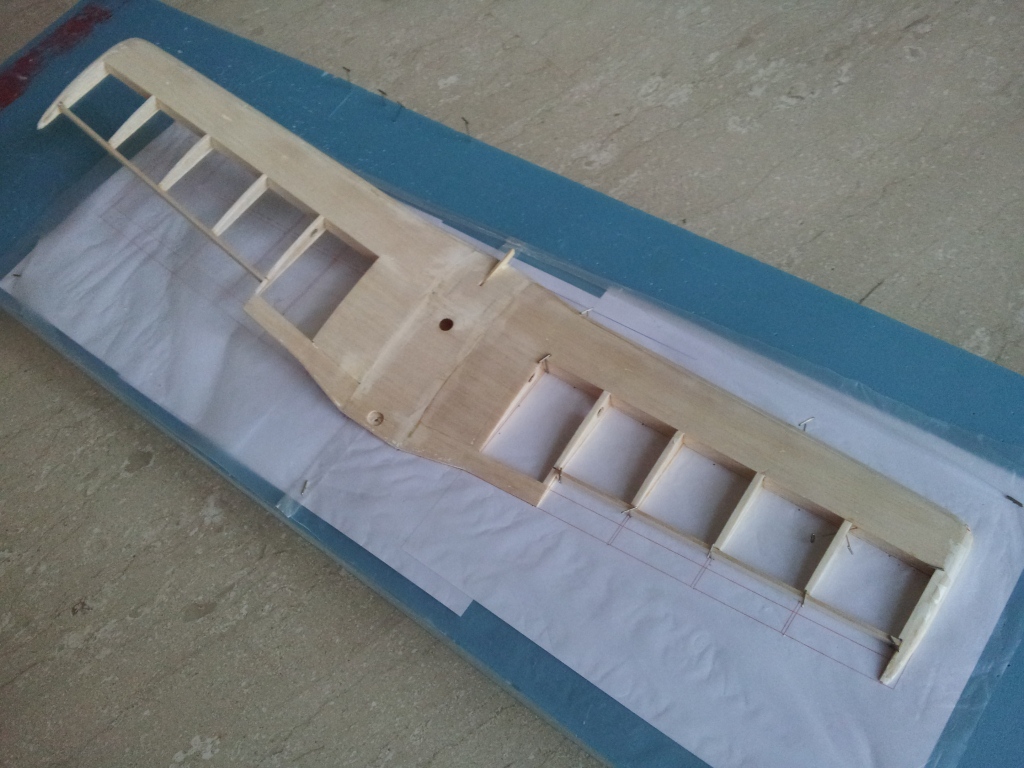
    I started building the wings, which are built separately at first.

    Attached Files
    Last edited by joe yap; 01-12-2013, 09:07 PM.

    #2
    The 2 wings are joined by a plywood brace, which set each wing with 10 degrees of dihedral. The centre section is built flat against the building board. The centre wing ribs are cut from plywood which has a tongue for wing mounting.

    Click image for larger version

Name:	B.jpg
Views:	1
Size:	301.0 KB
ID:	976551

    Comment


      #3
      The empennage is very much standard, and I later made some lightening holes on the horizontal stab as well. The 2 piece elevators are coupled with a steel wire torque rod during final assembly.


      Click image for larger version

Name:	C.jpg
Views:	1
Size:	378.7 KB
ID:	976552

      Comment


        #4
        The fuselage turns out to be the most complicated structure to design and build. The cross sections are not simply rectangular, but have some curvatures that added some challenge in shaping. The nose and turtle deck has rolled sheet balsa skins, but the outlines around the canopy area have solid balsa blocks which are carved to shape and hollowed out later. The main landing gear is permanently stitched and epoxied onto the fuselage bulkhead.

        The motor will be mounted in the cowl later. The outrunner motor mount has already been attached to the firewall beforehand, and a pair of small holes are made around the nose for the allen key access for motor fixtures.

        Click image for larger version

Name:	D.jpg
Views:	1
Size:	273.6 KB
ID:	976553Click image for larger version

Name:	E.jpg
Views:	1
Size:	274.3 KB
ID:	976554

        Comment


          #5
          I was busy with work last week and I only managed to finish covering after the whole weeks' evenings and weekend afternoons. The entire airframe is covered and trimmed with iron-on films. All decals are made from the iron-on films themselves, except the eyes' pupils, which are cut from Monotrim with a stationery hole punch. A small blob of white paint on each eye add some life to them.

          By now, you should have recognise the model, which is non other than "Dusty" from the Pixar cartoon. ( I haven't watch it myself yet.)

          The motor used is a HK 2211-2300 on 2S 370mah, and 12amp ESC. I use a 6x3 3-bladed plastic prop. A pair of 6gram servos from HK provide the flight controls. AUW tips at 197grams, yet to be flown at this point.

          Now the biggest question remains. How well will it fly, or will it fly in the first place? I have no doubt about the available power and the longitudinal balance. However, I do not know whether will the bulky cartoony fuselage induce some kind of weird behaviour, especially with such a tall canopy blocking most of the vertical stabilizer and rudder. Also, I also regretted using only 10 degrees of dihedral on each wing, which I'm now sceptical about its capability to create yaw-induced rolls.


          Click image for larger version

Name:	20131201_162351.jpg
Views:	1
Size:	581.6 KB
ID:	976558
          Click image for larger version

Name:	20131201_162343.jpg
Views:	1
Size:	626.9 KB
ID:	976555

          Attached Files
          Last edited by joe yap; 01-12-2013, 09:14 PM.

          Comment


            #6
            Great build!!

            Comment


              #7
              The build itself is an achievement!

              Comment


                #8
                very impressive build, esp the fuse. Seems like a great way to get young kids into aeromodelling! =]

                Comment


                  #9
                  Very cute plane indeed! Looks like the model pawnee. Hope to see some flight pics in time to come.

                  Comment


                    #10
                    HI Joe,

                    what is the board that you use to pin the wing down? I want to get one for myself. My mum used my board which I bought from NTC to put a mini Hi-Fi.
                    So, I am looking for more cost effective alternative. Any recommendation? Thanks.

                    Comment


                      #11
                      hi Mave. I think what Joe is using is a piece of blue foam board, commonly available from Art Friend.

                      He probably wrapped it with plastic to protect the board.
                      "Always fly with a responsible attitude. You may think that flying low over other people’s heads is proof of your piloting skill; others know better. The real expert does not need to prove himself in such childish ways..." - the Multiplex Build Manual

                      Comment


                        #12
                        Thanks Man!
                        Am at Art friend now.

                        Originally posted by Sunstorm View Post
                        hi Mave. I think what Joe is using is a piece of blue foam board, commonly available from Art Friend.

                        He probably wrapped it with plastic to protect the board.

                        Comment


                          #13
                          Click image for larger version

Name:	20131203_071033.jpg
Views:	1
Size:	305.9 KB
ID:	976559OK, maidened it yesterday. Flew pretty well as the CG and power is good. The turns are so-so on rudder. Left turns is pretty good even on rudder. However, the right turn is more of a yaw than roll. During the last flight, the motor cage touches the cowl cheek during flight after the wood has expanded slightly due to contact with water, which causes some really weird behaviour on right turns. The 3-bladed prop also induces quite a bit of torque roll as well.

                          So, now the wings are back to chop shop, and ailerons will be added.

                          Last edited by joe yap; 03-12-2013, 08:54 AM. Reason: picture inserted

                          Comment


                            #14
                            Wah haha joe
                            You need the whole 14 character .http://www.comingsoon.net/news/movienews.php?id=101979
                            That will be nice to fly them...your kid will love them.

                            Comment


                              #15
                              hmmmm sequel coming...

                              Comment

                              Working...
                              X