Announcement

Collapse
No announcement yet.

Mini Topsky DLG

Collapse

Zenm Tech Pte Ltd

Collapse

Visit Zenmtech at rc.zenmtech.com

X
 
  • Filter
  • Time
  • Show
Clear All
new posts

    Mini Topsky DLG

    It's been a while since I posted my last build thread. Ever since I started working in a local Polytechnic, I have been building small electric trainers and hasn't build much models for myself.

    While I went down to Fook Hai this afternoon to look for a wing joiner tube for my upcoming scale glider scratch build project, I suddenly remembered that I was looking at the mini Topsky in the internet lately. Recently, I have been trying out thermalling at my school field with my Predator 2 DLG, I bought from SC years ago.

    It was only yesterday that the local contractor started to cordon off some parts of the school field for some upcoming expansion projects. Suddenly, it came to my mind that I may need a smaller DLG to fly at whatever spaces available within the school, and a mini or micro DLG seems like something I should explore.

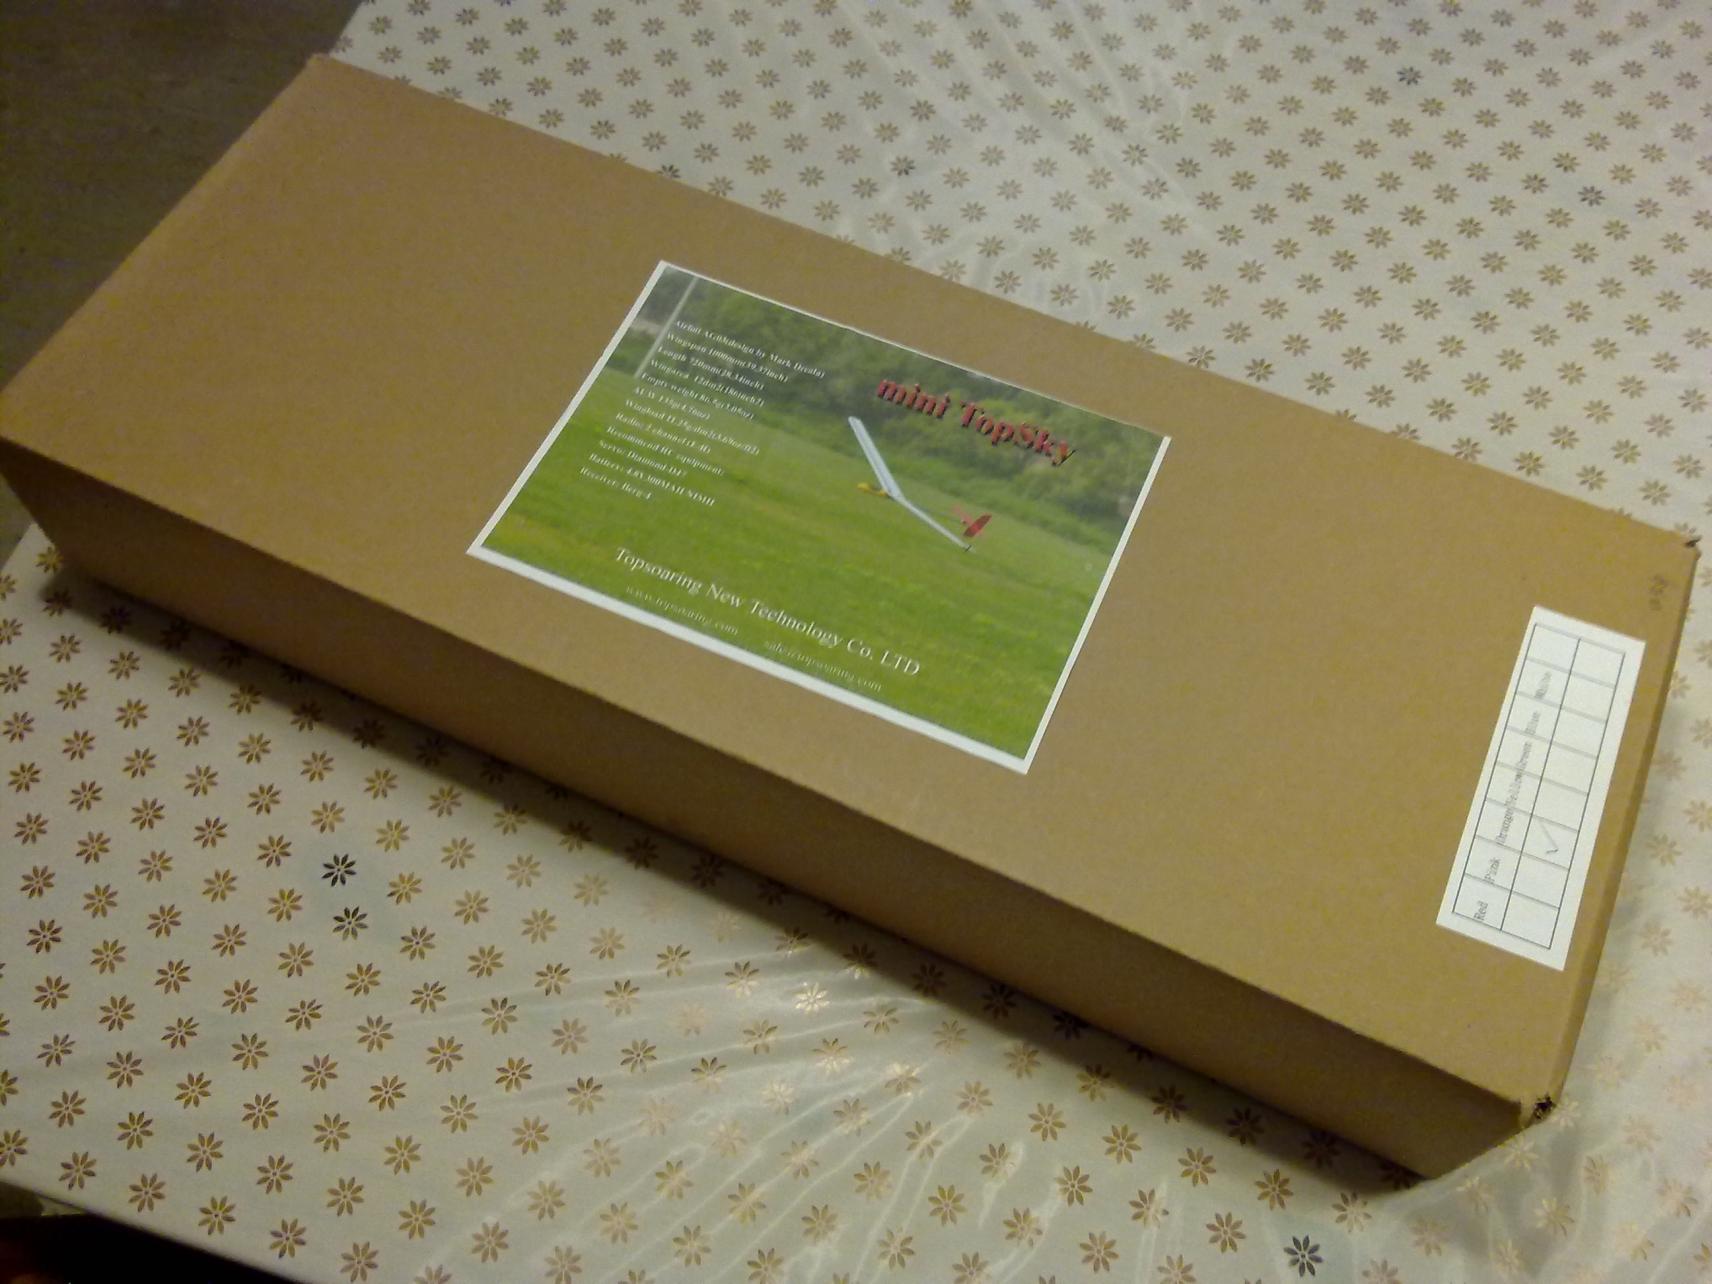
    Back to the shopping @ FH this afternoon. After walking into SHS, I was looking around the shop, before I was shown the few kits of the Mini Topsky. The one with the green fuselage I saw, is very nice. However, I settled on the orange fuselage pod as it should be more visible against my schools greenery background.

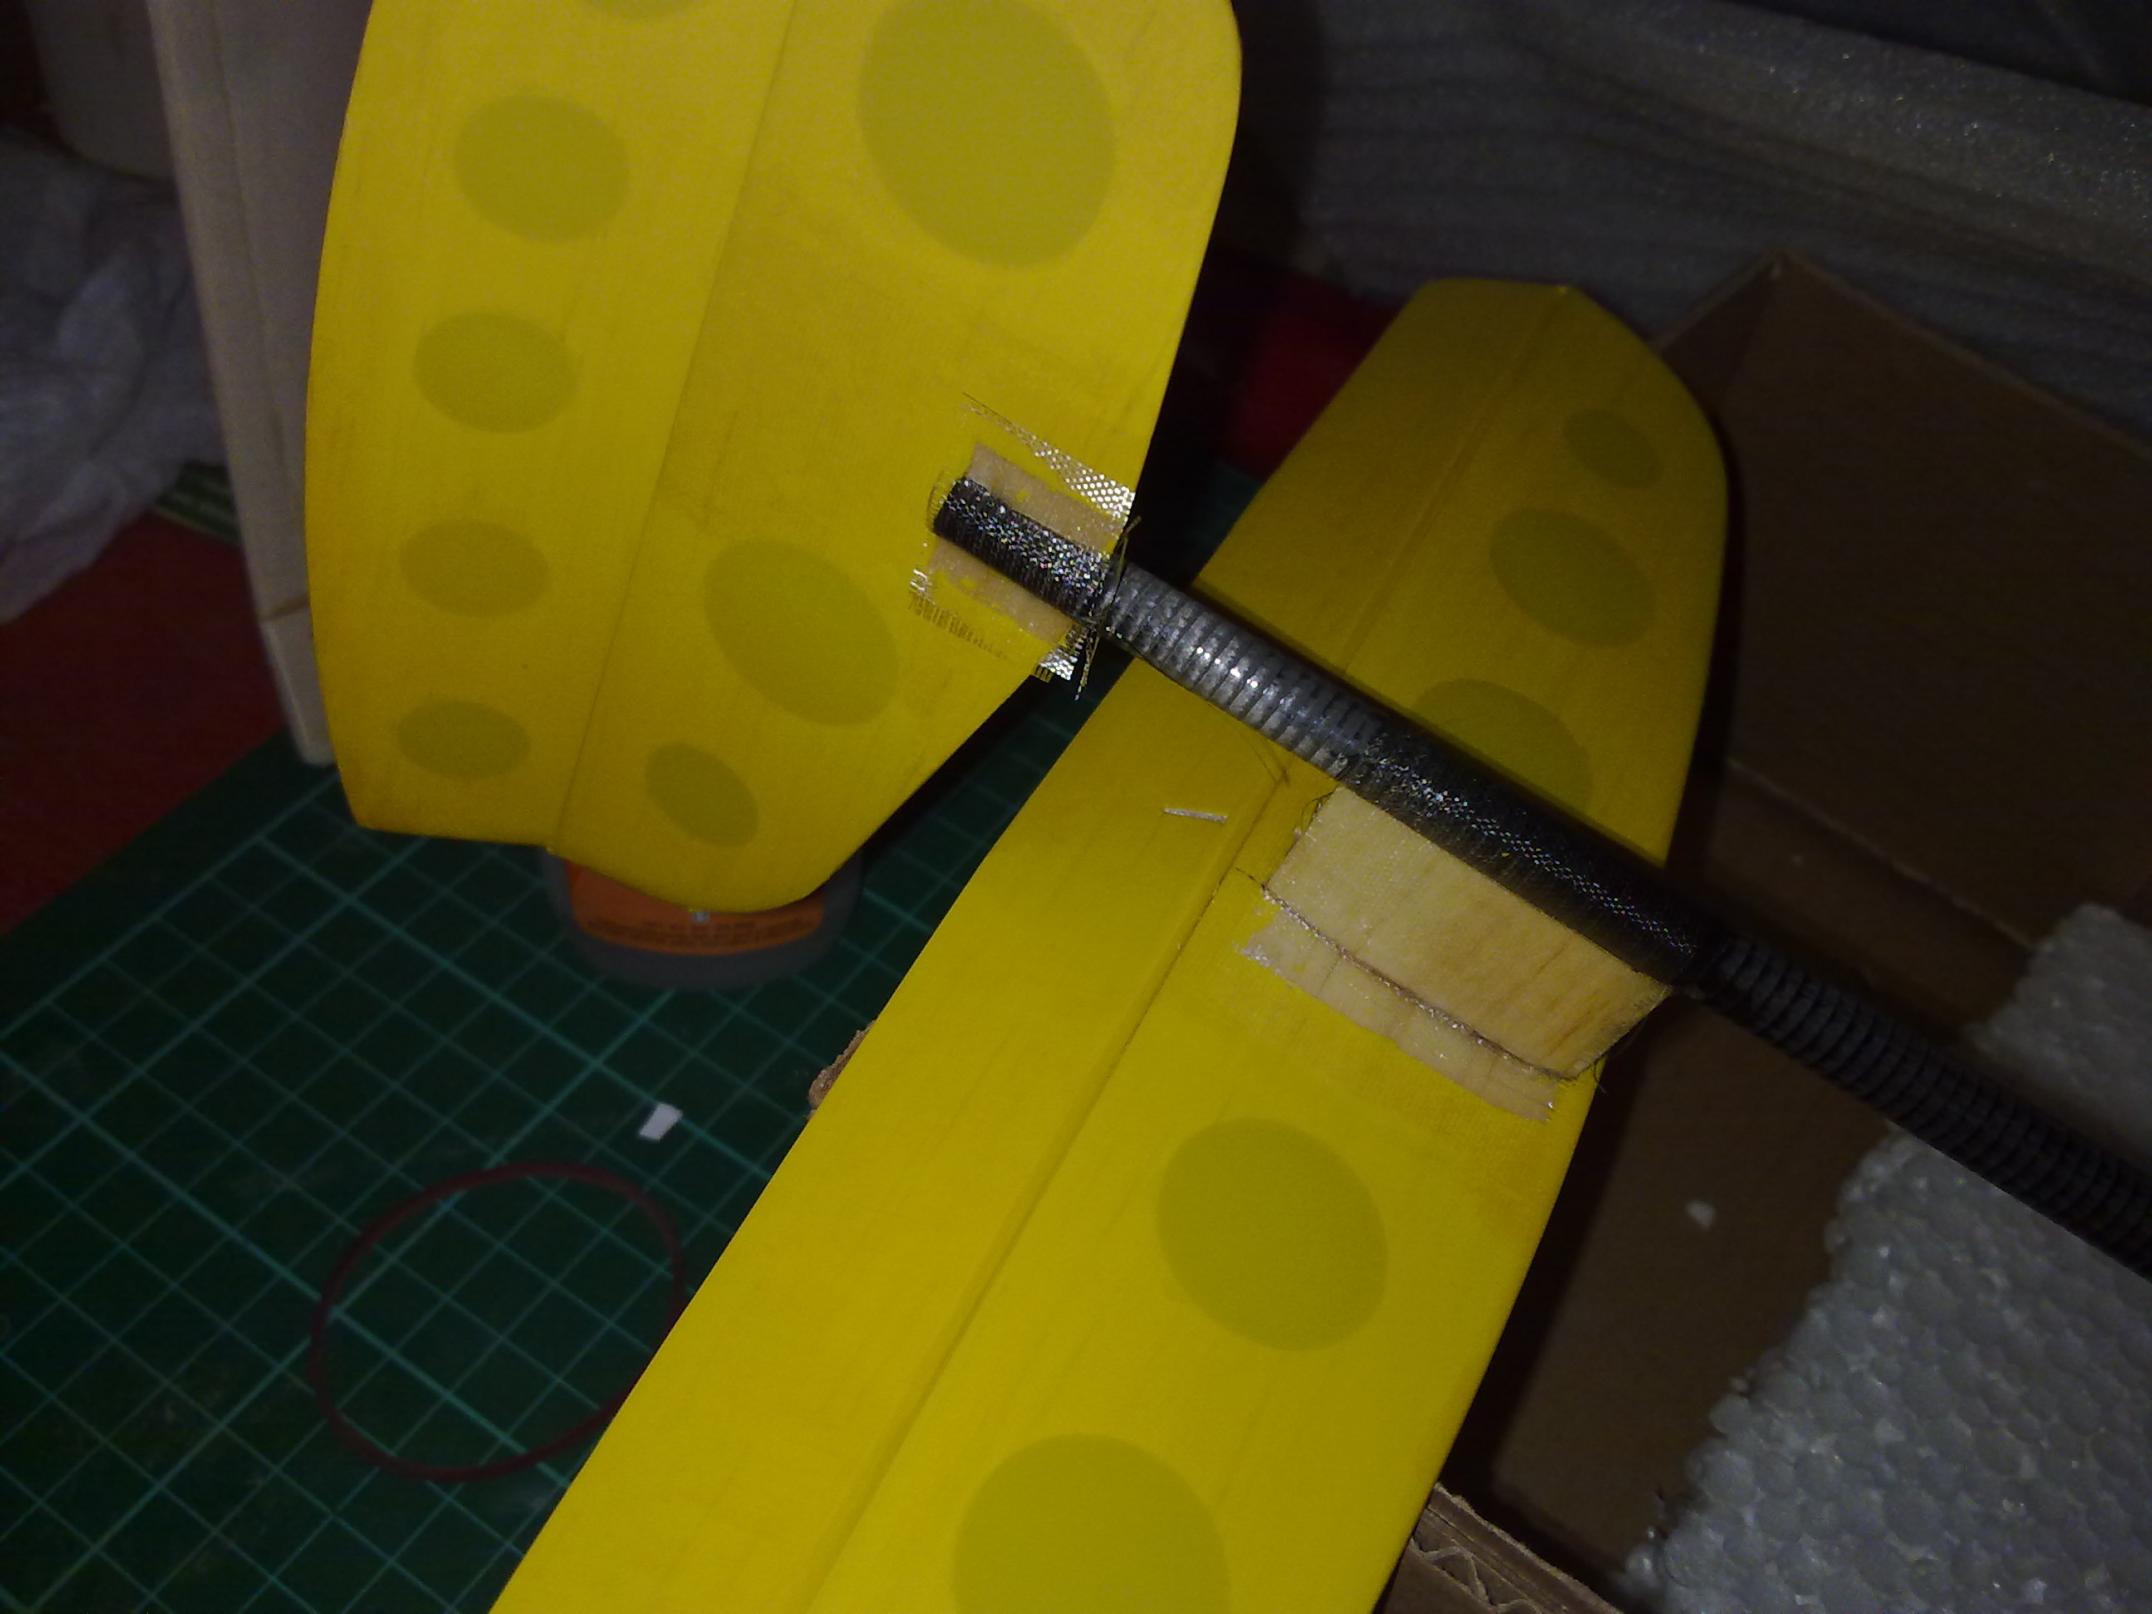
    After reaching school, I immediately shown it to my colleague to impressed them with the worksmanship of the kit. Of course, it is far cry compared to the high-end European DLGs, but for a scratchbuilder point of view, the worksmanship is still admirable.

    Attached Files

    #2
    The kit comes with a set of instructions with less than desireable English, a scaled down plan, a nicely moulded fuselage pod, tailboom, a pair of nicely vacuum bagged wings, laser-cut balsa tail surfaces and some hardwares and composite cloths.

    This model has only rudder/elevator controls and as such, the wings do not have ailerons on them. This should make construction pretty simple. In fact, this model resembles the DLG version of the Mark Drela's 40" Apogee.

    Attached Files

    Comment


      #3
      Although it's already late at night, I really feel like starting building. At least, I'll do something simple and easy first.

      Although the instruction didn't say so, my standard practice of any sheet flying surfaces must be sanded to airfoil shapes. If not for aerodynamic reasons, at least for some weight saving. A little weight saving on the tail can make a big dfference on the all-up-weight of the finished model. Also, I bevelled the flight control interface edges for hinging.

      Attached Files
      Last edited by joe yap; 10-05-2012, 09:33 PM. Reason: spelling

      Comment


        #4
        Not so sure if they have it in the instructions, but don't forget to create a hard point for the wing mounts.

        SO you gonna try a pull-spring on the tail surfaces or stick with the push rods.

        Also lemme me know when you gonna maiden. I wanna go see

        Cheers,
        Adnan

        PS
        I am building a Topsky at the moment too
        Last edited by randomtask; 10-05-2012, 10:37 PM. Reason: Add on text
        Take what you've got and fly with it - Jim Henson
        ... no plane will allow a pilot to recover from stupid. You still have to do those piloty things... - Joe Wurts
        Electric things run on smoke. Let the smoke out and they won't work.


        sigpic

        Comment


          #5
          Thanks, the instruction does mention about the wing mount hard point, just like the P2.

          I'm thinking of using pull-pull system instead of string and spring system. I may even try out single cell radio system.

          Comment


            #6
            wow lookit the wings

            vacuum bagged look so nice one ah
            "Always fly with a responsible attitude. You may think that flying low over other people’s heads is proof of your piloting skill; others know better. The real expert does not need to prove himself in such childish ways..." - the Multiplex Build Manual

            Comment


              #7
              What a cutie

              Joe, do you have to slot your own grooves for the aileron or is it a 2 channel dlg? If so, Can you please elaborate a little on that part?

              Thanks a mil!
              Irony = displaying enough parking coupons on your dashboard but getting fined for littering when you throw the stubs on the floor

              Comment


                #8
                It has only R/E controls, no ailerons.

                Comment


                  #9
                  Last night, I glassed the tail surfaces as per instructions, before bed.

                  Attached Files

                  Comment


                    #10
                    After reading some review in RCG, I decided to save some weight on the tail by making some lightening holes. The tails are covered with supplied iron-on covering, which I suspect is Super Coverlite. However, I had to wrestle with it for a while to get it done proper, due to the fact that it was tightly rolled and taped when it arrived in the kit. Everytime I peeled of the protective plastic sheet, the film tends to roll itself back and stick to itself.

                    I did not use additional material for hinging, other than the covering itself. The empennage tips at 6gms so far.

                    Attached Files
                    Last edited by joe yap; 11-05-2012, 10:51 PM. Reason: grammar

                    Comment


                      #11
                      The empennage is CA'ed in place first. I didn't bother to jig the members, but simply eyeball the alignments. I just hope it turns out well at the end of the day.

                      The joints are later wrapped over with pieces of provided glasscloth with epoxy.

                      Attached Files

                      Comment


                        #12
                        As per the instructions, I dug out some foam over the wing root where the wing bolts sit on. A mixed some spooge and fill the cavities with it.

                        Attached Files

                        Comment


                          #13
                          When the spooge has cured, I sanded the wing roots flat and tape the wings together on the underside, before glueing them together with epoxy. While waiting for the epoxy to cure I prop the wings to get 88mm of dihedral under each wingtip.

                          Once the epoxy as cured, I scuffed the surfaces where the fibreglass and CF cloth suppose to be applied over. Instead of following the instructions of laying the glasscloth over the wing joint, before the CF cloth reinforcements around the wing bolts, I actually did the opposite. I applied CF cloth patches onto the wing surfaces first, before applying the glasscloth over the entire wing joint. This is more like the usual practice done on fullsize aircraft composite repairs. If any sanding will be required for finishing, the glasscloth will probably be disturbed, but leaving the CF cloth intact. Anyway, I did this at one shot using the same batch of epoxy I mixed. When the epoxy started to gel, I applied the areas with a plastic sheet for better finishing.

                          The instructions didn't mentioned any CF or glasscloth reinforcements on the undersurface of the wing joint. However, I still go ahead glassing the bottom just like the top surface. AFter knowing someone from RCG who managed to split the wing joint during one of his hamfisted launches, I reckoned that additional effort is worth.

                          The left wingtip has both upper and lower surfaces patched up with a layer of CF cloth, around where the throwing peg's position.

                          Attached Files

                          Comment


                            #14
                            The fuselage pod tailboom mount is a little too small for the boom, and as such it produces a loose fit with the latter. Since I have some leftover epoxy mixed for the wing glassing, I applied a layer of provided glasscloth with the epoxy onto the tailboom mount. Now, I get a pretty nice fit between the pod and the boom.

                            Attached Files

                            Comment


                              #15
                              The wing mounting bolt holes are drilled through the wing joint. The throwing peg is also epoxied in place.

                              Attached Files

                              Comment

                              Working...
                              X