Announcement

Collapse
No announcement yet.

Building a Deceiver Pylon Racer

Collapse

Zenm Tech Pte Ltd

Collapse

Visit Zenmtech at rc.zenmtech.com

X
 
  • Filter
  • Time
  • Show
Clear All
new posts

    Building a Deceiver Pylon Racer

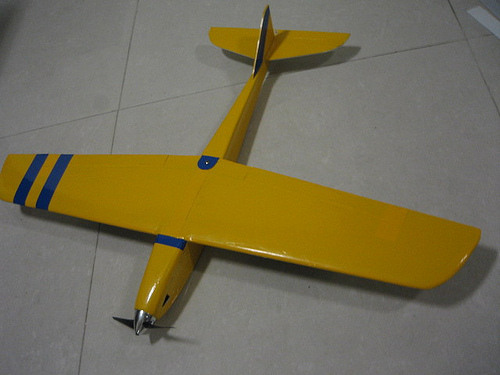
    Finally, something I can get used to;

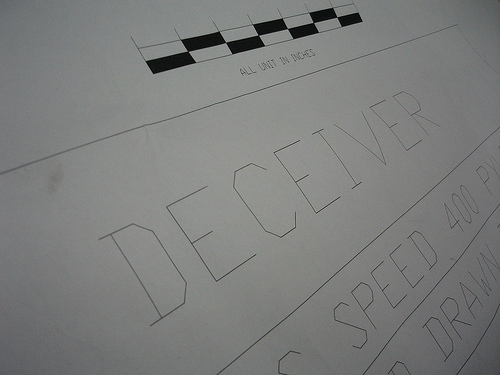
    the Deceiver Pylon Racer! What does the Deceiver look like?


    Click here for the thread on Deceiver

    Designed by our own Joe Yap! Similar to the Slipso, but better, I would say.

    Progress has started.

    It will use my old Align 400s motor with 40 amp esc on a 4.7 x 4.5 inche apc prop.

    Print out plans, I went to Queensway for this


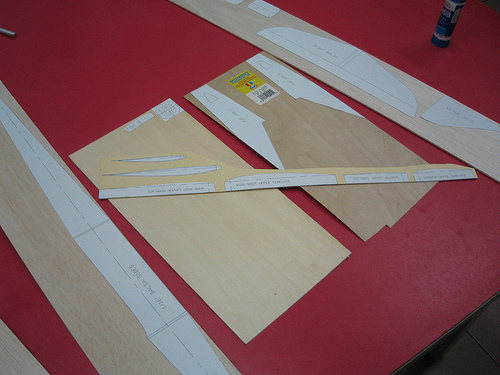
    Cut out parts, paste to balsa. Seems like very few parts, I love it


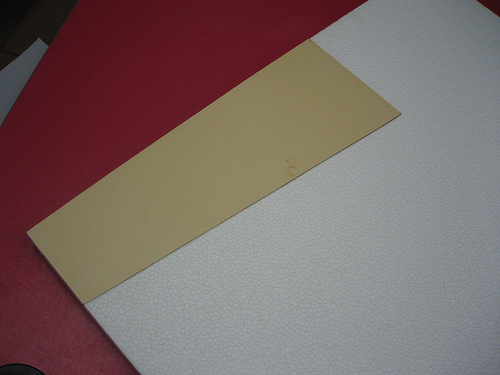
    Preparing of foam core
    From this


    To this


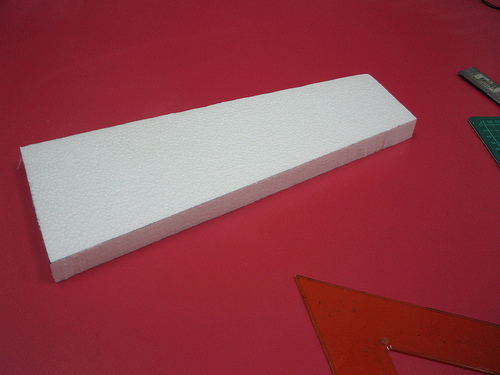
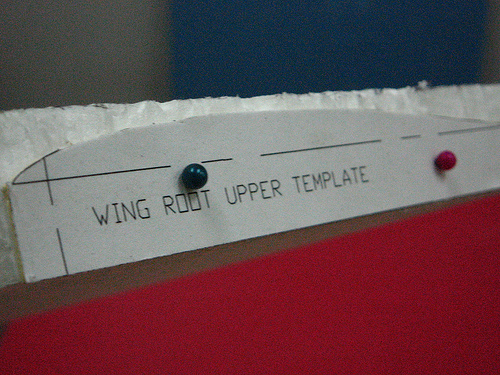
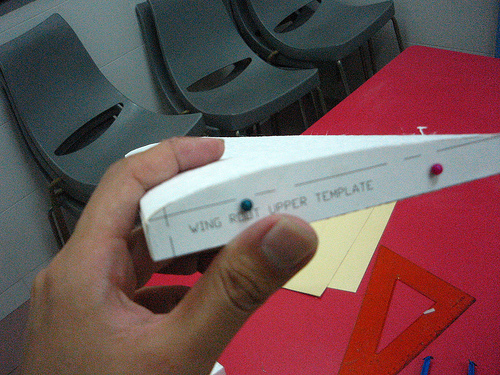
    Cut out template, pin on


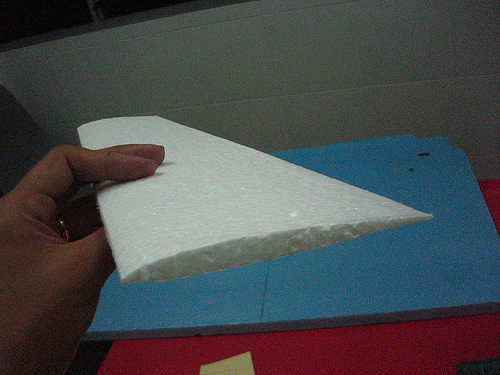
    Hotwire the excess away


    And you'll get yourself a thin wing.


    Note that this was just the practice cut, I'll be cutting the actual wings soon.

    You can get the Deceiver Plans from the Profili website.
    "Always fly with a responsible attitude. You may think that flying low over other people’s heads is proof of your piloting skill; others know better. The real expert does not need to prove himself in such childish ways..." - the Multiplex Build Manual

    #2
    Since Joe Yap did the detailed build thread on the Swindler, I restarted work on the deceiver, since I was stuck.

    After cutting out the wing cores, I just did what he did with some differences.

    Wing skins are 1 piece 6 inch 1/32 balsa from Art Friend

    Carbon rods are embedded in the wing instead of the stick on carbon fibre. Use epoxy for this.

    I did not use laminating epoxy for gluing the wing skin on the foam core, I used Elmers Pro Bond from Homefix. Apply it evenly with a paint roller, same method. You may want to dampen the surface of the balsa and foam by wiping them with damp cloth. This would help the ProBond to cure.

    Joe Yap uses weights like tiles and buckets of water to weigh down the Swindler wing. I use a vacuum bag for clothes I bought from Homefix. Just put the wing sandwich in the bag, make sure it is even and properly positioned.

    Then use a vacuum cleaner to suck out all the air in the bag. This is not 'true' vacuum bagging in the sense but I just want something to simulate it.

    The bag would collapse and press down on the wing core.

    The wing in the foam core may warp. You need to lay it on the floor with weights to ensure a flat wing.

    The Pro Bond would foam up as it cures and it would fill up the gaps in the foam core.

    Leave for 4 hours and then go watch tv.

    Pictures later.
    "Always fly with a responsible attitude. You may think that flying low over other people’s heads is proof of your piloting skill; others know better. The real expert does not need to prove himself in such childish ways..." - the Multiplex Build Manual

    Comment


      #3
      IMG_0680

      So, this is the 'vacuum bag'. The towels and cloth inside are my old rags - they are 'breathers' to ensure an equal vacuum throughout the bag. The weights just serve to ensure the wing is flat.
      "Always fly with a responsible attitude. You may think that flying low over other people’s heads is proof of your piloting skill; others know better. The real expert does not need to prove himself in such childish ways..." - the Multiplex Build Manual

      Comment


        #4
        Julian,

        This is still vacuum bagging. Just one thing to take note. Whichever carbon reinforcements you use in the wings, they should be attached to the balsa skins and not 'floating' within the foam core itself. If the carbon strip cannot have full contact with the balsa skins, the gaps between them must be at least filled with microballoons.

        A stiff carbon rod embeded within the soft foam has not much structural value at all.

        Comment


          #5
          Hello Joe;

          Well.... the carbon is epoxied to the foam and to the upper edge of the skin.... I sorta soaked the slit I made with epoxy and pushed the rod in....

          I'll chalk that up to experience. Thanks for the heads-up.
          "Always fly with a responsible attitude. You may think that flying low over other people’s heads is proof of your piloting skill; others know better. The real expert does not need to prove himself in such childish ways..." - the Multiplex Build Manual

          Comment


            #6
            IMG_0682

            After bagging, you remove the wing from the bag in between the core. Good, it seems like a stiff one. Cut off the leading edge. We would need to replace it with a balsa spar.

            IMG_0683

            Mark the lines to cut along.

            IMG_0686

            Also, glue the leading edge spar on.

            IMG_0689

            while glue is setting, prepare the wingtips. These are 2 pieces of 1/4 inch thick balsa stuck together.

            IMG_0692

            Glue them using PU on the wing ends and then later sand to shape.

            IMG_0690

            At the same time, I took the time to figure out how to use the aileron set I bought from our local hobby shop and mark out the cutout lines for the ailerons.
            "Always fly with a responsible attitude. You may think that flying low over other people’s heads is proof of your piloting skill; others know better. The real expert does not need to prove himself in such childish ways..." - the Multiplex Build Manual

            Comment


              #7
              Sorry, not much time to update the thread as I've been busy.

              Today, I am more free, and took a 5 hr stretch to finish up the Deceiver.

              + 1 to the number of Deceiver Pylon racers in Singapore.


              More details later.... but I was engrossed I forgot to take pictures = (
              "Always fly with a responsible attitude. You may think that flying low over other people’s heads is proof of your piloting skill; others know better. The real expert does not need to prove himself in such childish ways..." - the Multiplex Build Manual

              Comment


                #8
                What motor and battery did you use?

                Comment


                  #9
                  Some details

                  The battery is a 3s 1300 weighing about 113 gms.

                  The ESC is a Super Simple 30A

                  The motor is a Align 400s, 2800 kv weighing about 71 gms if I can recall.

                  The combination spins a APC carbon prop 4.7 x 4.5

                  It has an aluminum nose spinner

                  Full throttle on static draws about 25 amps

                  I don't intend to make this an overkill airplane, just a respectable and quick (when it needs to be) sport airplane. Just an alternative to the funjets out there =)
                  "Always fly with a responsible attitude. You may think that flying low over other people’s heads is proof of your piloting skill; others know better. The real expert does not need to prove himself in such childish ways..." - the Multiplex Build Manual

                  Comment


                    #10
                    This setup is already hot enough to chase Funjets on 6S. Any further overkilling is enough to send it to the moon.

                    Comment


                      #11
                      har really? Good thing I didn't put in my HET 3W in it.

                      Won't wanna snap a wing.

                      Maybe I should downgrade it to 2S?
                      "Always fly with a responsible attitude. You may think that flying low over other people’s heads is proof of your piloting skill; others know better. The real expert does not need to prove himself in such childish ways..." - the Multiplex Build Manual

                      Comment


                        #12
                        Just joking only lah, but it is really plenty fast. You can start off with 2S with 4.75 x 4.75 or 5 x 5 prop first, if you are not familiar with fast planes. It'll be lighter and has lower top speed, which makes it more comfortable to fly. Once the model has been trimmed out and you become familiar with it, then hop up to 3S setup.

                        For all up speed, it may not be the fastest on the field, but it allows you to fly comfortably with tight pylon turns even at lower altitude. Don't forget, hugging pylons is one of the most important forte of pylon racers, not just all out speeds.

                        Comment


                          #13
                          First flights are done.

                          This little plane really tracks well. Very satisfied with the performance. Later on, I'll really start pushing the limits on this plane = )

                          Good building experience, it really pushed my building skills a notch higher.

                          Good design too
                          "Always fly with a responsible attitude. You may think that flying low over other people’s heads is proof of your piloting skill; others know better. The real expert does not need to prove himself in such childish ways..." - the Multiplex Build Manual

                          Comment


                            #14
                            Congrats! Seriously, I think this is the first Deceiver, which is not built by me, to fly. I'm going back to my SkaT again this time.

                            Comment


                              #15
                              Congrats. You distributed a plan that other people built and flown.

                              Now let's make the Deceiver / Swindler more famous than the Slipso
                              "Always fly with a responsible attitude. You may think that flying low over other people’s heads is proof of your piloting skill; others know better. The real expert does not need to prove himself in such childish ways..." - the Multiplex Build Manual

                              Comment

                              Working...
                              X