My most satified and easiest scale built so far.. although I've only been through 2 scaled fuselage, but they were both of Polycarbonate material.

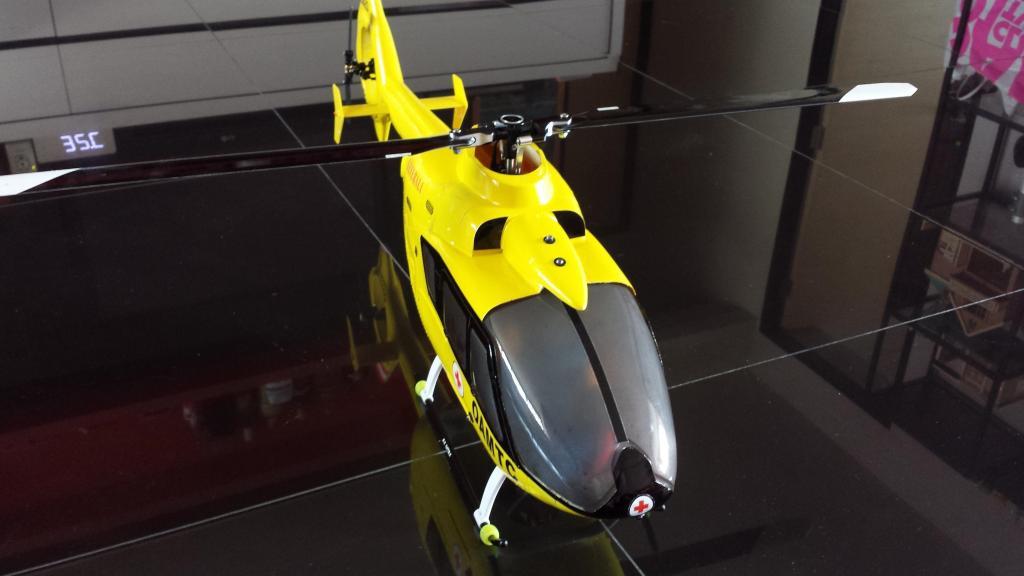
This EC135 from Align's 450 scaled series is of fibre glass and came with pretty much very details.
It is pre painted in bright stunning yellow and all I did was to spray smoked black for the canopy and windows.
Otherwise clear panels are OK, except I didn't like the look of windows showing those ugly LiPo and wirings inside.
First out of the box I notice there was nothing much to install. But working into the installation progress, I realize I need to somehow cut a curved slot for the tail wings to be inserted through the tail. TOUGH !

Then came the next step which i was instructed to dismantle the head and rotor so that the mechanics can be inserted through the opening. It had to be rotated about its axis 90 degree sideways, insert through the front of the fuselage, once 1/2 way in, rotate upright, push through the boom and then slightly wiggle its way for mounting onto the balsa stands.
But I didn't follow that step because I was too reluctant to disassemble the head and rotating the mechanics 90 degree here and there didn't sound right.
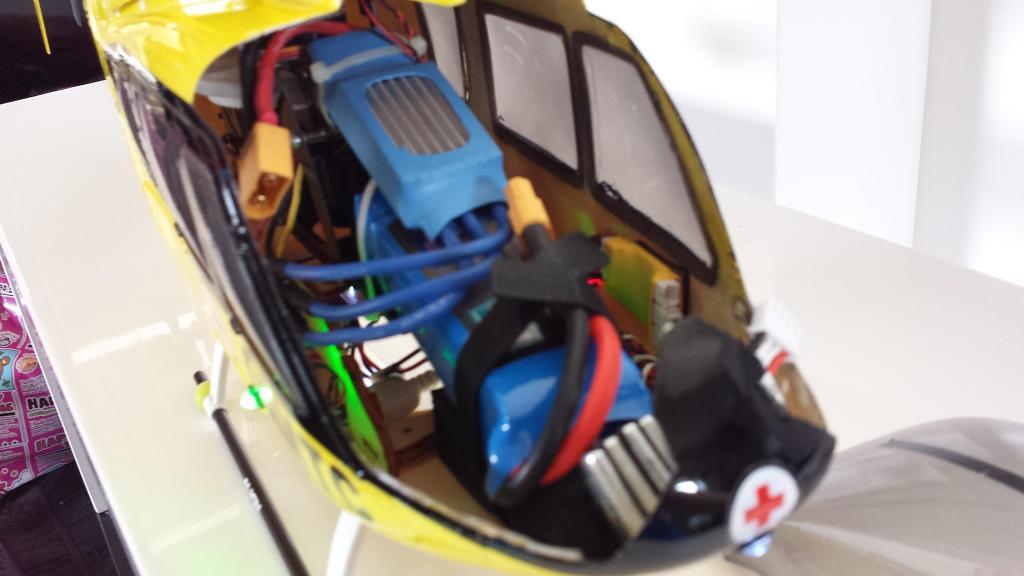
I chose to cheat and cut a slot at the top of the canopy so that I can split and pry the canopy up to slide the heli mechanics into the body in an upright direction.
It works nicely. Within minutes I can position the mechanics inside the fuselage. If I were to dismantle the head, I may take more time need to put the head back. Hah !
And luckily I did that cheat, because thereafter I realize I need to remove the mechanics in and out several times from the fuselage to adjust some stuffs here and there ; belt tension was loosen to my liking, check all screws all over again, reposition my ESC for C. of G. etc. It was much easier.
Next came the lights. I didn't want to get to the Receivers port to connect the LED because I was worried of current loading and of course the dreaded removal of the the heli mechanics again !
So I installed a small 380 mA Lipo for the sole use of the LED navi lights.
LED system came with 3 types of mode, solid ON, flasher and slow beacon glow.
Remember, Red for Port, Green for Starboard.

All up flying weight is 1030 grams. Not to my likings but its manageable.
Still running a pretty slow headspeed, but I have no idea how fast it is actually spinning.
Need a RPM gauge, but no money to buy LOLX
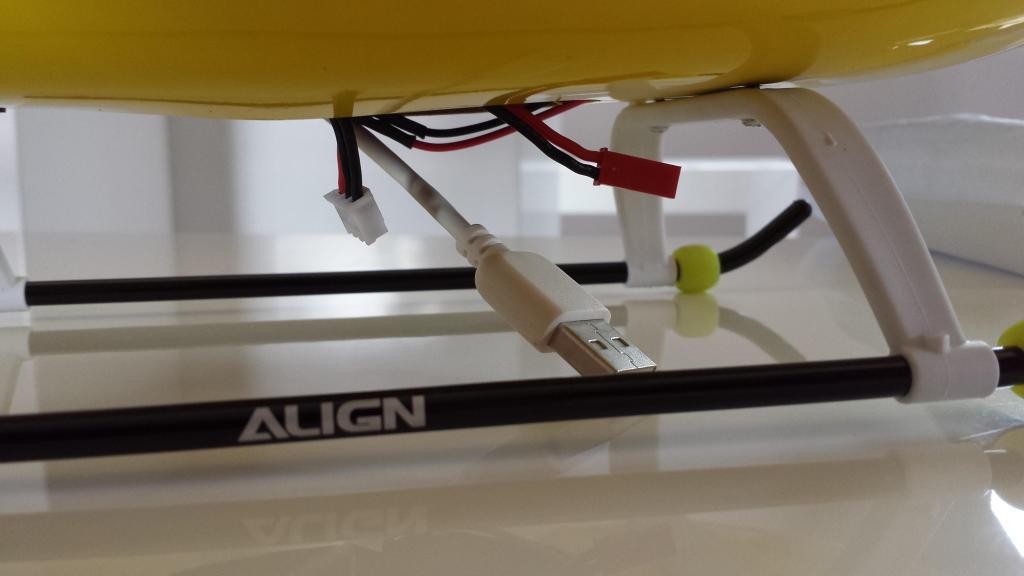
Some tips that I've worked around, such as charging my spare LiPo that's used to power up my navi lights, and how to access my Robird G31 flybarless system - I connected a short USB connector to the Robird's mini USB port and left the other USB end somewhere near the bottom access hole under the heli belly. Also notice the LiPo's connectors that I will be using to power up the navi lights. During flight, these cables are tucked inside. No problem at all, as long no violent stunts, all cables will stay where they are inside.
Here is a short video of the maiden.

Can't control heli very well yet, still at noobie level.. but as long don't crash, come back one piece I'm satisfied.

This EC135 from Align's 450 scaled series is of fibre glass and came with pretty much very details.
It is pre painted in bright stunning yellow and all I did was to spray smoked black for the canopy and windows.
Otherwise clear panels are OK, except I didn't like the look of windows showing those ugly LiPo and wirings inside.
First out of the box I notice there was nothing much to install. But working into the installation progress, I realize I need to somehow cut a curved slot for the tail wings to be inserted through the tail. TOUGH !

Then came the next step which i was instructed to dismantle the head and rotor so that the mechanics can be inserted through the opening. It had to be rotated about its axis 90 degree sideways, insert through the front of the fuselage, once 1/2 way in, rotate upright, push through the boom and then slightly wiggle its way for mounting onto the balsa stands.
But I didn't follow that step because I was too reluctant to disassemble the head and rotating the mechanics 90 degree here and there didn't sound right.
I chose to cheat and cut a slot at the top of the canopy so that I can split and pry the canopy up to slide the heli mechanics into the body in an upright direction.
It works nicely. Within minutes I can position the mechanics inside the fuselage. If I were to dismantle the head, I may take more time need to put the head back. Hah !
And luckily I did that cheat, because thereafter I realize I need to remove the mechanics in and out several times from the fuselage to adjust some stuffs here and there ; belt tension was loosen to my liking, check all screws all over again, reposition my ESC for C. of G. etc. It was much easier.

Next came the lights. I didn't want to get to the Receivers port to connect the LED because I was worried of current loading and of course the dreaded removal of the the heli mechanics again !
So I installed a small 380 mA Lipo for the sole use of the LED navi lights.
LED system came with 3 types of mode, solid ON, flasher and slow beacon glow.
Remember, Red for Port, Green for Starboard.

All up flying weight is 1030 grams. Not to my likings but its manageable.
Still running a pretty slow headspeed, but I have no idea how fast it is actually spinning.
Need a RPM gauge, but no money to buy LOLX

Some tips that I've worked around, such as charging my spare LiPo that's used to power up my navi lights, and how to access my Robird G31 flybarless system - I connected a short USB connector to the Robird's mini USB port and left the other USB end somewhere near the bottom access hole under the heli belly. Also notice the LiPo's connectors that I will be using to power up the navi lights. During flight, these cables are tucked inside. No problem at all, as long no violent stunts, all cables will stay where they are inside.

Here is a short video of the maiden.
Can't control heli very well yet, still at noobie level.. but as long don't crash, come back one piece I'm satisfied.


Comment